
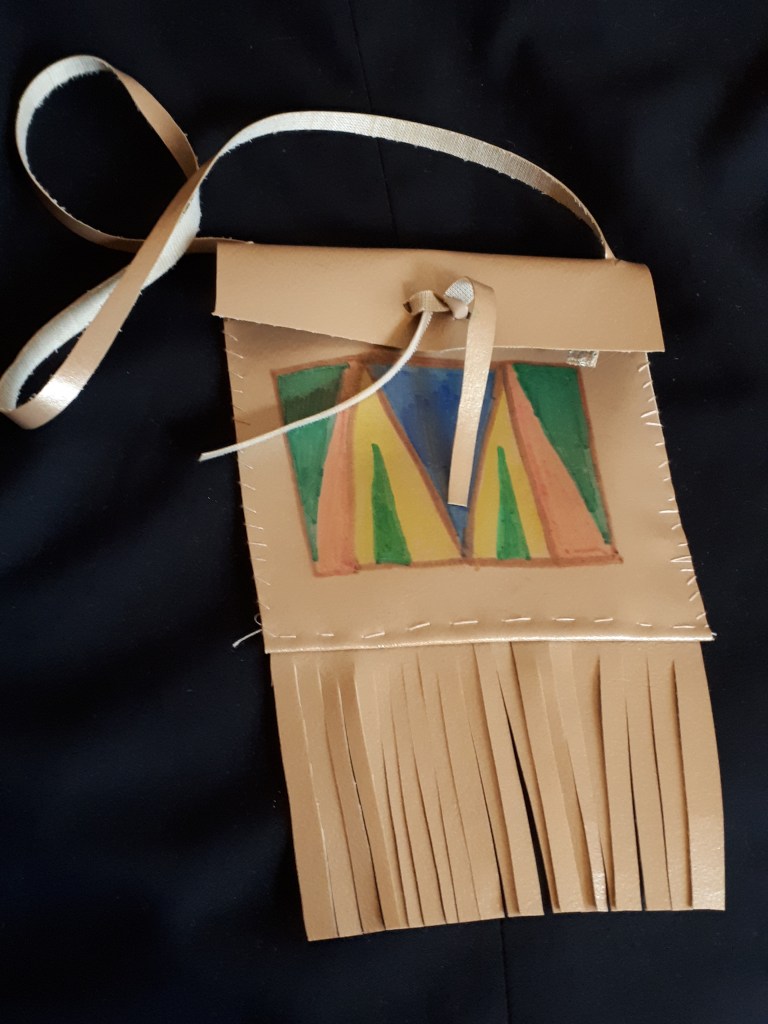
For week four of our study of Canada’s Natives Long Ago we learned about the Natives of the Plains. What a interesting group! Eagle feather headdresses, buffalo hunts. So fascinating. The Natives of the Plains (who lived in both modern day Canada and the United States) made small bags, called parfleche, that they hung round their necks to carry pemmican. We made our own version of a parfleche for our Natives of the Plains activity.
As I mentioned already, this is week four of our study. So far we’ve learned about:
Week 1: Eastern Woodland Farmers: I used another crafter’s idea. You can find the link to it on my Conical Wigwam post.
Week 2: Eastern Woodland Hunters: Conical Wigwam
Week 3: Inuit of the Arctic: Soap Carving
Week 4: Natives of the Plains: Parleche (TODAY!!!)
Supplies:
- Fabric. I used the leftover vinyl from our Reupholstered Dining Room Chair post. It’s supposed to look like rawhide, and I thought this did the trick, but you can use whatever you’d like…including rawhide🤷♀️. More details on the size of fabric in the instructions below.
- Scissors, ruler and pen
- Awl and hammer (if you don’t have an awl you can use a thick nail)
- Colourful permanent markers
- Needle. You can also use a floss threader and thread so little people can sew it themselves without risk. If you want an example of what I’m talking about you can see the craft where we used a floss threader and embroidery thread to sew our Burlap Coasters. If you’re using something thicker as your thread, like twine or rope, you won’t need a needle.
- Thread. You can also use string, embroidery thread, twine, etc. It needs to be fairly strong so it doesn’t break when the children open up their parfleches. We tried using thin vinyl as the thread (like the strap) and it was rather weak. It lasted on the older children’s parfleche, but broke very soon with the younger ones, and had to be replaced with thread.
Instructions:

I decided on how big to make them based on how much fabric I had.
- Cut out your fabric. All sizes I’m providing are approximate and flexible. Adjust as necessary to suit your needs. For one parfleche I cut the following pieces of fabric vinyl:
- 11 inches tall by 5.5 inches wide (this will be the body of the parfleche)
- 25 inches tall by 5/8 inch wide (this will be your strap. If you don’t have enough length for this you can also use something strong like twine or rope)
- 10 inches tall by 5/8 inch wide (this will be the closure)
- OPTIONAL: 5.5 inches wide by 3 inches tall (this will be the fringe)


2. Using your hammer and awl put holes along the edge of the parfleche body. Fold the fabric first so the holes (front to back) line up. See picture below for where I put the holes. Notice in the picture above how I left 2-1/2 inches to make a flap. While it was folded I made a crease in the vinyl so I could easily remember which holes lined up. See the next picture, and description, for the explanation of how many holes to make.
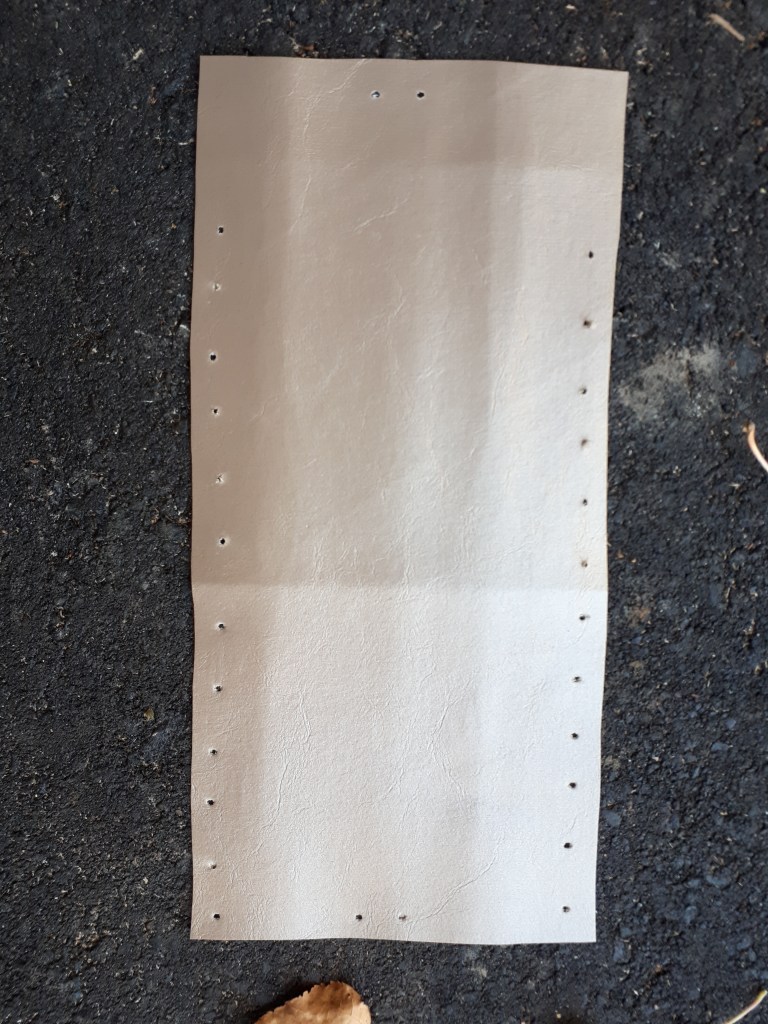
- The two holes at the top and bottom are for the closure. It’s very important that they line up. Once the parfleche is sewn you’ll thread the 10 by 5/8 piece of vinyl through to make tie it closed (see step 5).
- The top hole on either side is for the strap
- All the other holes will be sewn to close the sides and create the pouch.

3. Sew up the sides, remembering to leave the top hole on either side for the strap. We did a loop-round style, but you can sew it however you like.
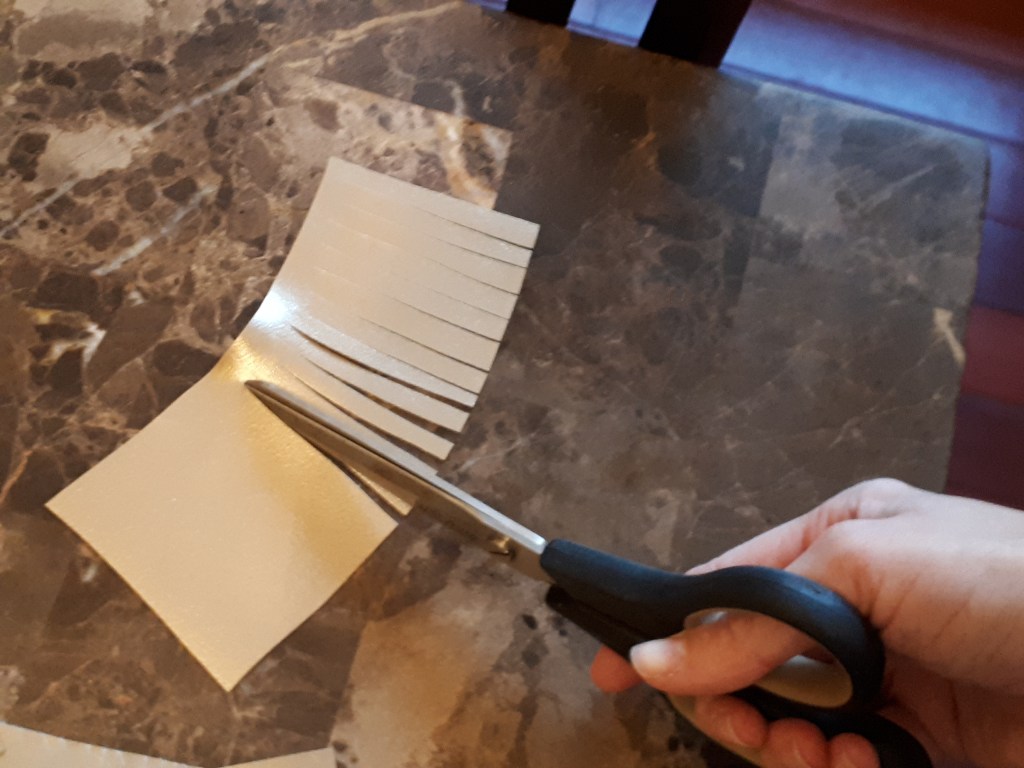
4. OPTIONAL: Cut the fringe. Sew it onto the bottom of the parfleche, at the back.

5. Tie on the strap and insert the closure tie. See picture below.

6. Using permanent markers, decorate the front of your parfleche. If you search “Parfleche Designs” in Google Images you’ll get lots and lots of inspiration! When I made mine as an example for the children I coloured mine at the end and it worked great. I got the kids to colour theirs before we made them. Big mistake. They all smudged while we were sewing them. It wasn’t terrible, but it’s there.
Here they are!!

Now to make some pemmican…um…no thanks. Perhaps we’ll buy some beef jerky. Next week: Natives of the Plateau and Mini Basket Weaving! Unless we take a break for a Christmas craft…I haven’t decided yet. What do you want to see next week?


That is a great craft and looks like a lot of fun to make – practical, too!!
LikeLike
Thank you! I’m so glad you like it!😊
LikeLike