
Natives of the Subarctic
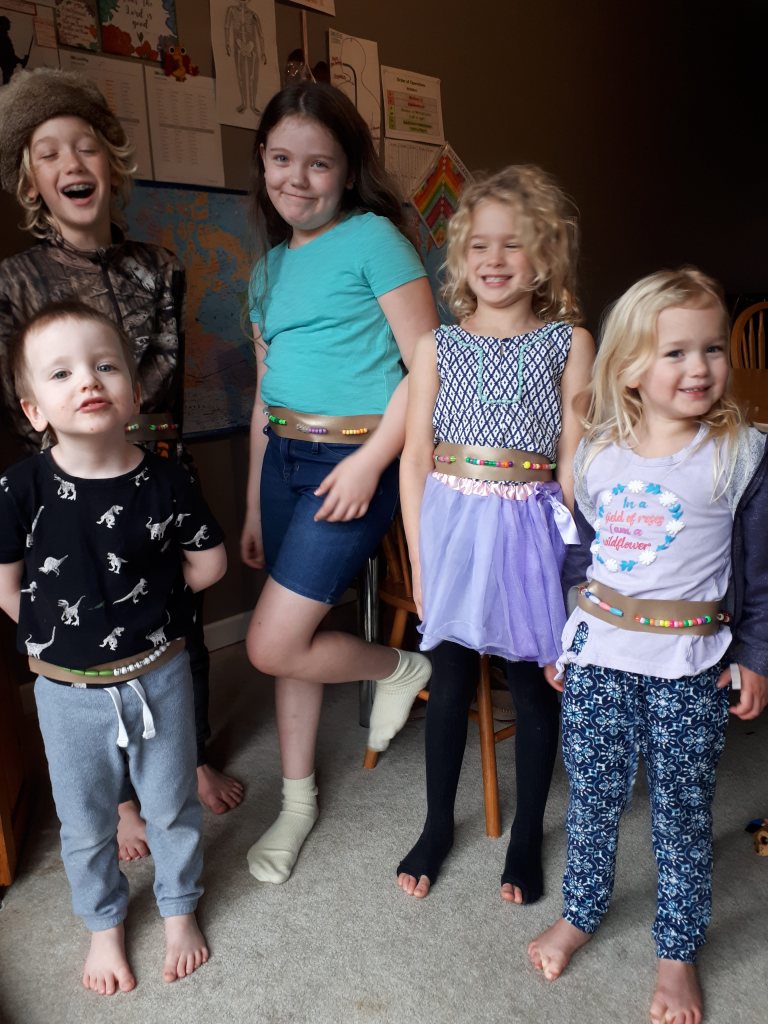
Here we are! The second last lesson on educating our children about Canada’s Natives Long Ago! In this lesson we learned about the Natives of the Subarctic, and how they used a tumpline to transport their belongings over distances. While this craft is supposed to be a tumpline, it really turned out to be a headband for some of the children, and a belt for others.
This is a great fine-motor craft, and lets children express their creativity through the colours of bead and embroidery thread they choose, whether or not they have tassels and whether they choose to wear it as a belt or a headband…or if they make both! This is also an awesome craft for little ones because they don’t need a real needle and thread to make it. They can use a floss threader, as we did with our Parfleche and Burlap Coasters. You will just have to thread it through for them using a real needle, then exchange it for a floss threader once the hole is made. Let’s check out how to make it!
Supplies:
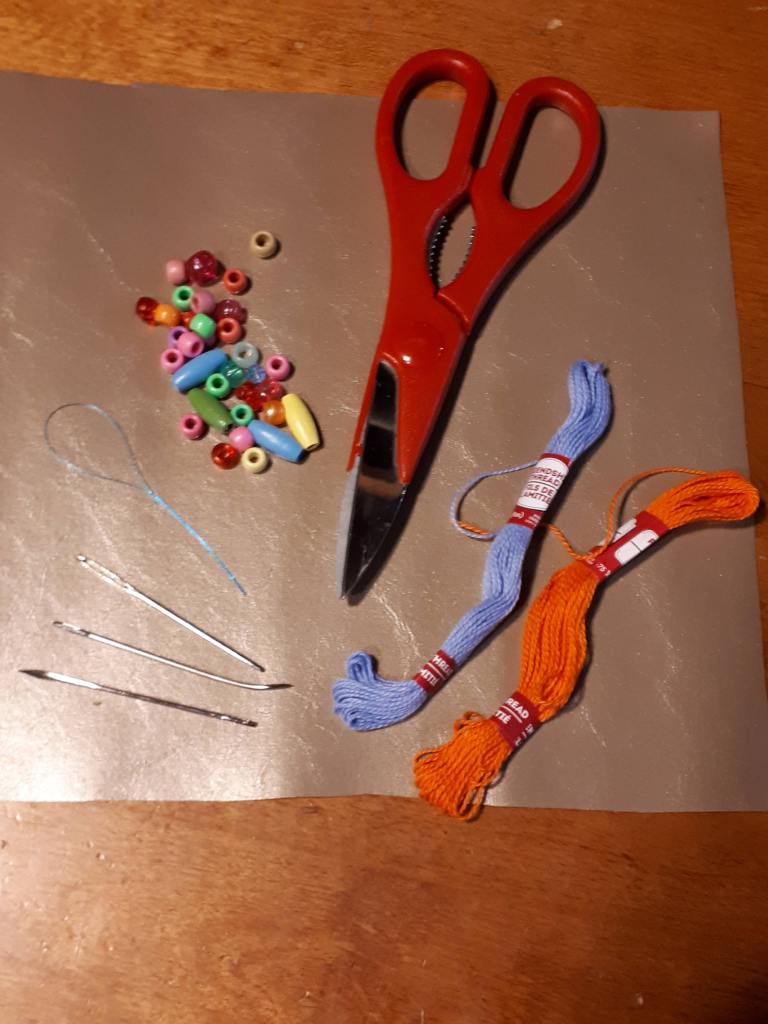
- Fabric vinyl – I used the very end of the roll of vinyl I used for my Reupholstered Dining Room Chairs and our Parfleche.
- Beads – we used mostly pony beads, but also an odd assortment of beads that we had in our bead bin
- Embroidery Floss/Embroidery Thread
- Needle – I used pretty thick needles because the pony beads have big holes in them. Bigger needles are easier for kids to wield. As I mentioned above, the littler kids used floss threaders so we didn’t need to worry about them stabbing themselves.
- Scissors – to cut all the thread, and the tassels if you choose
Instructions:
- Cut out your belts/headbands/tumplines. I had them all cut out ahead of time, which turned out to be slightly problematic, as I made the little ones a little too little. All of ours were about two inches wide, and I made them all different lengths. 40 inches wide should do the trick, but you should measure your children’s waist/head and then add about a foot or more to tie it.
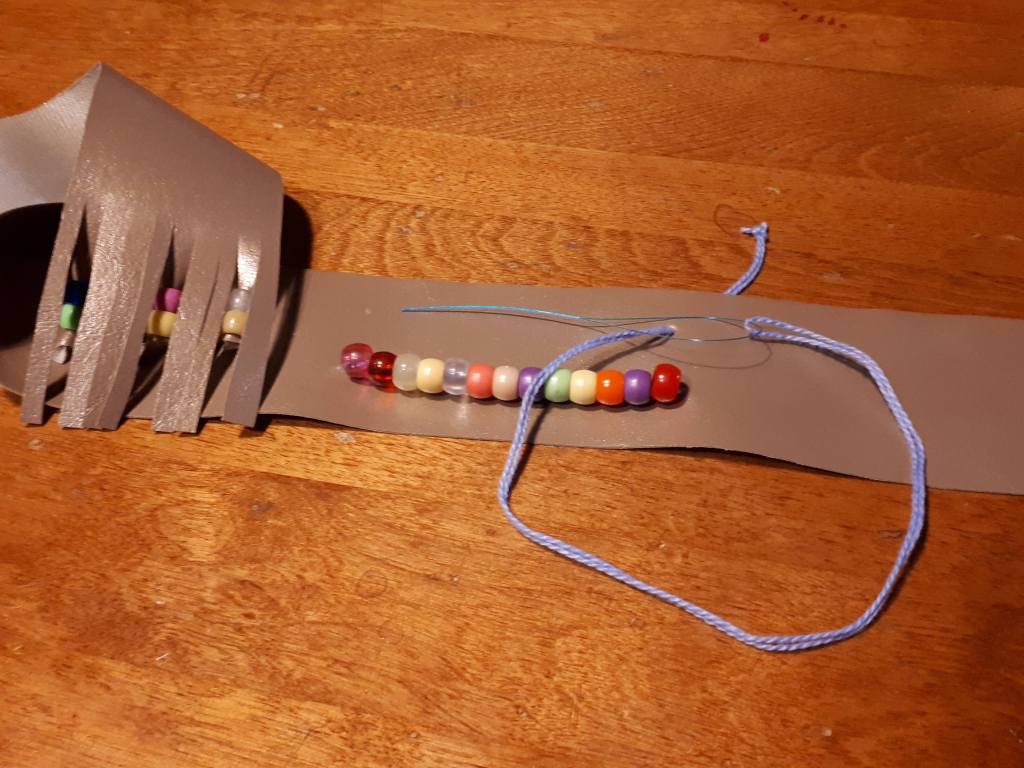
2. Thread your needle and push it through the fabric vinyl. Thread as many beads you want onto the embroidery floss and push it through again, at the end of the row of beads. Make a fairly sizeable knot to start and end the beadwork, as the vinyl fabric tends to have some give in it, and small knots slip right through the hole, dumping all the beads (that’s a lesson I learned from experience). Do this as many times as you want. Older children may want to use only embroidery floss to make patterns, shapes and lines.
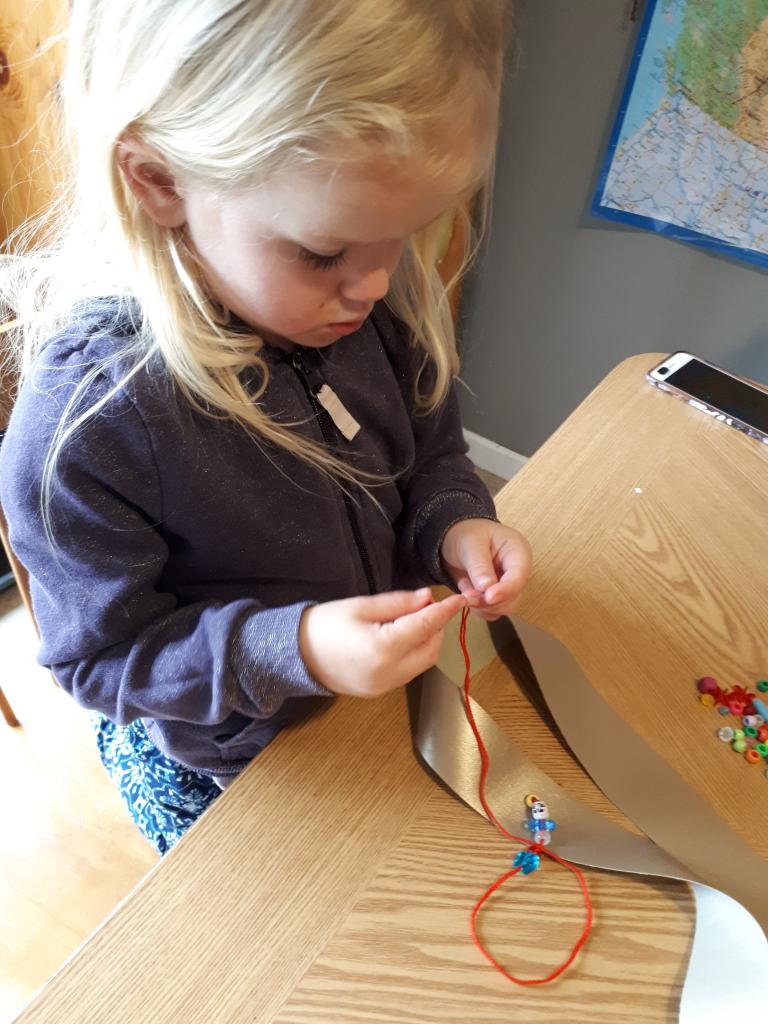
The large beads and floss threaders make this a safe craft,
and a great one for little fingers!
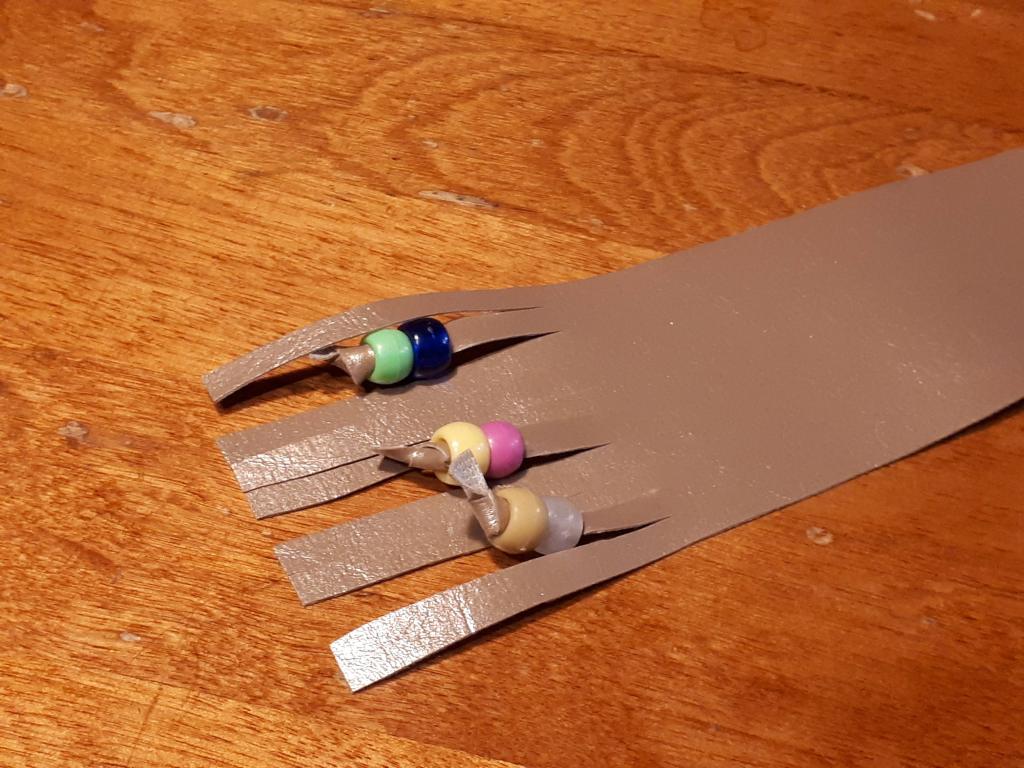
3. If you’d like, you can just slits in the ends of your tumpline/headband/belt to make it tasseled. Threading beads onto some of the ends adds a very nice touch!
Now tie them up and send your Natives of the Subarctic out to play!
If you liked this craft, or any in this series, be sure to comment and like! I’ve changed the settings, so you don’t have to sign in anymore to comment. So, please! I want to hear from you!😊 Lots and lots!
Next week we’ll show you our Natives of the North Pacific Coast craft, a Paper Towel Roll Totem Pole. And then we had a Potlatch! Don’t know what a Potlatch is? Stay tuned!!


One thought on “Native Headband, Belt and Tumpline Craft”