

Do you have a New Year’s Resolution? Perhaps it’s reupholstering your dining room chairs? If it is (what are the chances?!) you’ve come to the right place! I reupholstered my dining room chairs not too long ago – with the help and tutelage of my Mum, who is brilliant. I was shocked at how easy it was! It took a lot of time and my hands were sore at the end, but the sense of accomplishment far outweighed both of those things- AND it looks like a professional job. When my friend Allison asked if I would help reupholster her dining room chairs I was more than happy to help. I was excited actually. It took us a full morning to do it, but it made such a difference to the look of her dining room!
When I recovered my chairs I had to change the padding and everything because they were so old, and the covering was fabric. The original padding was like powder. It. was. disgusting. My Mum and I, with three little kids in tow, went to Lens Mills Store and got quilt batting, foam and vinyl. When we recovered Allison’s chairs she didn’t need the padding because her chairs were covered in faux leather; we just put the vinyl right over that. So there are two methods, really. 1. Take everything down to the bare wood, replace the padding and the fabric. 2. Cover right over the existing material. It’s really easy to change the padding too, so never fear! And let’s get started!

Supplies:
- Dining room chairs
- Vinyl (measure your chair seats before you go pick out your vinyl, and be sure to take one seat with you.)
- Quilt batting for padding (optional)
- Thick foam (optional)
- Scissors
- Screw Driver
- Staple gun and staples
- Ruler
- Pen or pencil
Instructions:
- Remove the seat of the chair from the rest of the chair by unscrewing the screws at the bottom. Feel free to enlist help from the little people. This is a great job for them! If you’re purely recovering what’s already here this step is done. If you’re replacing the padding you’ll have to pull out all the staples, foam, etc., until it’s just the wooden seat left.

2. Measure and cut the vinyl. If you’re replacing the padding as well as the vinyl you’ll have to cut the foam and batting at this step too. The foam should be just slightly bigger than the seat. The batting should be about an inch bigger on all sides. You can also just trace the old fabric and foam for this step. And the vinyl needs to be a bit bigger than the batting. It’s preferable that only the vinyl is showing, but that the staples go through the vinyl and the batting. Trace only one chair seat. If you’re replacing only the vinyl you should leave about and inch and a half to two inches that can fold over the seat. We used the leftover vinyl to make parfleches as part of our study on Natives of the Plains. It’s a great craft for all ages!

3. If yours, like Allison’s, flare out at the front flip every other seat so they don’t waste vinyl.

4. Cut it out.

5. Use this first piece as a template so you don’t have to measure every one. (If you want to measure two of everything, cut one out and make it to make sure it’s the right measurement you can do that. Then measure and cut out everything.)

6. Now it’s time to staple it all together. You’re going to love how easy this is! (If you’re redoing the padding you might want to do this in two steps: 1. Staple on the foam and the batting, then 2. Staple the vinyl over top.) Place the vinyl face down on a surface – we used the table top. Centre the seat on the vinyl. If you’re using the cotton batting and foam as well, the order of your stack should be: vinyl, batting, foam, seat. Pull firmly on one side and staple to the the bottom of the seat. I put my staples about 2 inches apart.
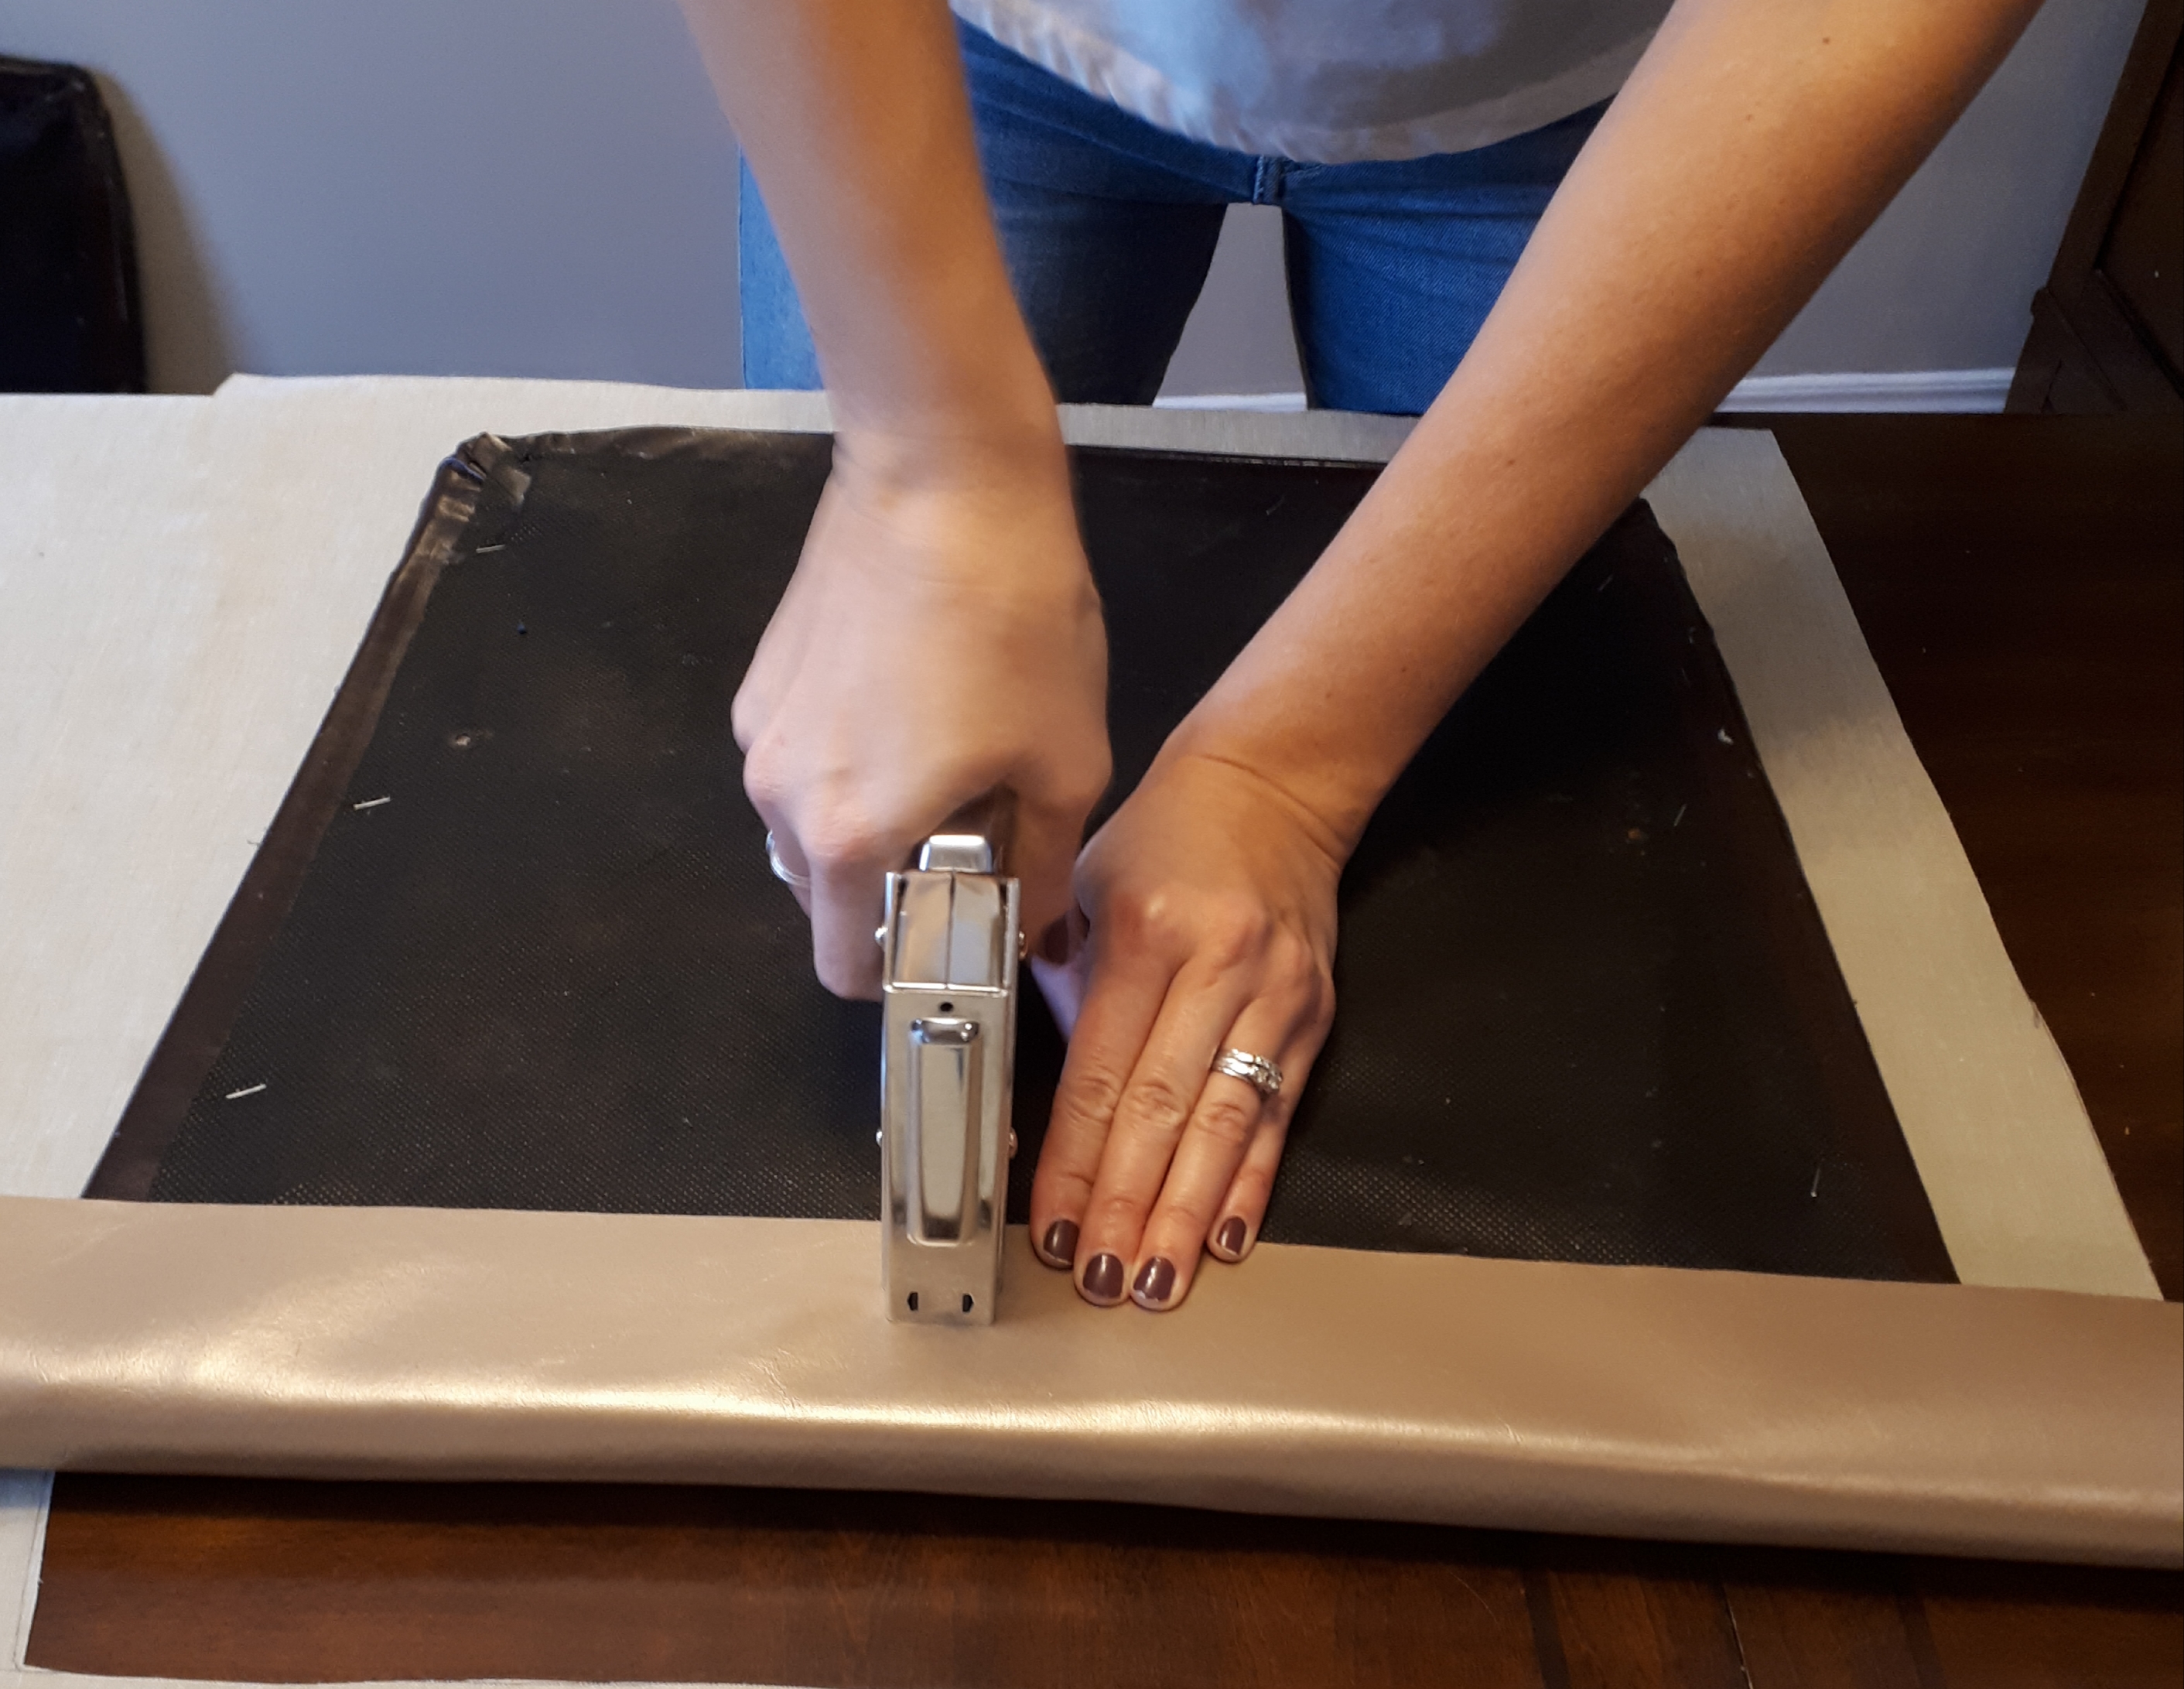
7. Turn the cushion and staple the opposite side. You’ll have to pull very tightly here, and that’s why your fingers will start to hurt! (But the rest of you will feel so darn good!)

8. Do the two remaining sides the same way.
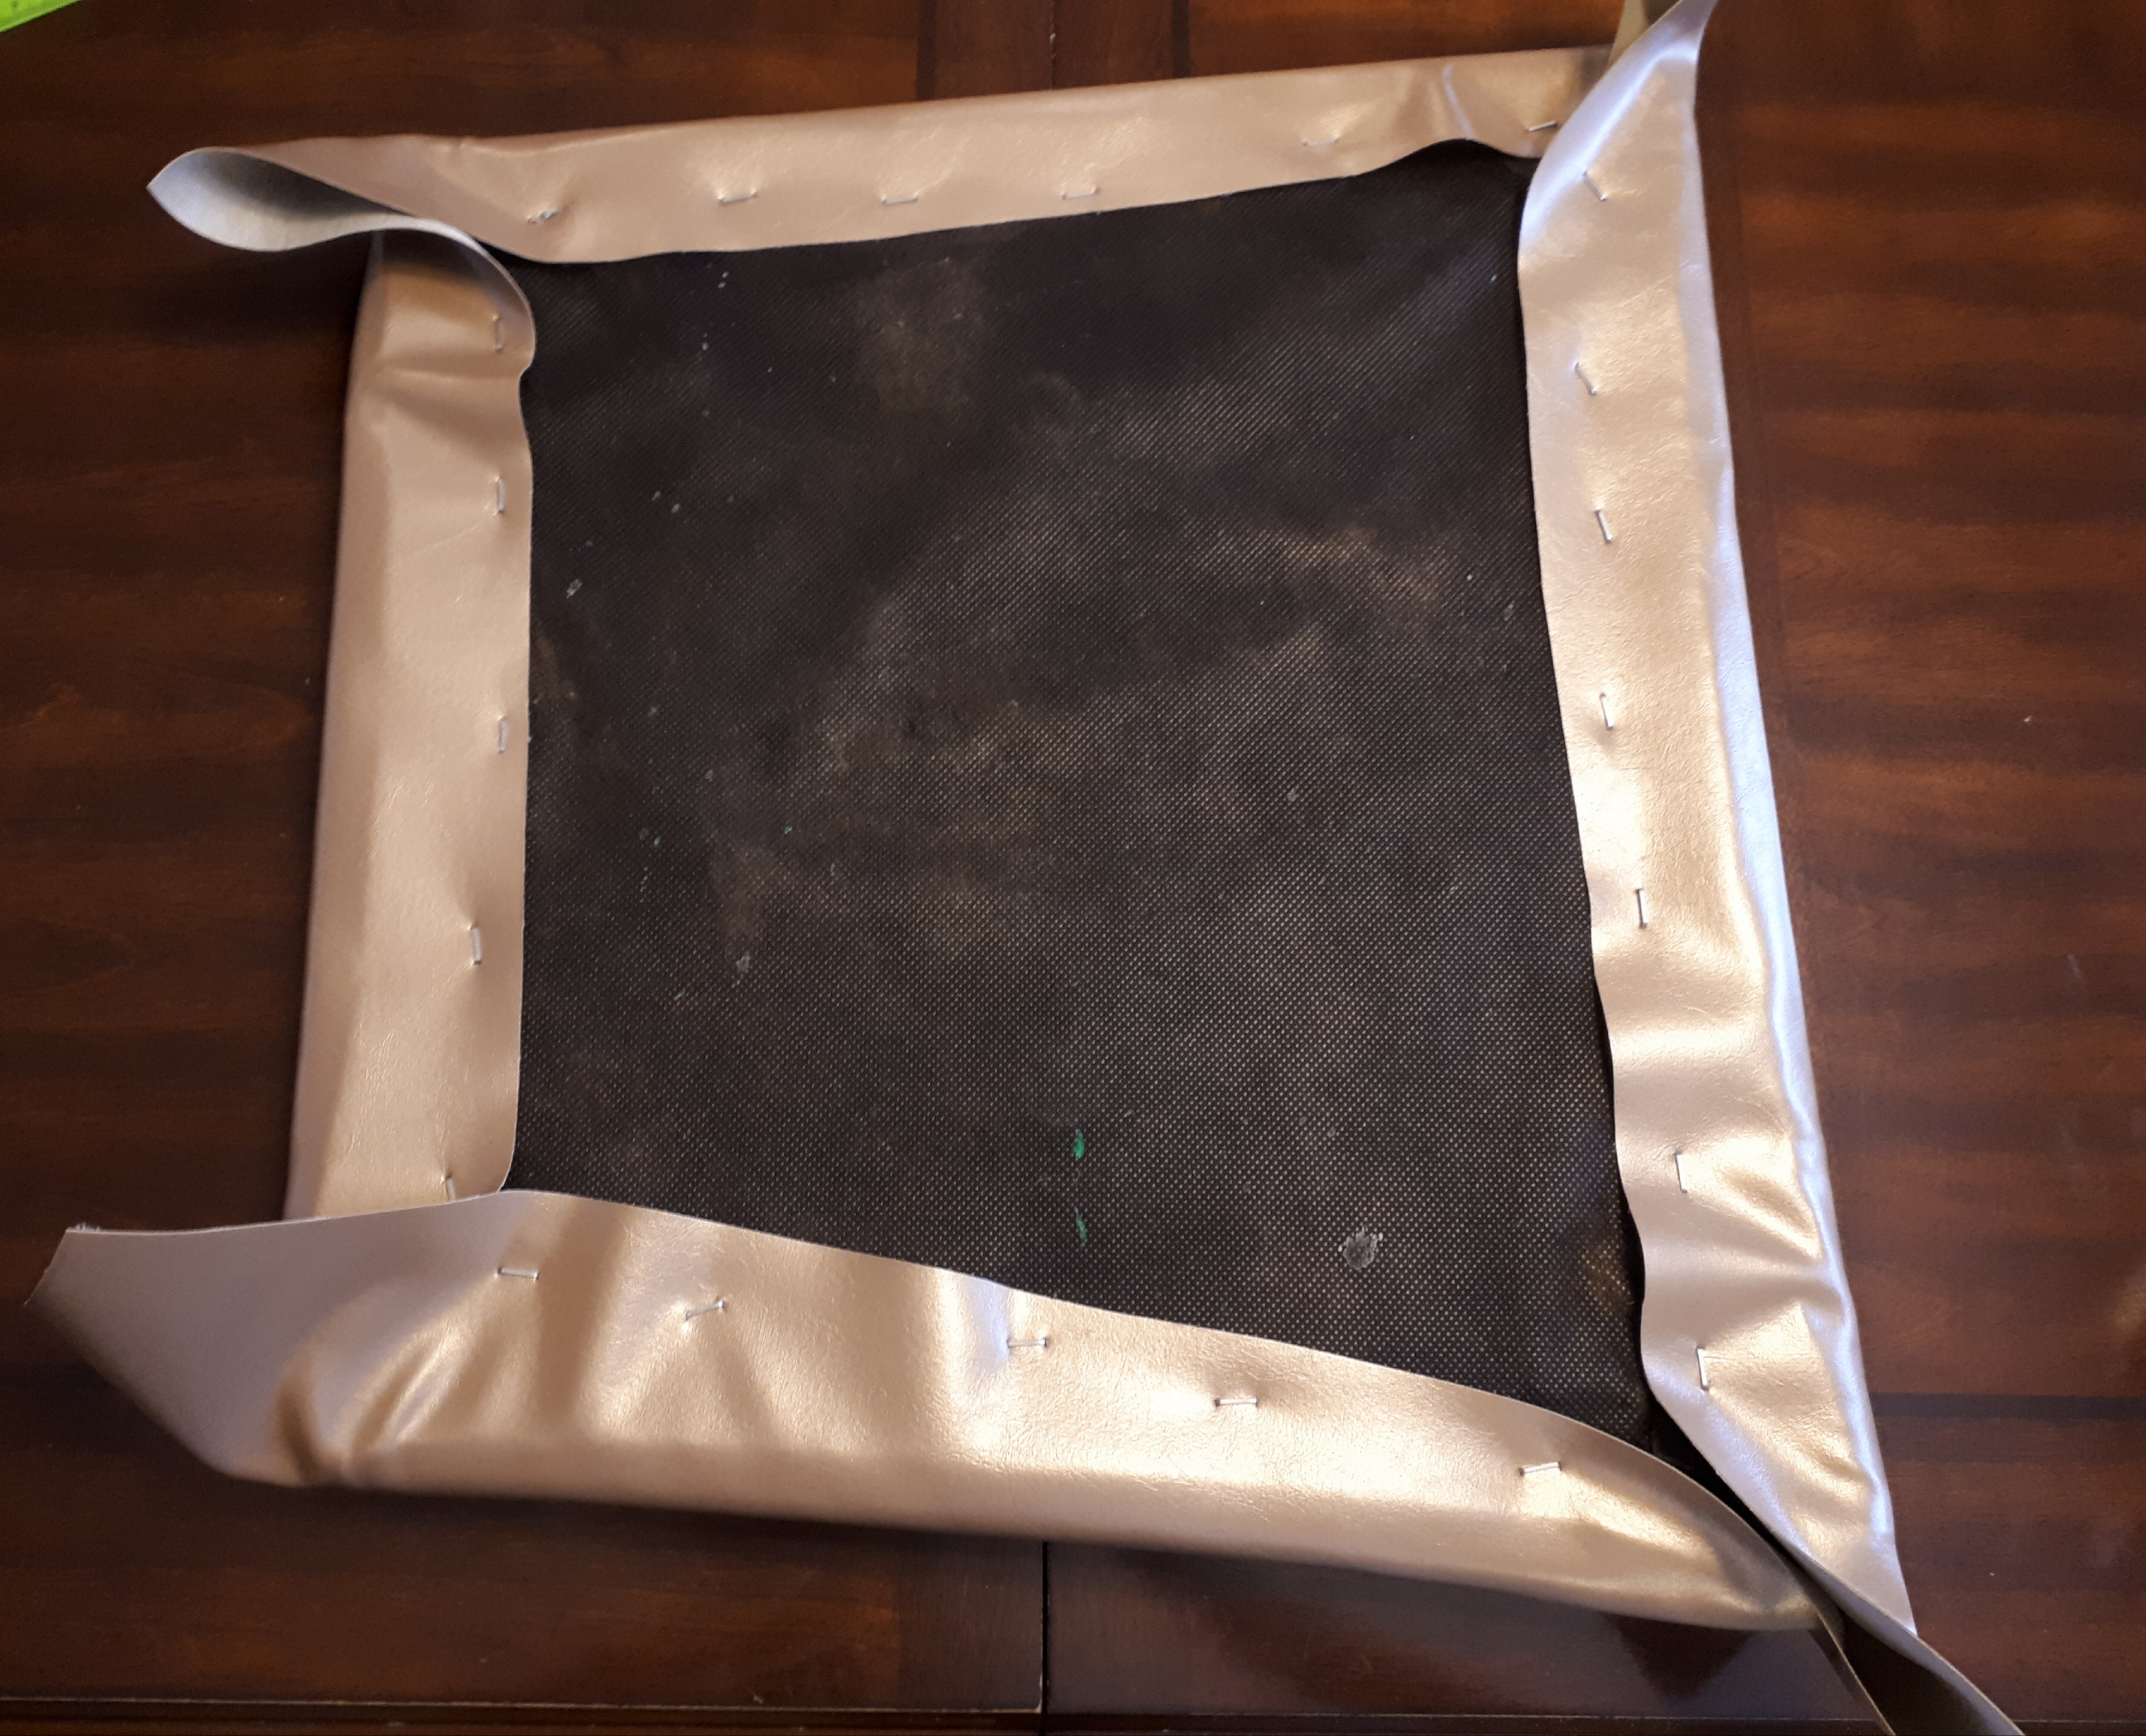
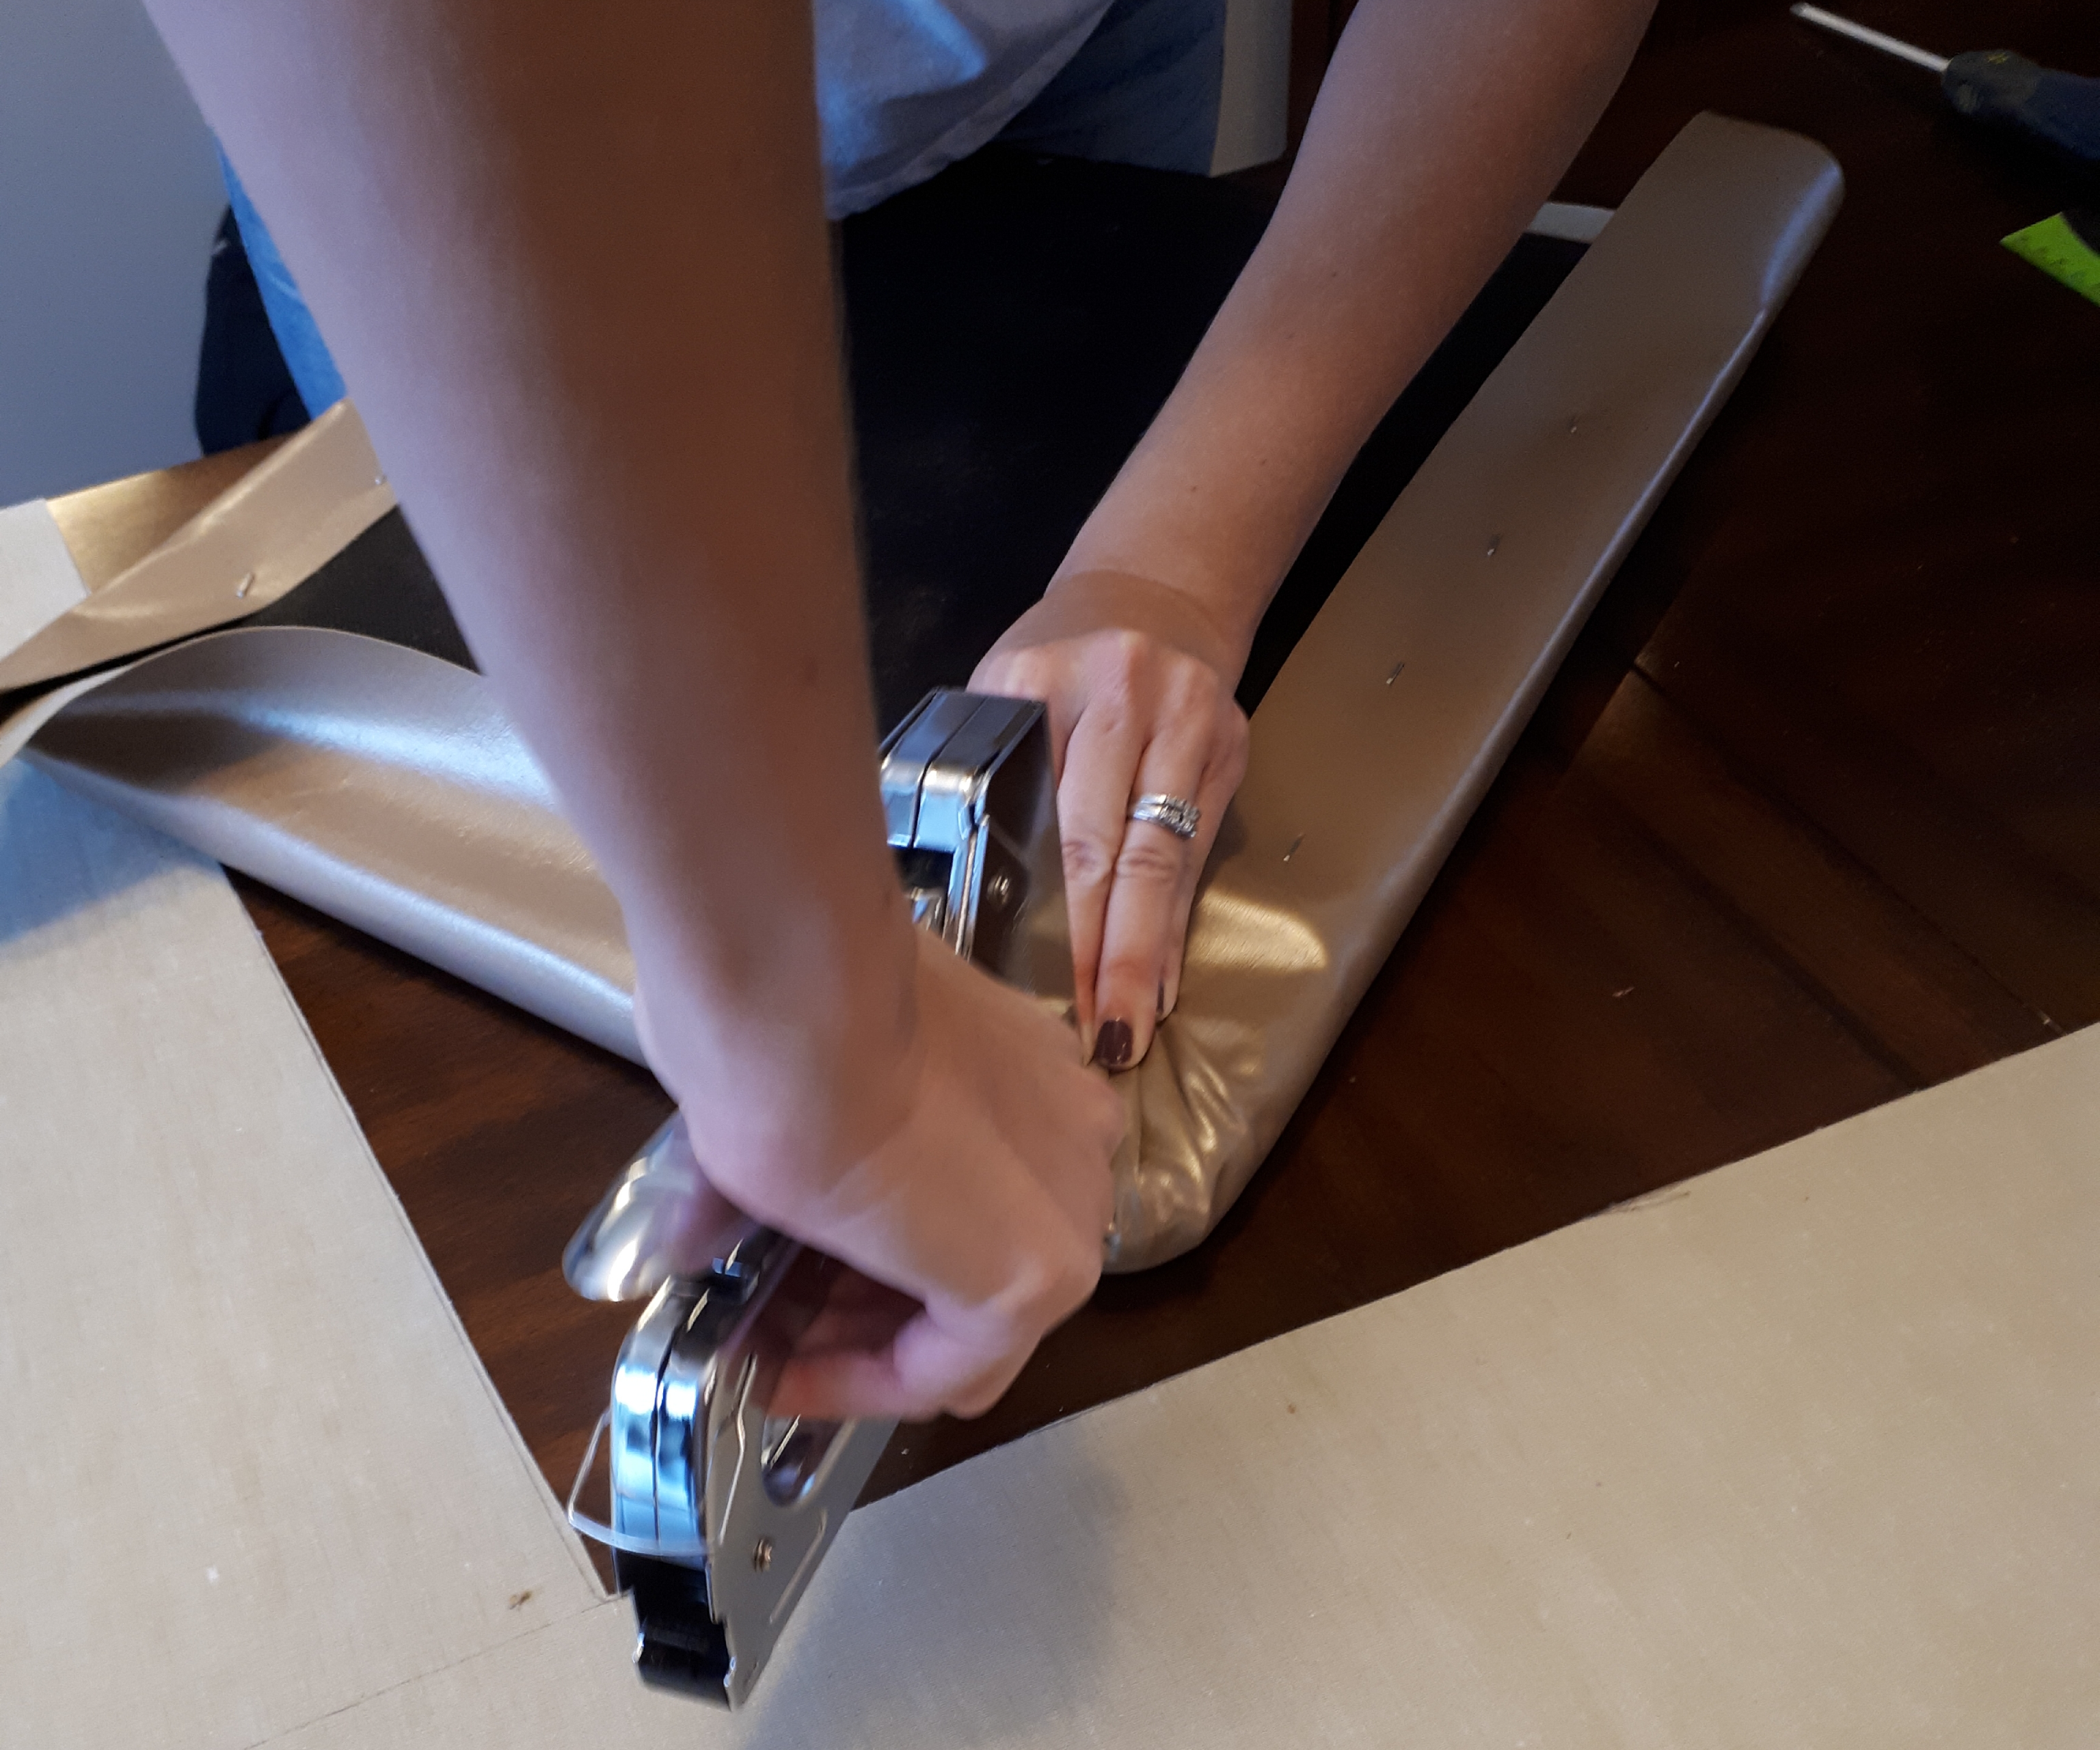
9. Now we do the corners. I found this to be the most challenging part. But if I didn’t like how it turned out I just let go and started again. To do the corner turn the seat so that it looks like a diamond. Starting at one end firmly pull the edge tight, laying it flat as you go.

10. Once you’re happy with it put in staples across all the ridges. It’s totally okay if it takes a couple of tries! These pictures are of me 1. turning it over to check it before I’ve stapled it and 2. stapling it . It might be helpful if you have a friend for this part so you can hold it up and get them to check it. It can be hard to hold it and look at the top before you’ve stapled it- and trust me, you don’t want to have to pull out more staples.
Here are some pictures of my corners after they’re reattached to the chair.


11. Screw the seat back onto the chair. For this step we just screwed right through the vinyl and foam. Sometimes the screw wouldn’t pierce it so we’d have to try again, but that was the only snag. Again, enlist the little people. Since the holes are already there it’s not too tricky for them to be helpful. It can be easier to put the chair upside down on the table to screw it. The downward pressure is helpful.

What do you think? You’re probably ready for a cup of tea and a hand massage. But are you not proud of yourself? Below is the before and after pic of Allison’s chairs. Amazing, eh?

I’d love to see your reupholstered chairs! Don’t they just brighten the place up? Especially if you’re doing it after having them for a long time- or post-toddler!


Super cool!
LikeLike
Thanks Cesar!😁
LikeLiked by 1 person