
Natives of the Plateau Craft

We’re back to crafts that compliment our studies on Canada’s Natives Long Ago. This blog post is part of a series, and it starts with our Wigwam Craft (Eastern Woodland Hunters). So if you’re enjoying this post and are looking for more Native education crafts I suggest you click that link to get all set up! We’ve also made a Parfleche for Natives of the Plains, and Soap Carvings for Inuit of the Arctic.
Supplies:
- Printer and cardstock (to print the basket weaving template) OR thin cardboard and a pen to trace your own template
- Template for the baskets (there’s a free printable below⬇😉)
- Yarn
- Scissors
- Hot glue gun and glue
Instructions:
- Print off the Free Printable Basket Weaving Template for Kids. You can do this by clicking “Download” below. Printing it on cardstock will definitely work better than paper. I don’t even think paper would work. If you don’t have cardstock, just trace a circle on a piece of your recycled cardboard, trace a smaller circle in the middle, and then cut out notches from the outer circle to the inner (look at the template below if you have no idea what I’m talking about. You need the notches or your basket will not be a bowl, it’ll just be flat. Also, be sure that your template has an odd number of panels, or you won’t create a pattern.
It looks like this:

2. Starting with your yarn tail on the inside begin weaving in and out of the “bowl” in an over-under pattern. Go over one panel, under the next, etc. The tail of the yarn will eventually be held in place by the subsequent wrappings.

The kids all needed help getting started, and changing colours,
but most of the rest of the weaving they could do themselves.
I did the gluing.
Because these baskets are so small they really give kids a chance to finish them without getting too tired or bored. Also, it exercises their fine motor skills, so that’s always exciting!
⭐TIP: To change colours, simply trim the yarn you’re using on the inside of the bowl and continue wrapping the new colour where the other left off. Just like when you started you’ll have to hold onto the end of the new strand until it gets covered and held in place by itself.

3. When you finish, take your hot glue gun and glue that final strand to the top inside of the template. Trim all the loose threads inside.
Here are all the kids with their completed little baskets!
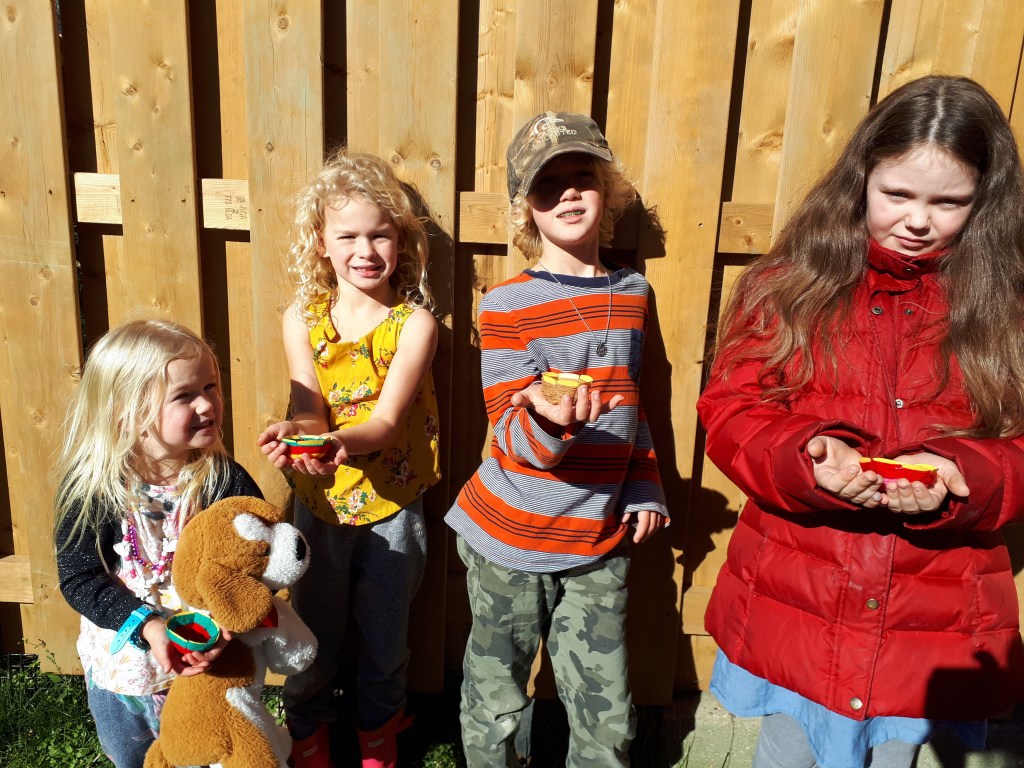
photographed are wearing the whole spectrum of seasons! Tank tops to winter coats here!
The kids all had different ideas of what they were planning on keeping in their woven baskets! The winning ideas were candy and coins, but I’m sure there are hundreds of things you could keep in your little woven basket. What will you keep in yours?
Next week we’ll look at the craft we completed when we learned about the Natives of the Subarctic. The plan was supposed to be the decorative part of a tumpline. But in actuality it became belts and head bands. They’re still cool, even if they weren’t entirely on the mark!


How long of a piece of yarn is needed for one basket? Im wanting to prep these ahead of time
LikeLike
I’m sorry! I don’t know! We just unraveled it as we went. My advice is to make an example basket and measure that yarn. Or you could cut lengths in different colours so they can choose their pattern.
LikeLike
Thanks for the response! Sorry if my comment posted too many times
LikeLike
No problem!!
LikeLike
You have not mentioned in the instructions when you used glue. Was it to glue the yarn to the template?
LikeLike
Thanks for your question! It’s step 3. At the beginning, the yarn will be held in place by the following strands. You need the glue at end, when you secure it to the basket. Have fun!
LikeLike