
With LOTS of pictures!!
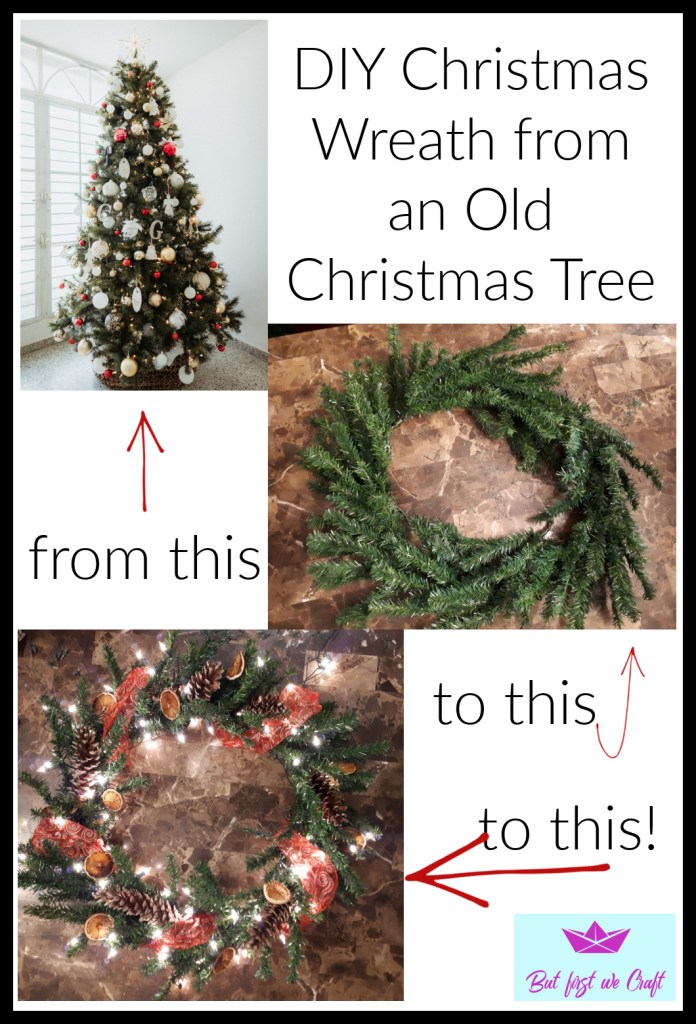
My husband and I got a new Christmas tree the first year we were married, that made it 14 years old this year. About five years ago my husband had to go through it and replace almost half of the lights. It took hours! So, this year, when we set up our tree and saw that, once again, half the lights were out we decided to get a new one. (Funny side story: After we decided to get a new tree my son shot the old tree, which was still set up and plugged in, with his Nerf gun. An additional third of the lights all of the sudden lit up!) We got a beauty of a tree, and had the old tree in the van, ready to go to Goodwill when I began having second thoughts: what if I want to make something from the old tree? I bet I could make a wreath out of it, or even a door hanging. So my husband took it out of the van again and hauled it down to my craft room – he’s a wonderful man💑!
Supplies:
- Old Christmas tree
- Side snips
- Zip ties (I used clear and black)
- Thick wire (ours is from a political sign we had on our lawn during the last election)
Instructions:
- Cut the branches off your tree using the side snips. My Christmas tree came apart into three sections. In the top section of my tree, going down about halfway, there were individual strands. My husband cut that whole thing off for me to make into a door hanging. From there down my son and I cut off all the rest of the branches. These branches differed from the top (door hanging) part because each branch has 5 or more smaller arms coming off of it. It’s these branches that you want for your wreath.

Notice that I have all the “stems” facing the same direction.
2. Figure out the approximate spacing. You’ll need to be especially careful if you have a place in mind for this with limited room. Mine was going on a large wall, so it didn’t matter at all.
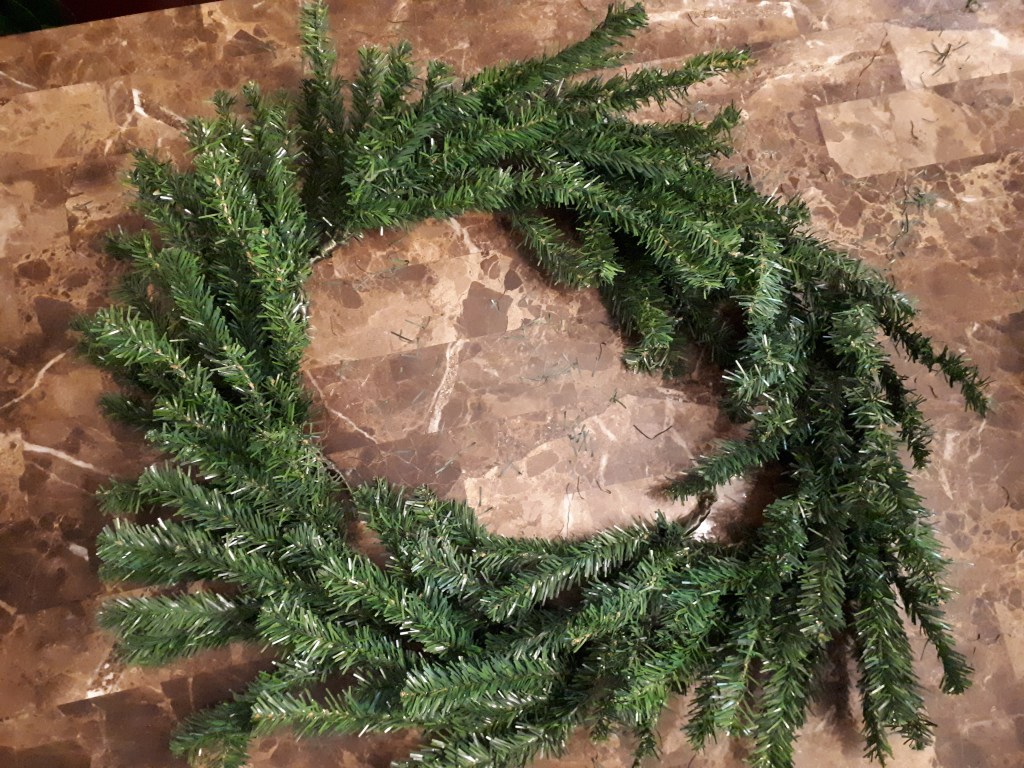
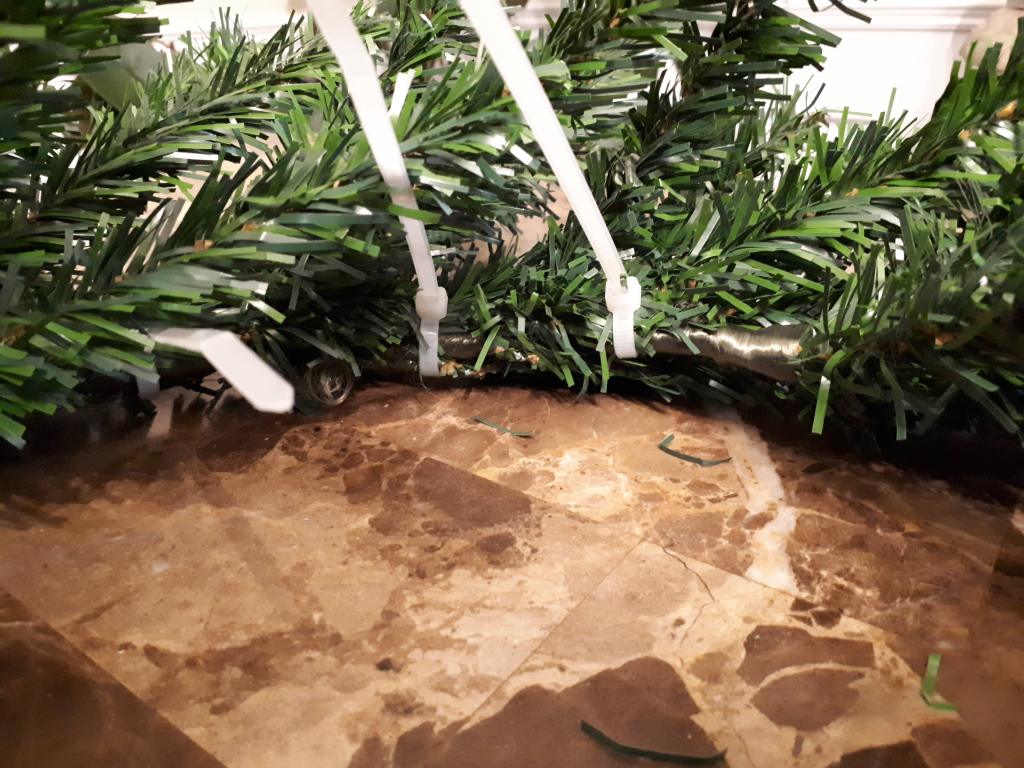
3. I zip tied my branches together about halfway up the stem of the next branch. I used clear zip ties (they look white here) because I didn’t know we had black, but they worked fine because they’re hidden under the branches. Each stem is zip tied to the middle two bristles of the next. You’ll need to pull the zip ties very tightly or the next branch will slip right out.
After I had these on, I added in more where it felt a bit flimsy.
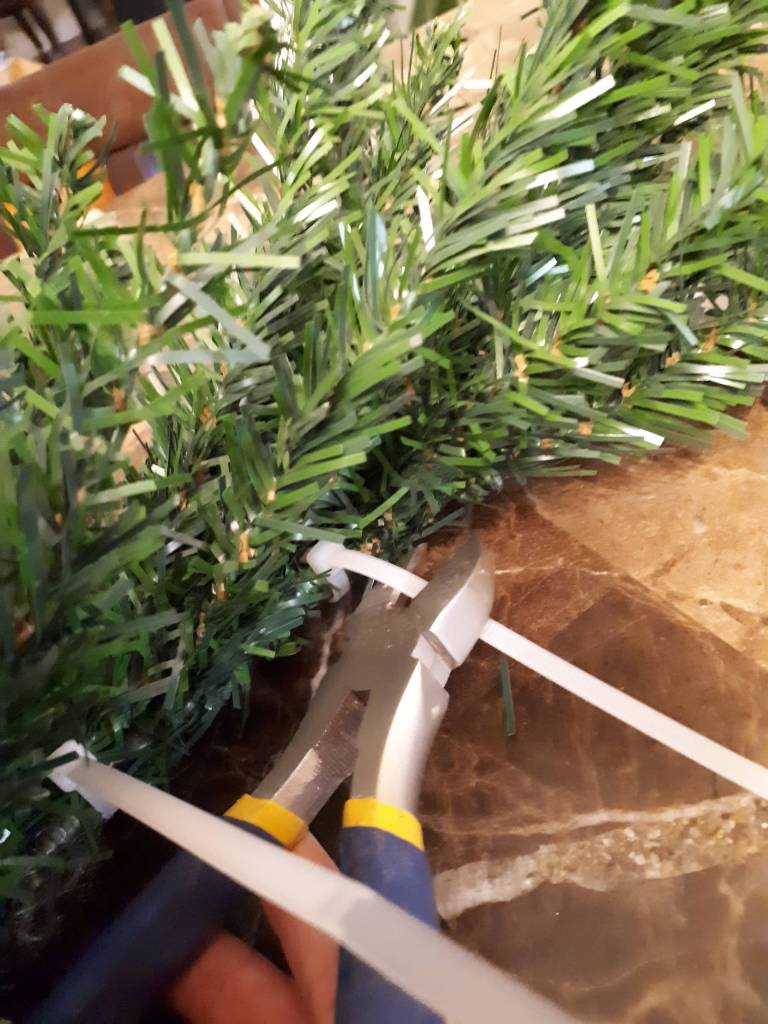
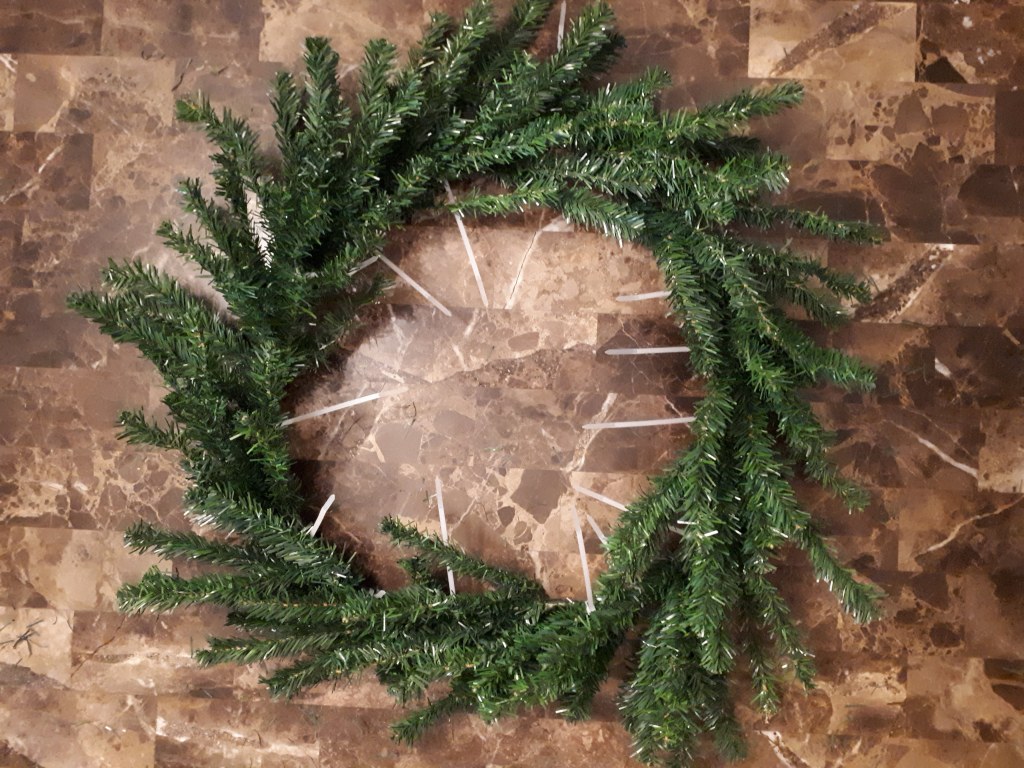
4. Cut off the ends of the zip ties with side snips.
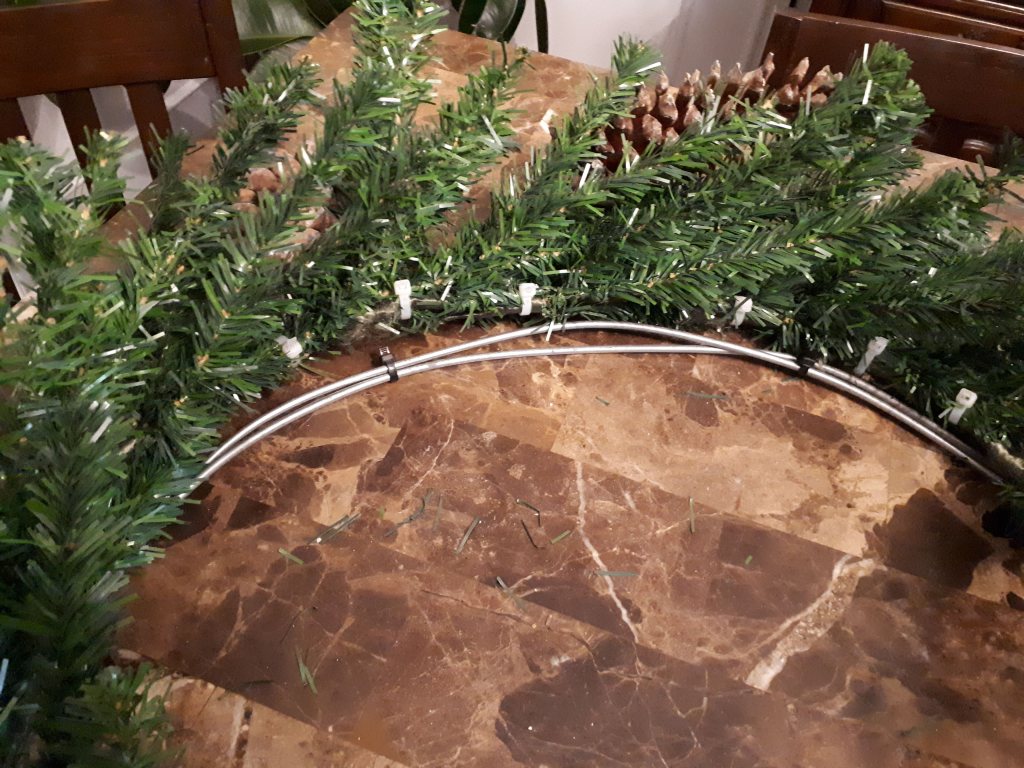
5. Once again my husband helped me with this part (isn’t he a gem?). He fashioned the wire into a circle, lined it up with my existing wreath and adjusted it as necessary. Then I zip tied it together. It was at this point that he enlightened me about the existence, in our garage even, of black zip ties.
6: Zip tie the wreath to the wire.
The next night I decorated the wreath in a Victorian style. I’ll give you more details about that next time. My husband, brilliant as usual, used a brick hook to hang this DIY Christmas Wreath from an old Christmas tree on our front porch wall. Here it is😄:

Here’s the whole front of our house:

I hope this post brings you Christmas cheer! We have never really decorated the front of our house for Christmas before, so this is very exciting for me! Maybe it’ll inspire you to do a bit more, too. Merry Christmas!!

Such a great idea! Love it! It makes a pretty good tutorial of how to make a wreath if you have live boughs too. 🙂
LikeLike
Maybe I’ll have to try that!😊
LikeLiked by 1 person