

Before we get to the craft I just wanted to talk about the lack of post last week. If you’re just here for the craft go below the divider. If you’re here for more than just a craft read on: I have been faithfully posting weekly for almost a year. I missed one post in November when my family went to Florida, and I missed my second post last week. Somehow the week got away from me, and when I went to write up my post on Thursday night my husband reminded me that he was going to do the taxes on the laptop. We only have one laptop, and writing it on my phone never works well. Since getting a tax return sounded lovely to me, (and since we’d already agreed he could use the laptop for taxes on Thursday night) I just relaxed, had a cup of tea and read my book! But now I’m back, with a craft that I think is pretty awesome. As we were making it my son exclaimed, “This is so much fun!” So here we go. Back to crafting!
My son is all about nests. All of his animals need nests, and when he goes to bed at night he always asks us to make a nest out of his blankets. He often goes to bed all wrapped up in pillows and blankets, and when we check on him before bed he is COVERED in sweat! Anyway, we were at Dollarama a couple of days ago buying supplies for my daughter’s Under the Sea party- that post will be coming soon!- when my son found a long wooden snake; the kind that sways back and forth. Since then he’s been asking me to make a nest with him, and today is the day that we got it. And man did it ever turn out! We used the same technique that we’re going to use to make the coral reef for our Under the Sea party- putting coffee filters in a bit of water and food colouring and having it soak it up. Then you dry it out, stick them together and glue them into a box. This nest is meant to look like grass and twigs, the kind of habitat a snake would like. You can change the colours to make other types of nests. Keep reading for a full tutorial!
Supplies:
- Large cardboard box
- Water
- Food colouring
- Coffee filters
- Plates or bowls in which to put the water
- Twist ties
- Scissors
- Glue gun and glue
- Sharp knife (if you do this step like me you’ll need a Band-Aid too🤦♀️)

Instructions:
- Dye the coffee filters. We wanted light green, yellow, brown and dark green so we used five plates. Put several drops of food colouring onto each plate. You want it to be fairly dark, so we used a total of 13-15 drops on each plate. Add about 3 TBSP of water to each plate and mix the water and food colouring with a fork. This can be a cool exercise in mixing colours too. Brown didn’t come in our set, so we discussed ways to make brown with the colours we had. The kids also had to figure out how to make the green lighter and darker.

2. Put the coffee filters upside down on the plate and watch as the water is soaked up. This was really cool to see- even for me! Because there is so little water you may have to swirl it around a bit, and then even turn the filters upside down to finish the bottoms. You could just use more food colouring and water, but that seemed like unnecessary waste to me. When the filters are done place them on a cookie sheet, or something similar, for them to dry. Our filters took about 24 hours to dry. As they were getting close to dry I separated them all to hasten the process a bit. Learn from my mistakes: if you put wet coffee filters close together they’ll bleed onto each other. Some of my lovely yellow filters have huge bright green splotches on them.

3. Now your filters are all dry! Isn’t this exciting? And aren’t they beautiful? Take about 4 filters and stack them together. We made a pattern of green-brown-yellow-pink for our filter-sorting. Each filter bundle you make start at the next colour over, so filter bundle #2 will be brown-yellow-pink-green, etc.

4. This is the part where I cut myself- notice the Band-Aid in the picture? Turns out four coffee filters are pretty sturdy, but once you get through, man does that knife fly! So I started laying it atop the box and aiming the knife so it slit in the fold of the box. So, Step 4: Pierce two little holes in the centre of the filters, pretty close together, to slide the twist ties into.


5. Insert a small twist tie into the top of the filters and twist them together at the bottom of the filter.

6. If your filters went limp, as ours did, simply pull each, one at a time, into the middle. Then just squish them a bit and then fluff them out.

7. Lay out all the filter bundles where you think you want them to be.

8. Use a glue gun to glue them into your box. It’s kinda cute how they can sleep under the “leaves!”
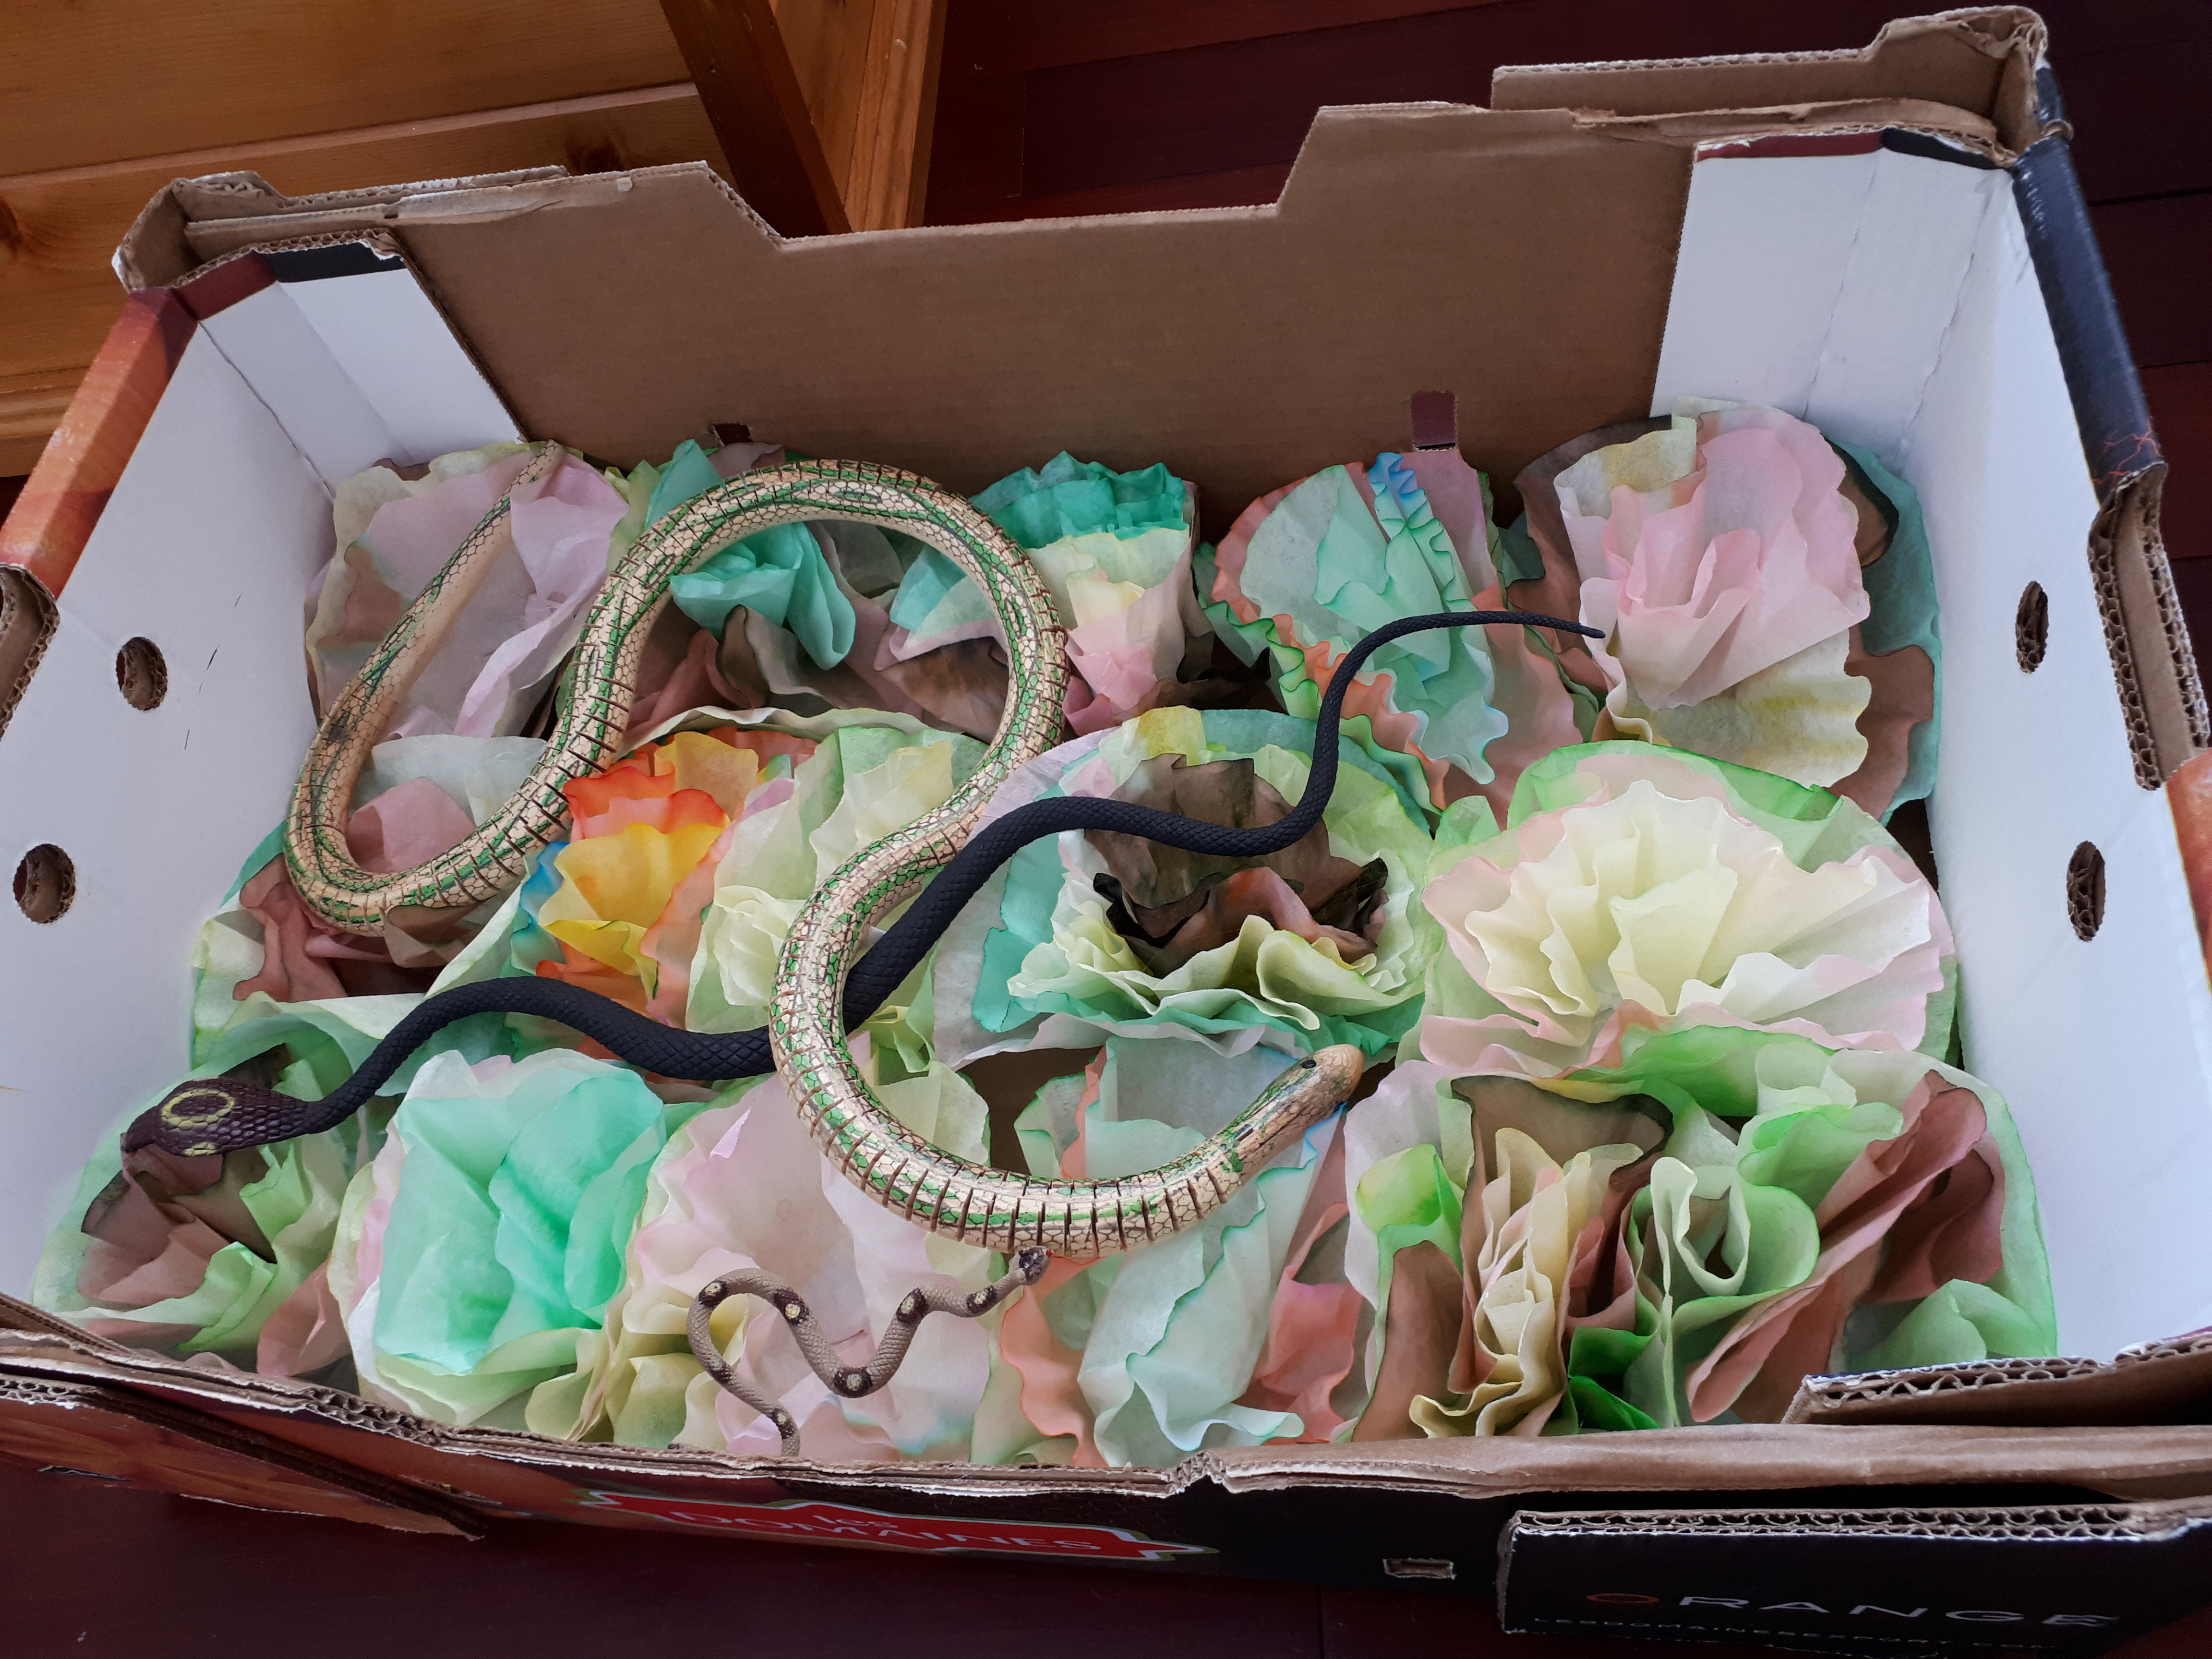
9. Tuck all your animals into their lovely little bed!
What do you think? Why not try blue, white, pink and purple for a unicorn nest? Or maybe green, orange, red and yellow for an autumn nest? This is also a great opportunity to teach children about where different animals live! If you’re looking for more animal crafts be sure to check out How to Make Cat Ears and DIY Flying Squirrel Costume. If you’re looking for a bed for a doll or stuffed animal then you should read Clementine Box Doll Bed. Happy Crafting!


2 thoughts on “DIY Toy Snake Nest”