
For my daughter’s birthday she has requested that her room be redecorated in Princess Theme. We are also using the opportunity to take down the crib and move both girls into a room together. I have really enjoyed coming up with ideas! So far we have white and black damask curtains, black, white and pink comforter set, white net canopy and I’m in the process of choosing a gray paint for the walls. I thought it would be awesome to put pictures up of the girls, and then I thought “How awesome would it be to make those pictures look like the portaits of monarchs from history!?” All it took was a trip to Michael’s, where I found perfect vintage frames, to make this dream a reality. Sit back and enjoy one of my favourite crafts yet!
Taking the Picture:
Supplies:

- Princess dress
- Make-up
- Tiara
- Jewellery
- Stool
- Blank wall for backdrop
- Natural Lighting
- Camera
- Depending on how young they are you might want help. I used my other children who were surprisingly cooperative. I went into it with very little hope of getting a good picture, but was pleasantly surprised. I actually only managed to take one picture of my two-year-old and it was a great picture!
Instructions:
To Take an Epic Princess Picture:
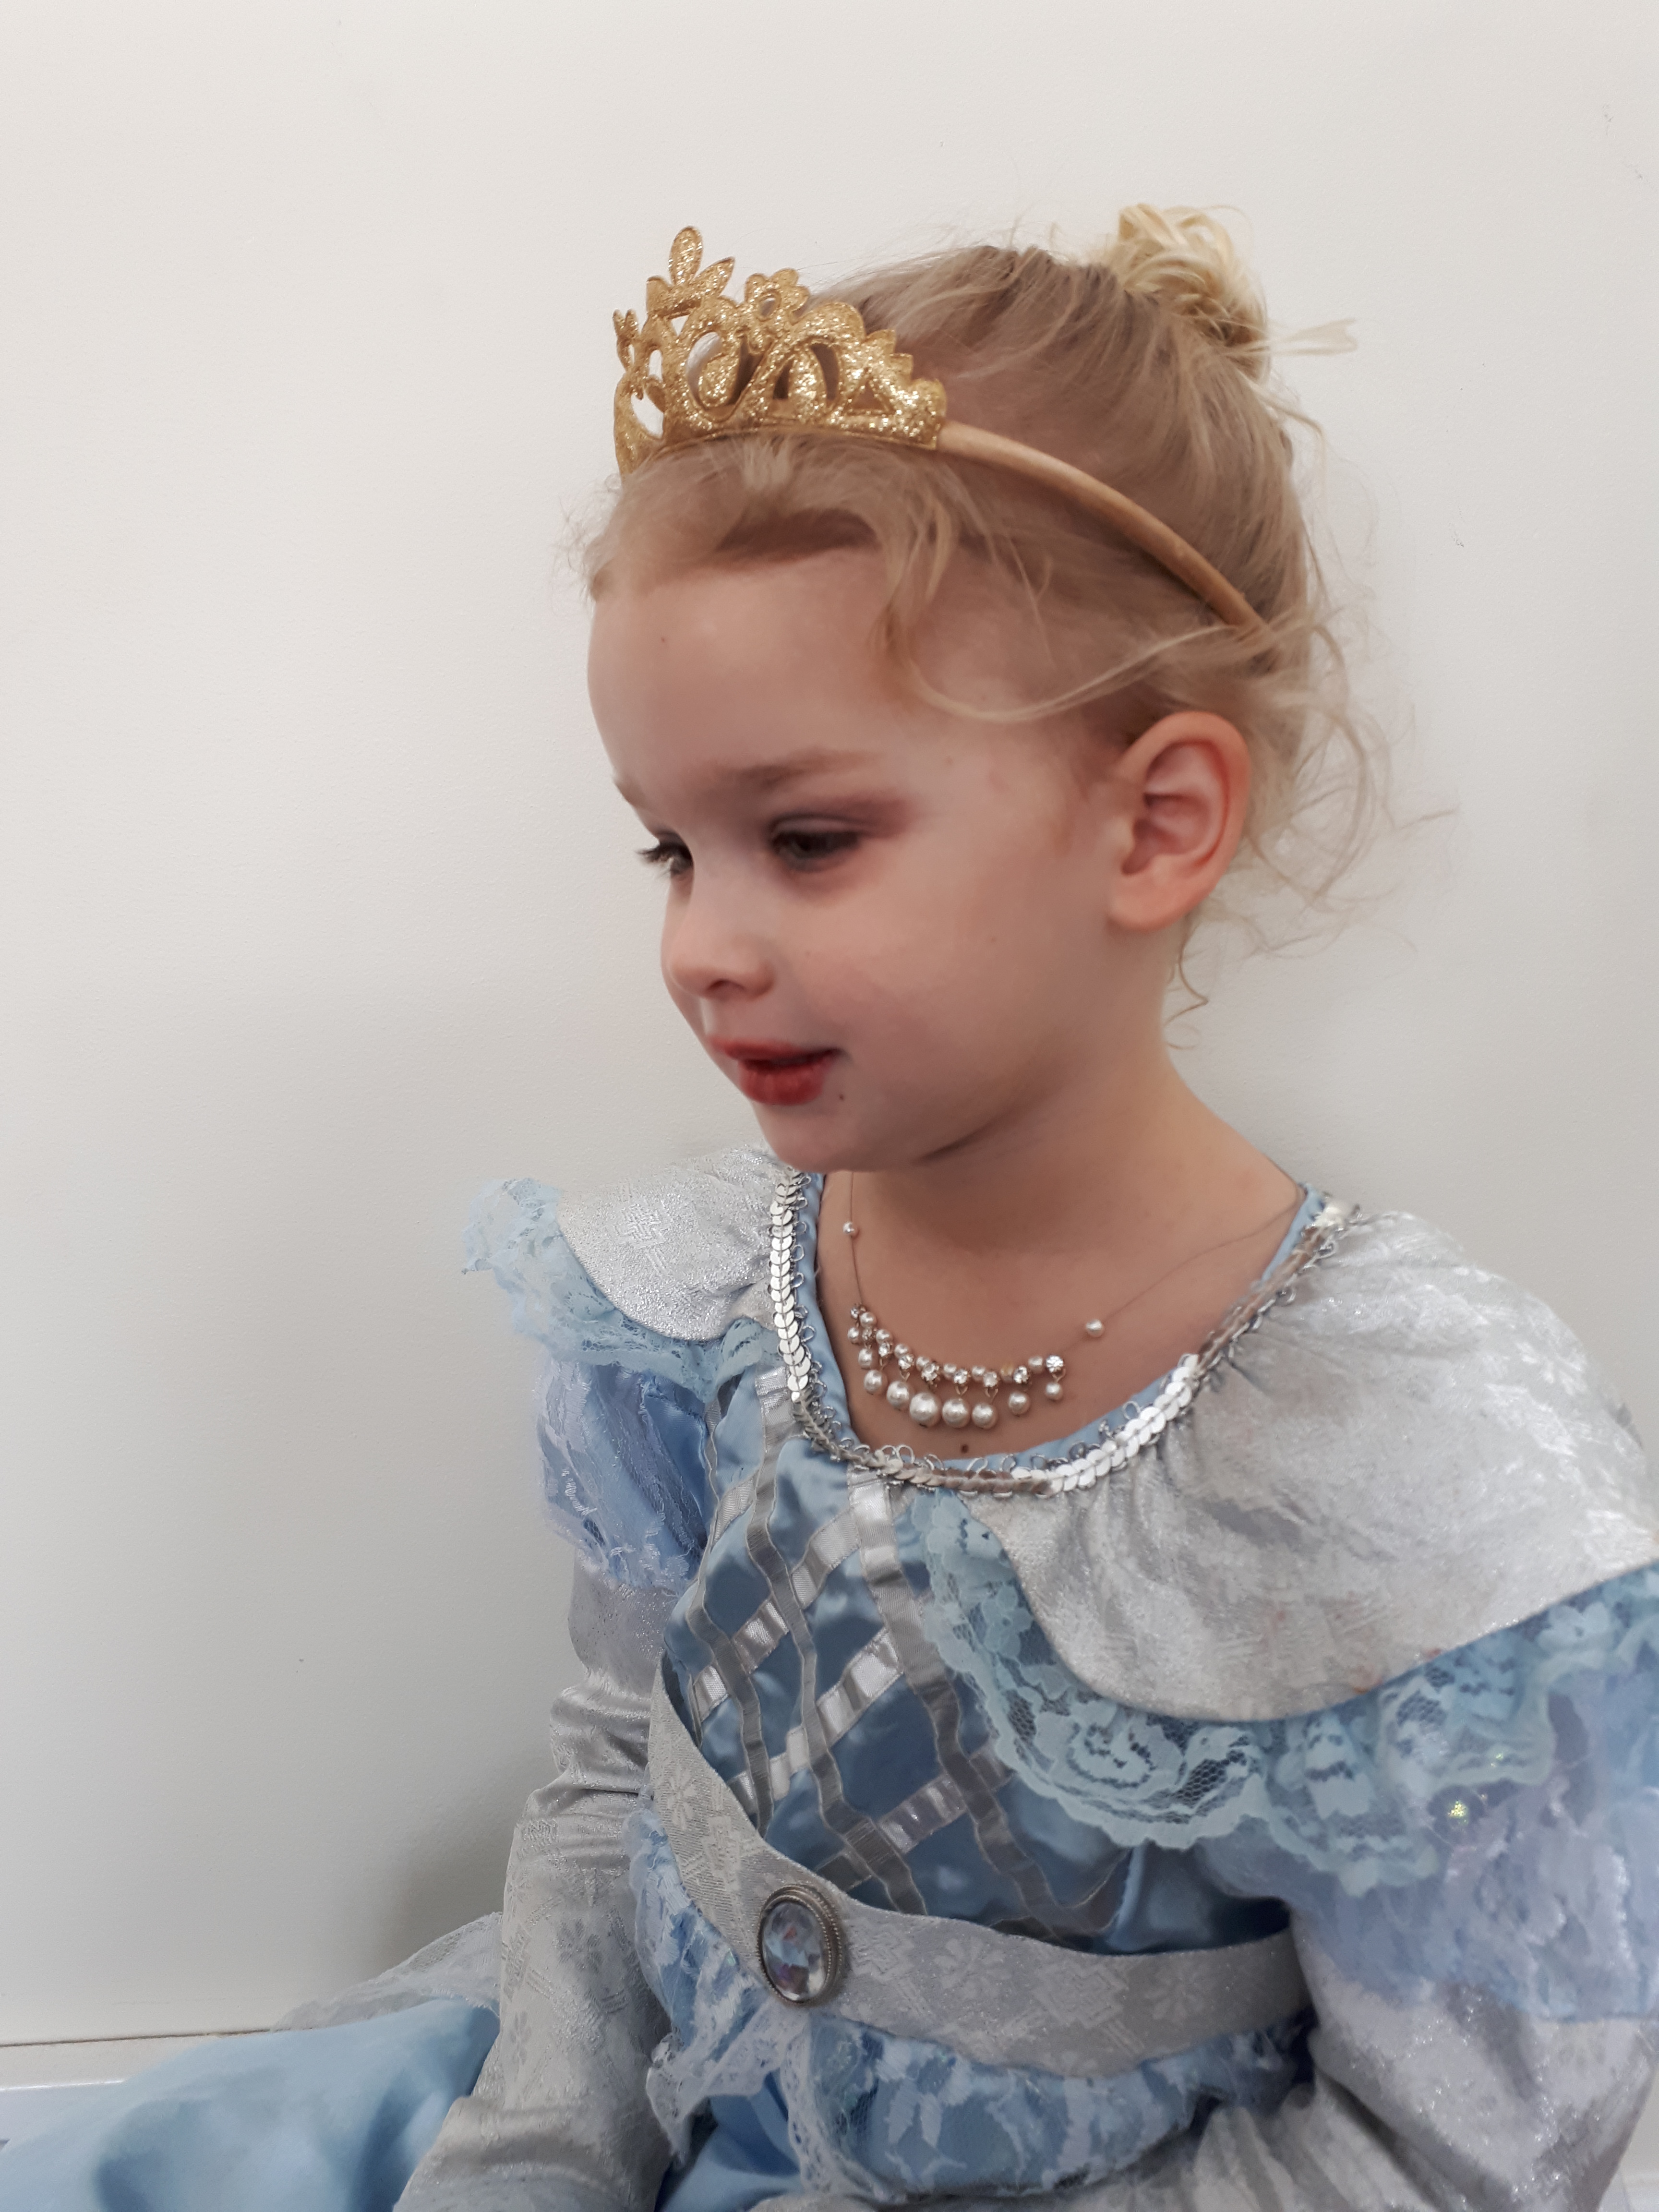
- Dress up your girls. I put up their hair in buns, put a tiara and necklace on them and even gave them make-up. Then we put their dress-up princess dresses on them.
2. Take the picture. We actually moved the couch to take the picture in our living room. Our walls are an off-white colour, and we have a large window across from where the couch is supposed to be, so that worked out really well. I had each girl sit on the stool and turn sideways to me. Then I asked them to look at whichever sibling was supposed to making them smile in a nice way. (You know when you tell a little one to smile and their face gets all scrunched up? That was the “smile” I was trying to avoid.)
3. Go into a photo editor (unless you can do it on your phone or camera- which I maybe could have done, but I’m technologically deficient) and change your photo to black and white. Crop if necessary. I used the Pixlr app.
4. Measure your frame and have the picture printed.
Make the Frame and Assemble:
Supplies:

- Frame. Mine is a wood-type thing from Michael’s
- Spray paint
- Scissors
- Tape
- Pen
- Pliers (for the cutting bit)
- Self-leveling picture hangers
- Picture

- Spray paint the frame. It may take a couple coats. Be sure, too, that you get all those edges. Let dry.

The tape will hold it in place for the next step.

2. Measure the picture. Line up the picture where you want it to go, and tape it down on one side (picture 1 above). Then hold it up to the light and trace about halfway between the edges of the frame (Picture 2). You want to be able to tape the picture onto the frame without the tape showing on the other side.
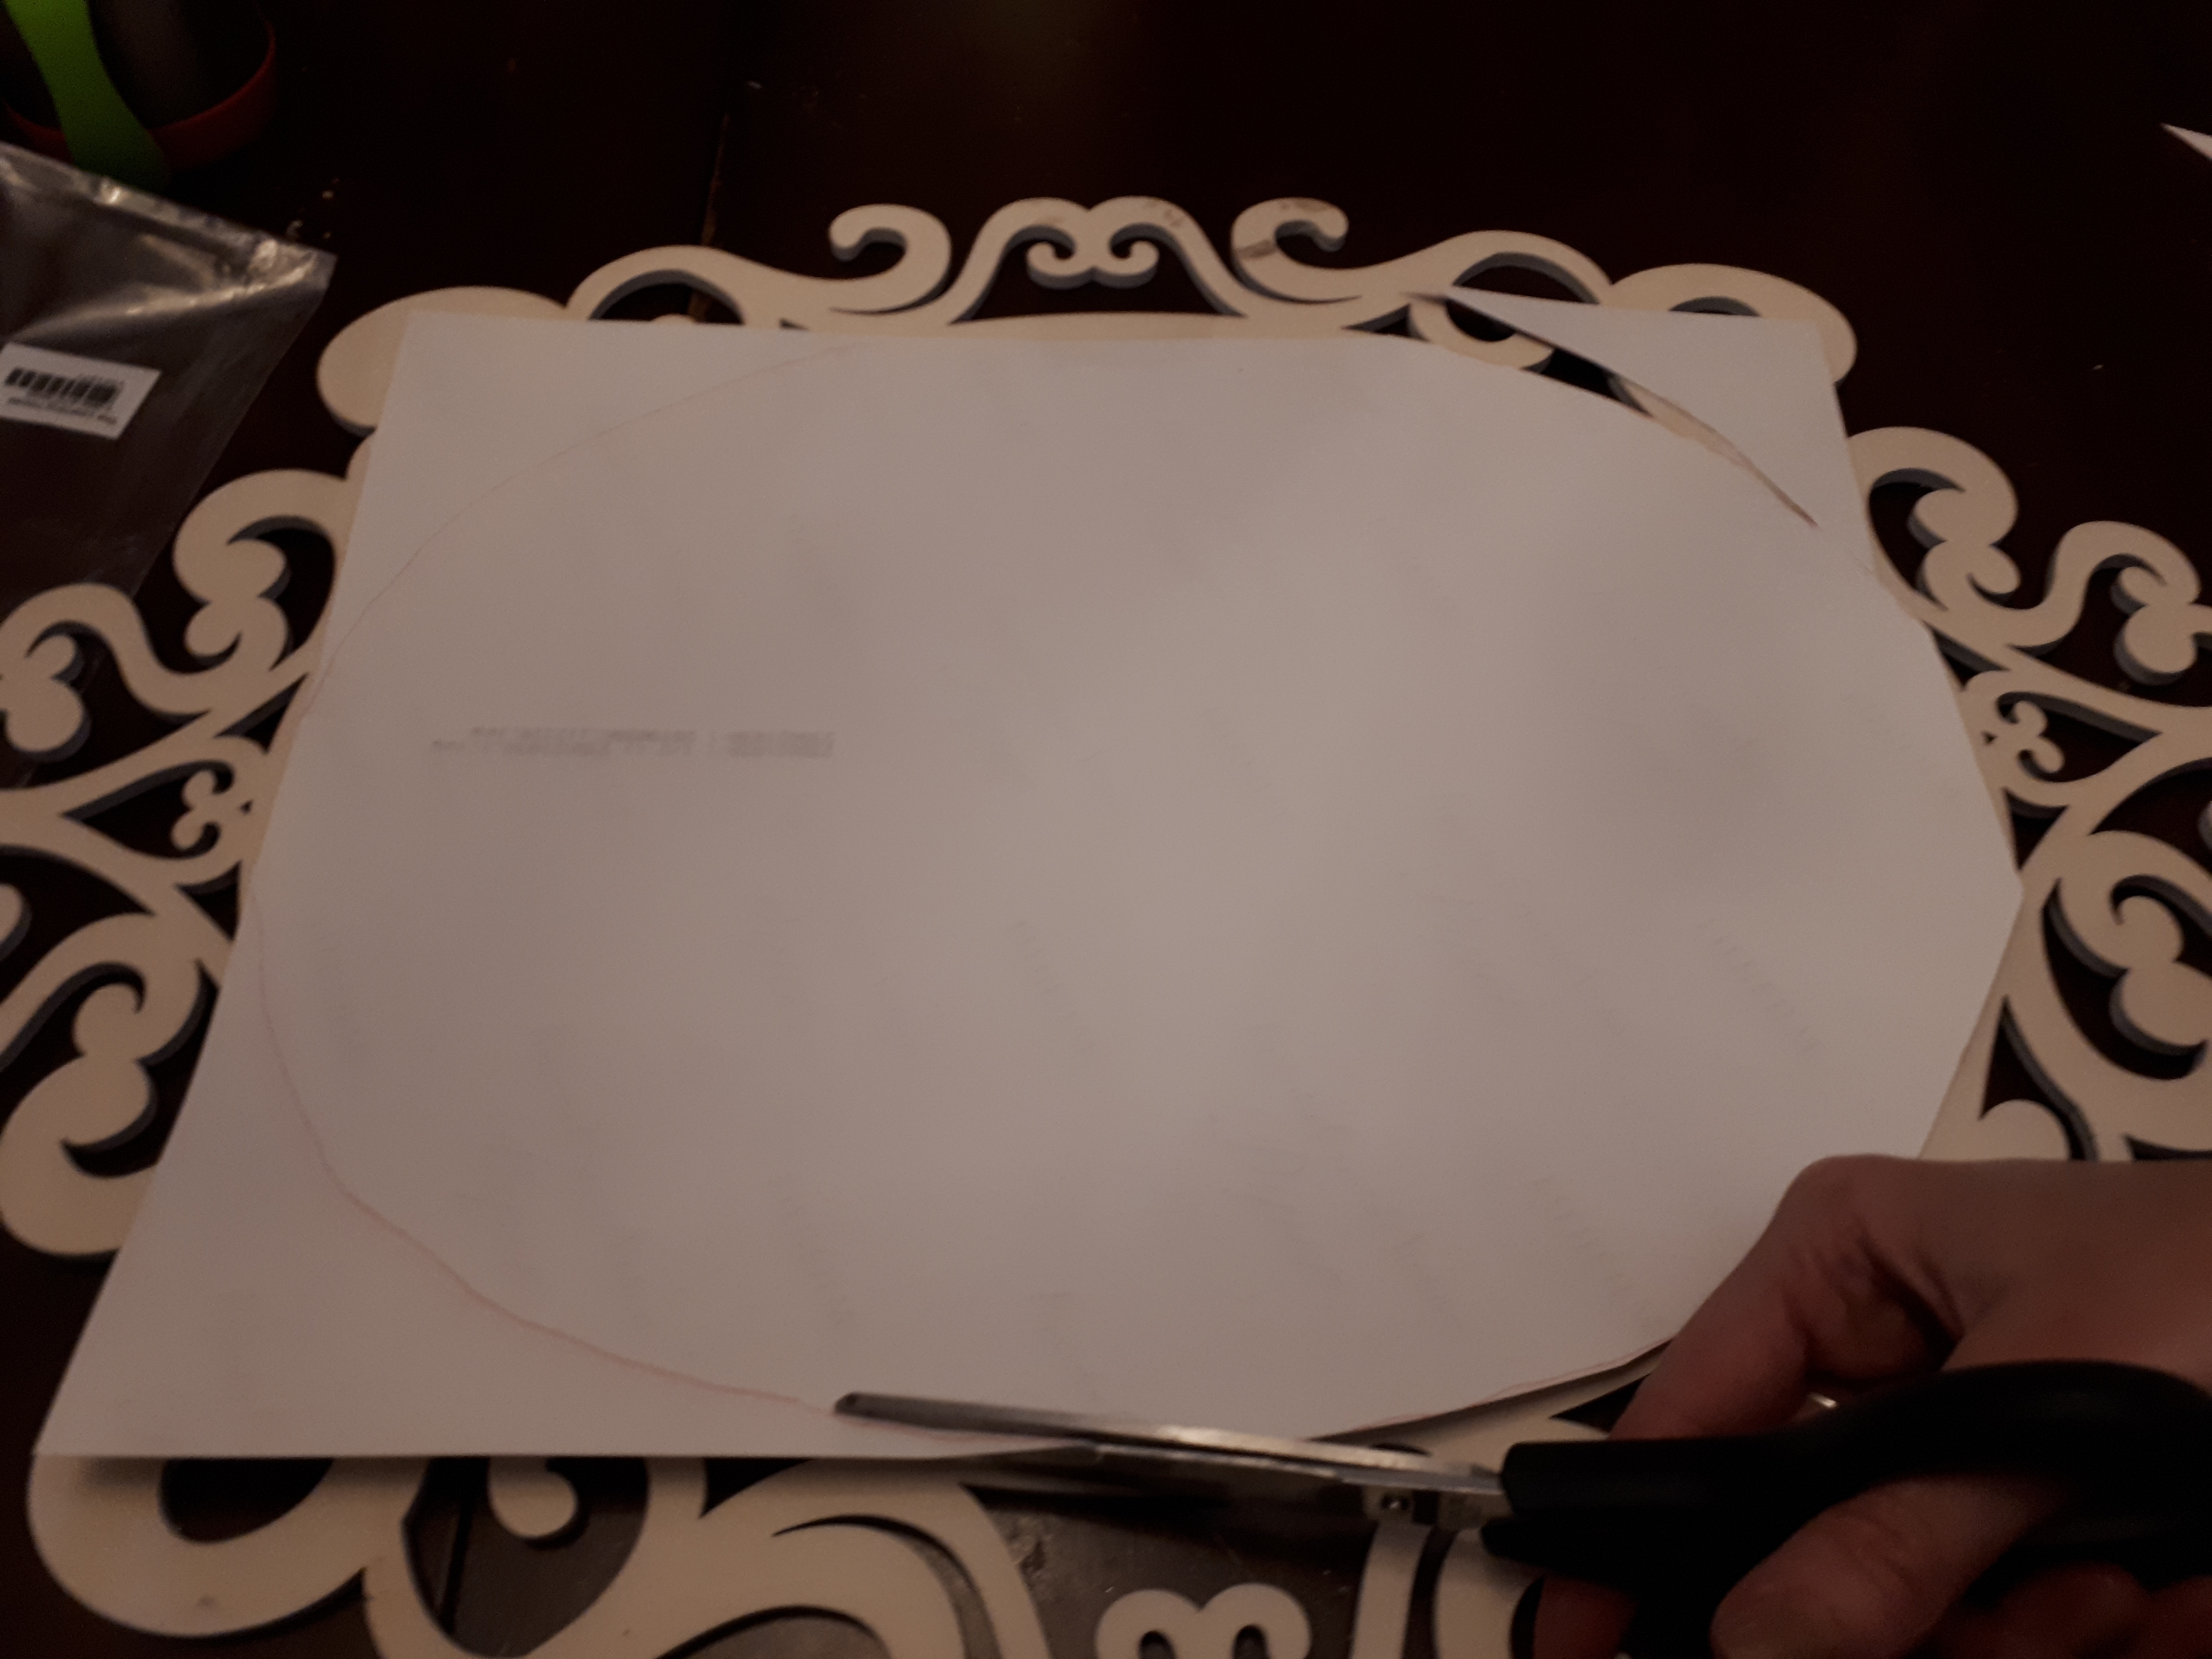
3. Cut it out. Need I say it? Measure twice, cut once. My pictures cost over $5 each, so you don’t want to cut it too small. Then tape it all the way around.

4. Add the self-leveling picture hanger. This is where I should have measured twice and cut once🤦♀️. I measured and trimmed the little nails that go with it, hammered them in and turned the frame around to see that BOTH nails were showing through the other side😔. Husband to the rescue. He filled the holes with glue, sanded it and repainted it. God bless him. The second frame I did properly!
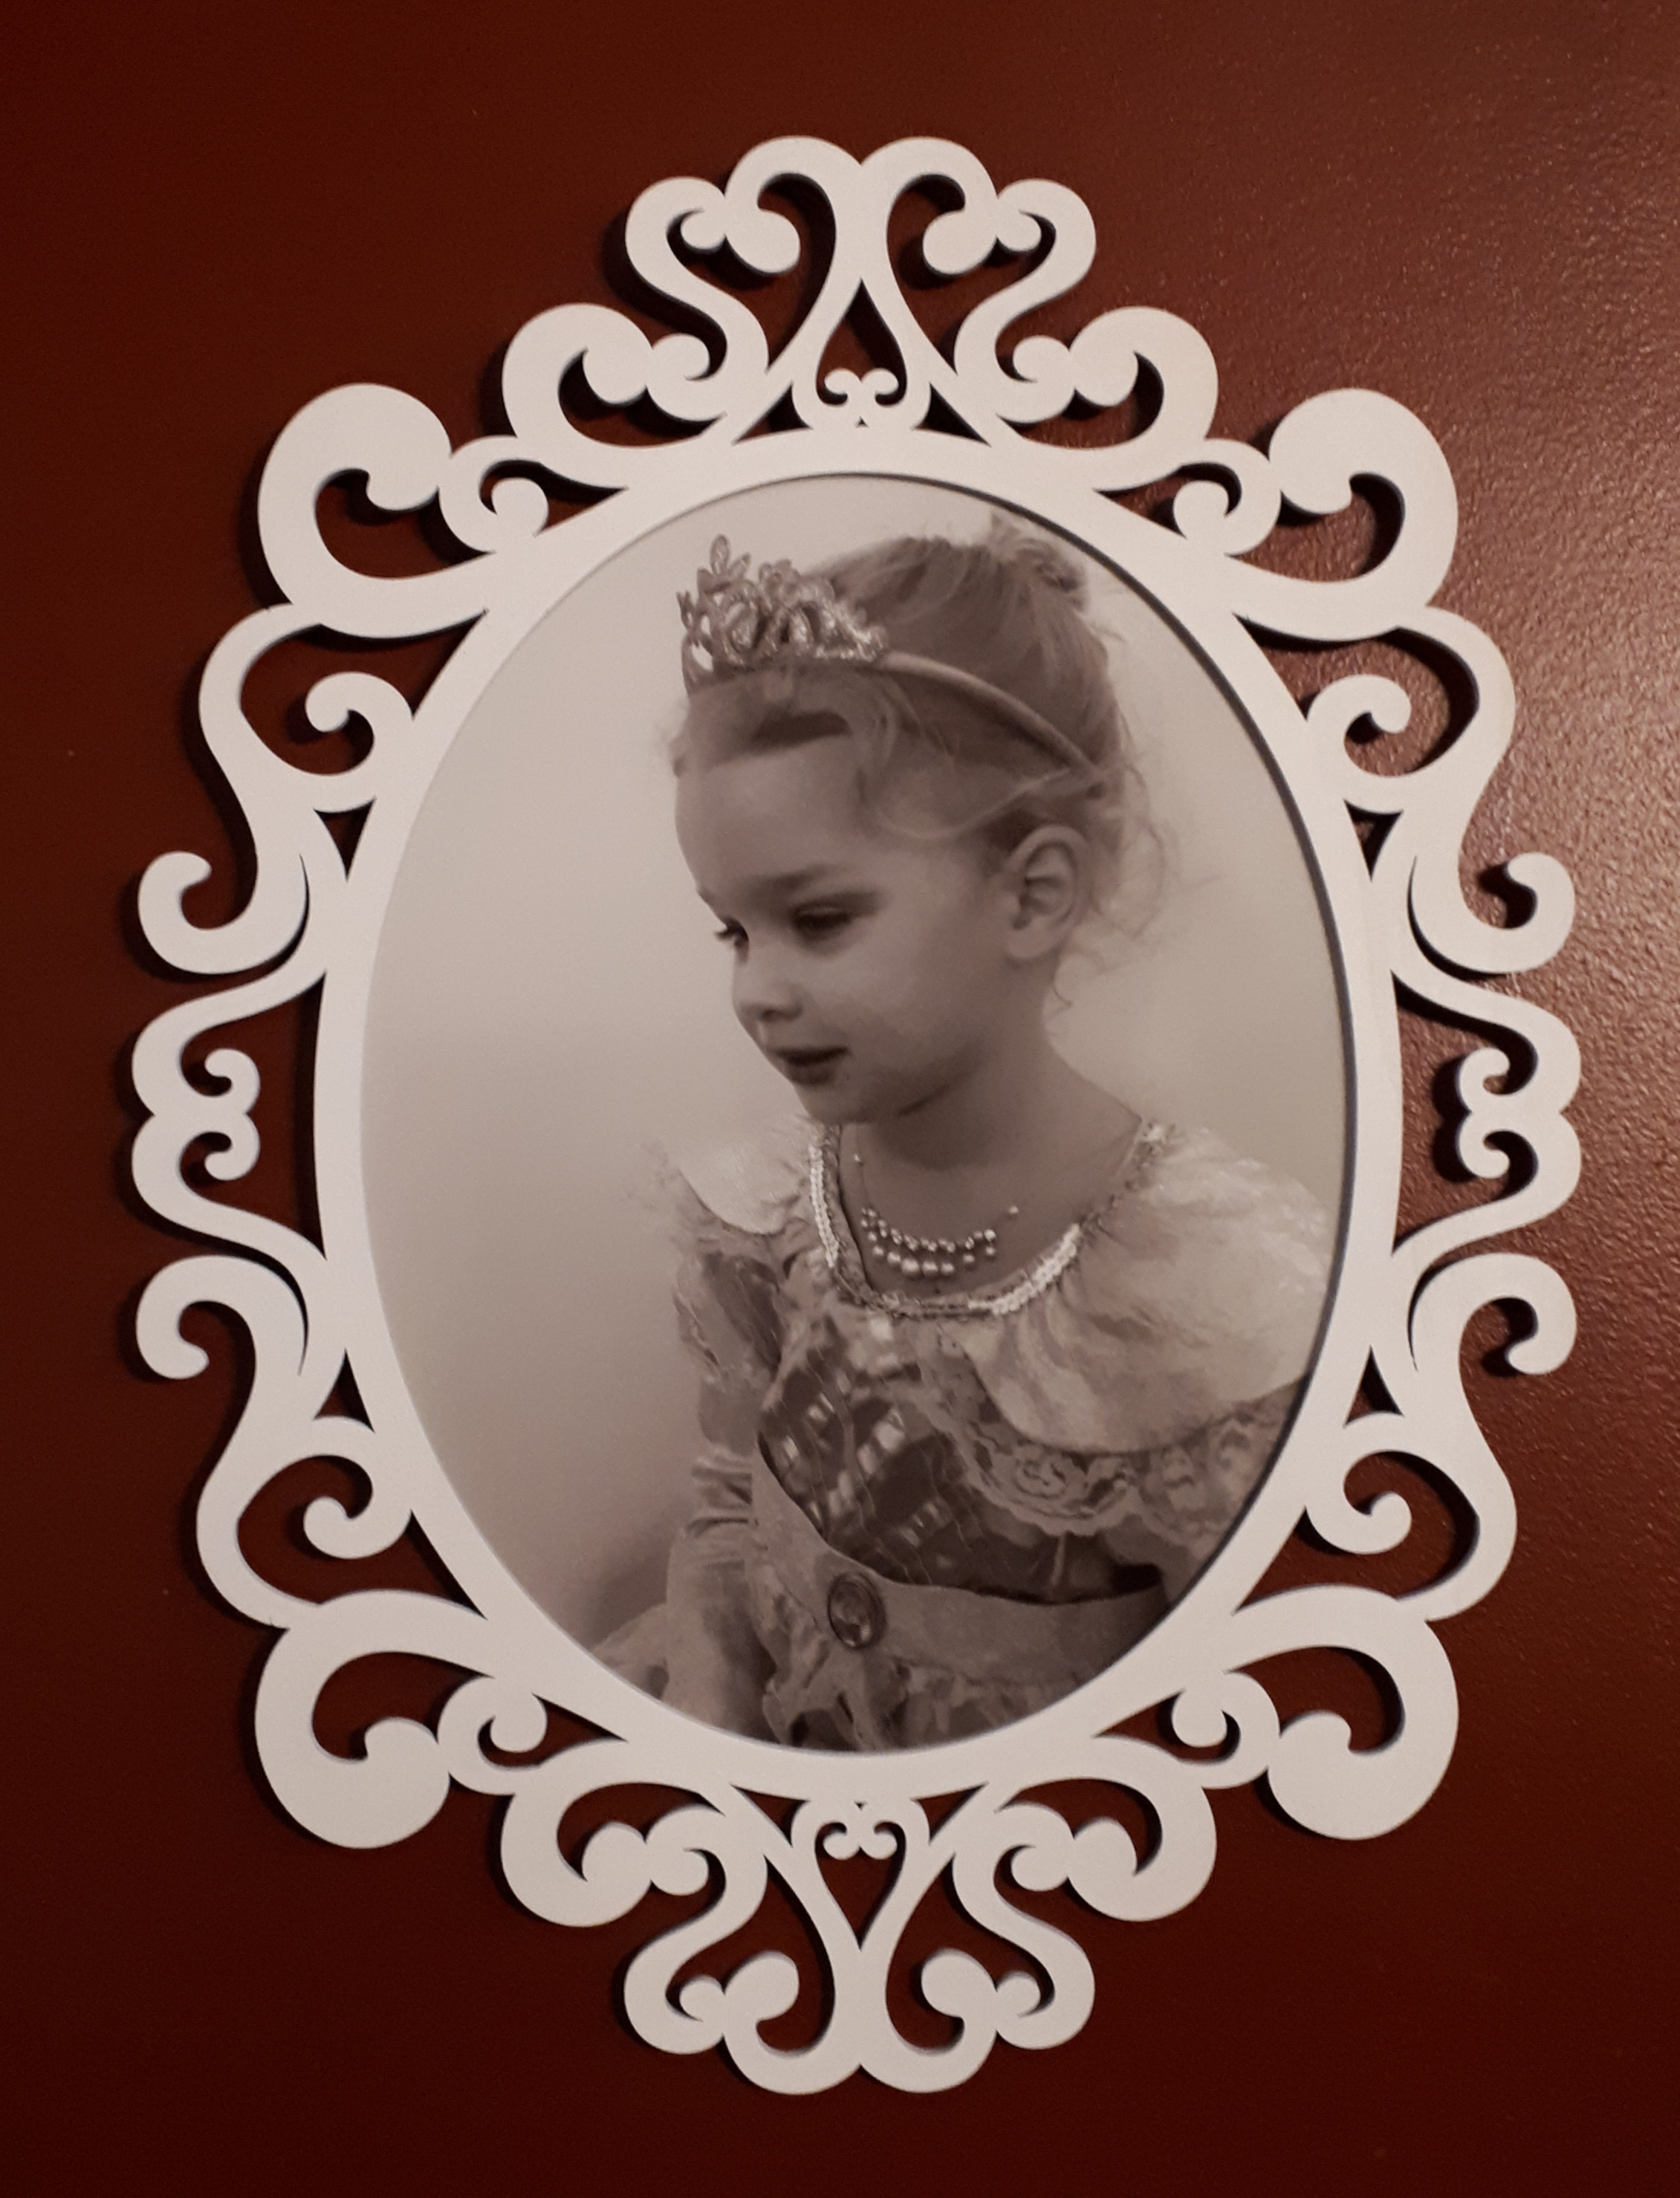
Ready to see the finished product?

Isn’t it amazing? I am so proud of this one! The room isn’t ready yet, so this is hanging on our dining room wall, but man, do I love them!


Wow! This one will be hard to match! Perhaps something Napoleonic with The King and his Prince.
Barry
LikeLike
Haha, Barry! You’ll have to give me some time to think if something Napoleonic! I’m sure there’s something…
LikeLike
Well done Jessica!
LikeLike
Thanks Dorian!
LikeLike
They turned out beautifully! Great idea!
LikeLike
Thank you! I am SO happy with them!😊
LikeLike