
I wanted to start off this post with a little chat about But First We Craft. If you’re not a regular follower and would like to jump right to the craft tutorial just scroll down a bit. But if you’re interested in the blog as a whole, or me, Jessica, keep reading.
Ordinarily I post once a week, every Friday morning. However, sometimes life takes over – usually it’s because I’m packing for a trip or I’m on a trip. I try to have a post ready so it can go up automatically even though I’m away, but that doesn’t always happen. My family and I just returned from a camping trip to the north shore of Lake Superior. It was awesome, but it took a lot of preparation, and not only was I unable to have a post prepared to go up while we were away, I also was unable to put one up the day we left- I don’t think that’s happened since I started blogging almost a year and a half ago. But First We Craft is partly called that because I’m a firm believer that crafting (or being creative in whatever way fits you) needs to be a priority – some time to myself, some time to use my God-given creativity. But there are times when first I need to pack a tent or prep a meal. And while I probably made a craft last week, I didn’t have time to blog about it.
Now, what’s really cool (and why I’m going into this in the first place) is that while we were away I checked my stats, and to my surprise, I saw that people were coming to the blog every day! Usually a lot of people visit on Friday when the post is first published, and for a couple days after, and then there’s a lull. But after two weeks of not posting any new content I was still getting visitors! From Pinterest, search engines, WordPress Reader, Facebook and Instagram. I even had visitors from countries who had never been on the blog before: Spain and Russia. I even got new email followers (if you aren’t following by email yet, I’d love for you to take the plunge! It’s typically just one email a week.) Anyway, I want to say THANK YOU! to my loyal readers and WELCOME, I HOPE YOU’LL COME BACK! to our visitors. Now for a craft:
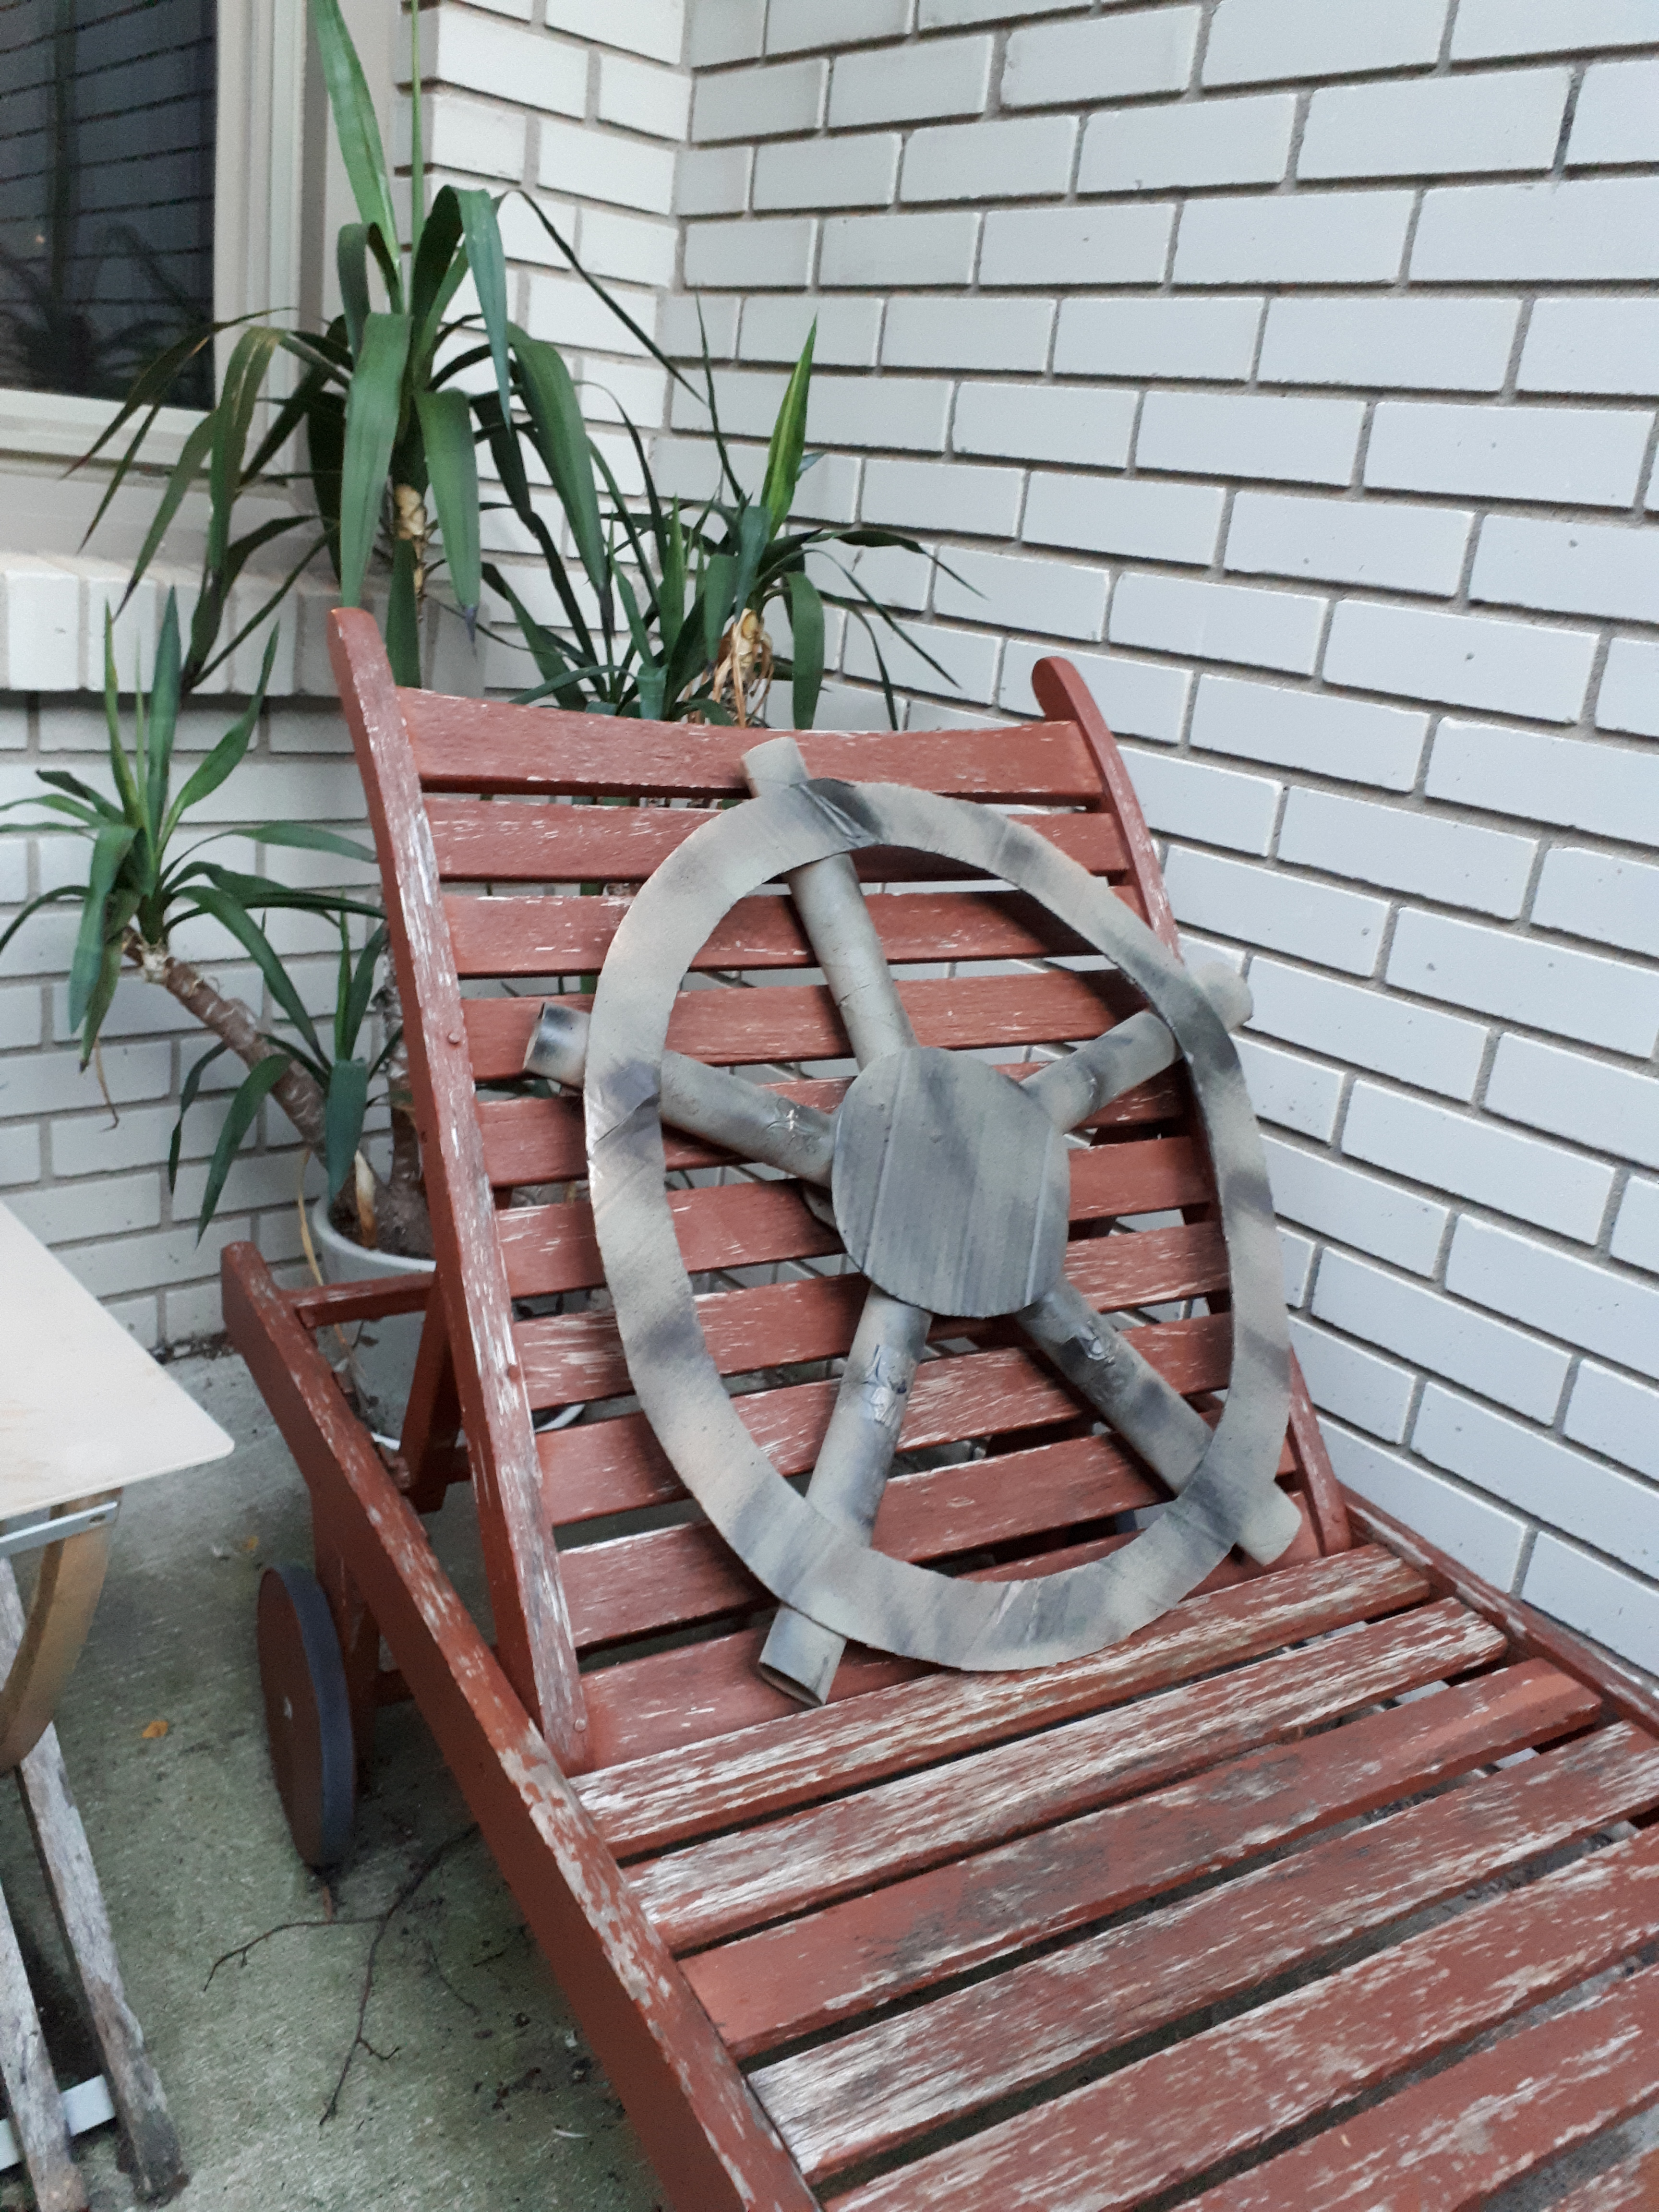
DIY Cardboard Ship Wheel
Supplies:
- 13 toilet paper rolls (or half as many paper towel rolls)
- Large corrugated cardboard box
- Glue gun and glue
- Spray Paint
- Moving tape
- Scissors
I didn’t take pictures as I was going along (probably because we came back from a camping trip and I was hosting this party three days later and needed to work SUPER QUICKLY!). But I think that the pictures I’m including should be sufficient for you to understand what the heck I’m talking about.
Instructions:
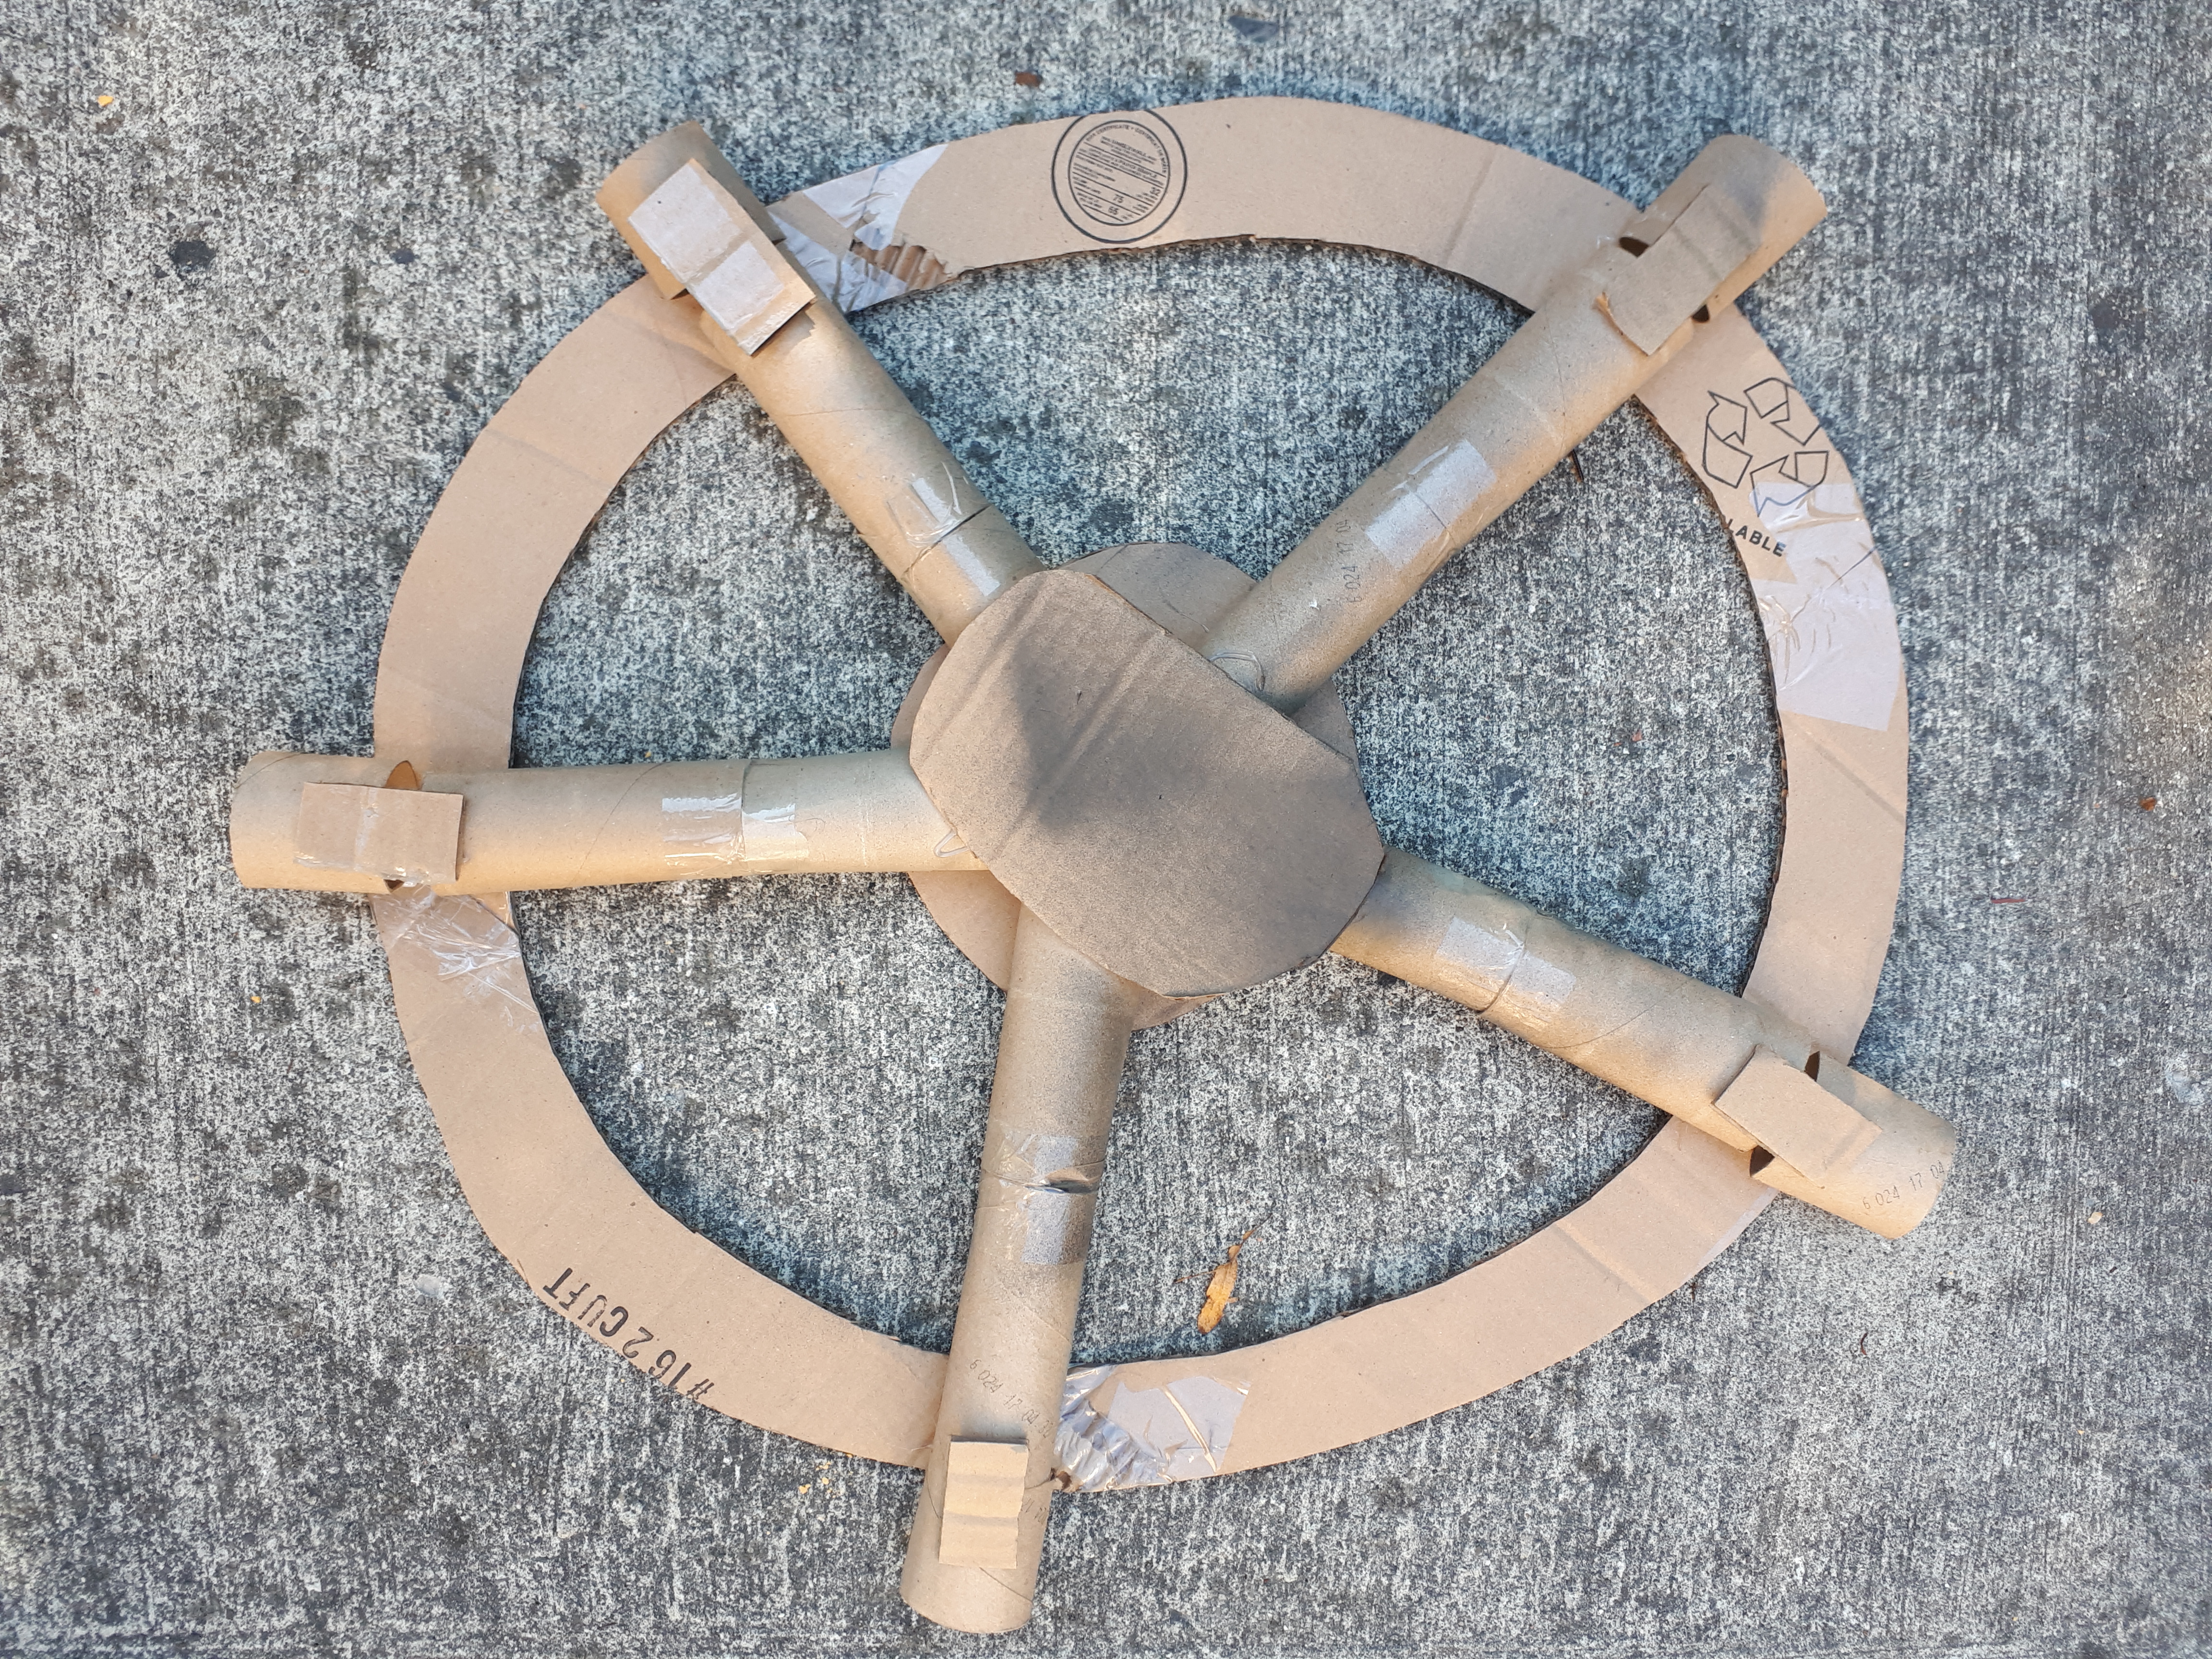
- Tape two toilet paper rolls together five times to make the cardboard Ship Wheel Spokes.
2. Cut the remaining toilet paper rolls in half. All these toilet paper rolls will end up being the spokes of the wheel.

3. Cut two smallish circles out of the corrugated cardboard. These circles will attach all the toilet paper rolls together at the centre of the wheel. The one at the back won’t show, so it doesn’t have to be a real circle (thankfully! Look at mine in the picture under the “Instruction” heading!😂). In the picture above you can see how much space is in between my spokes.
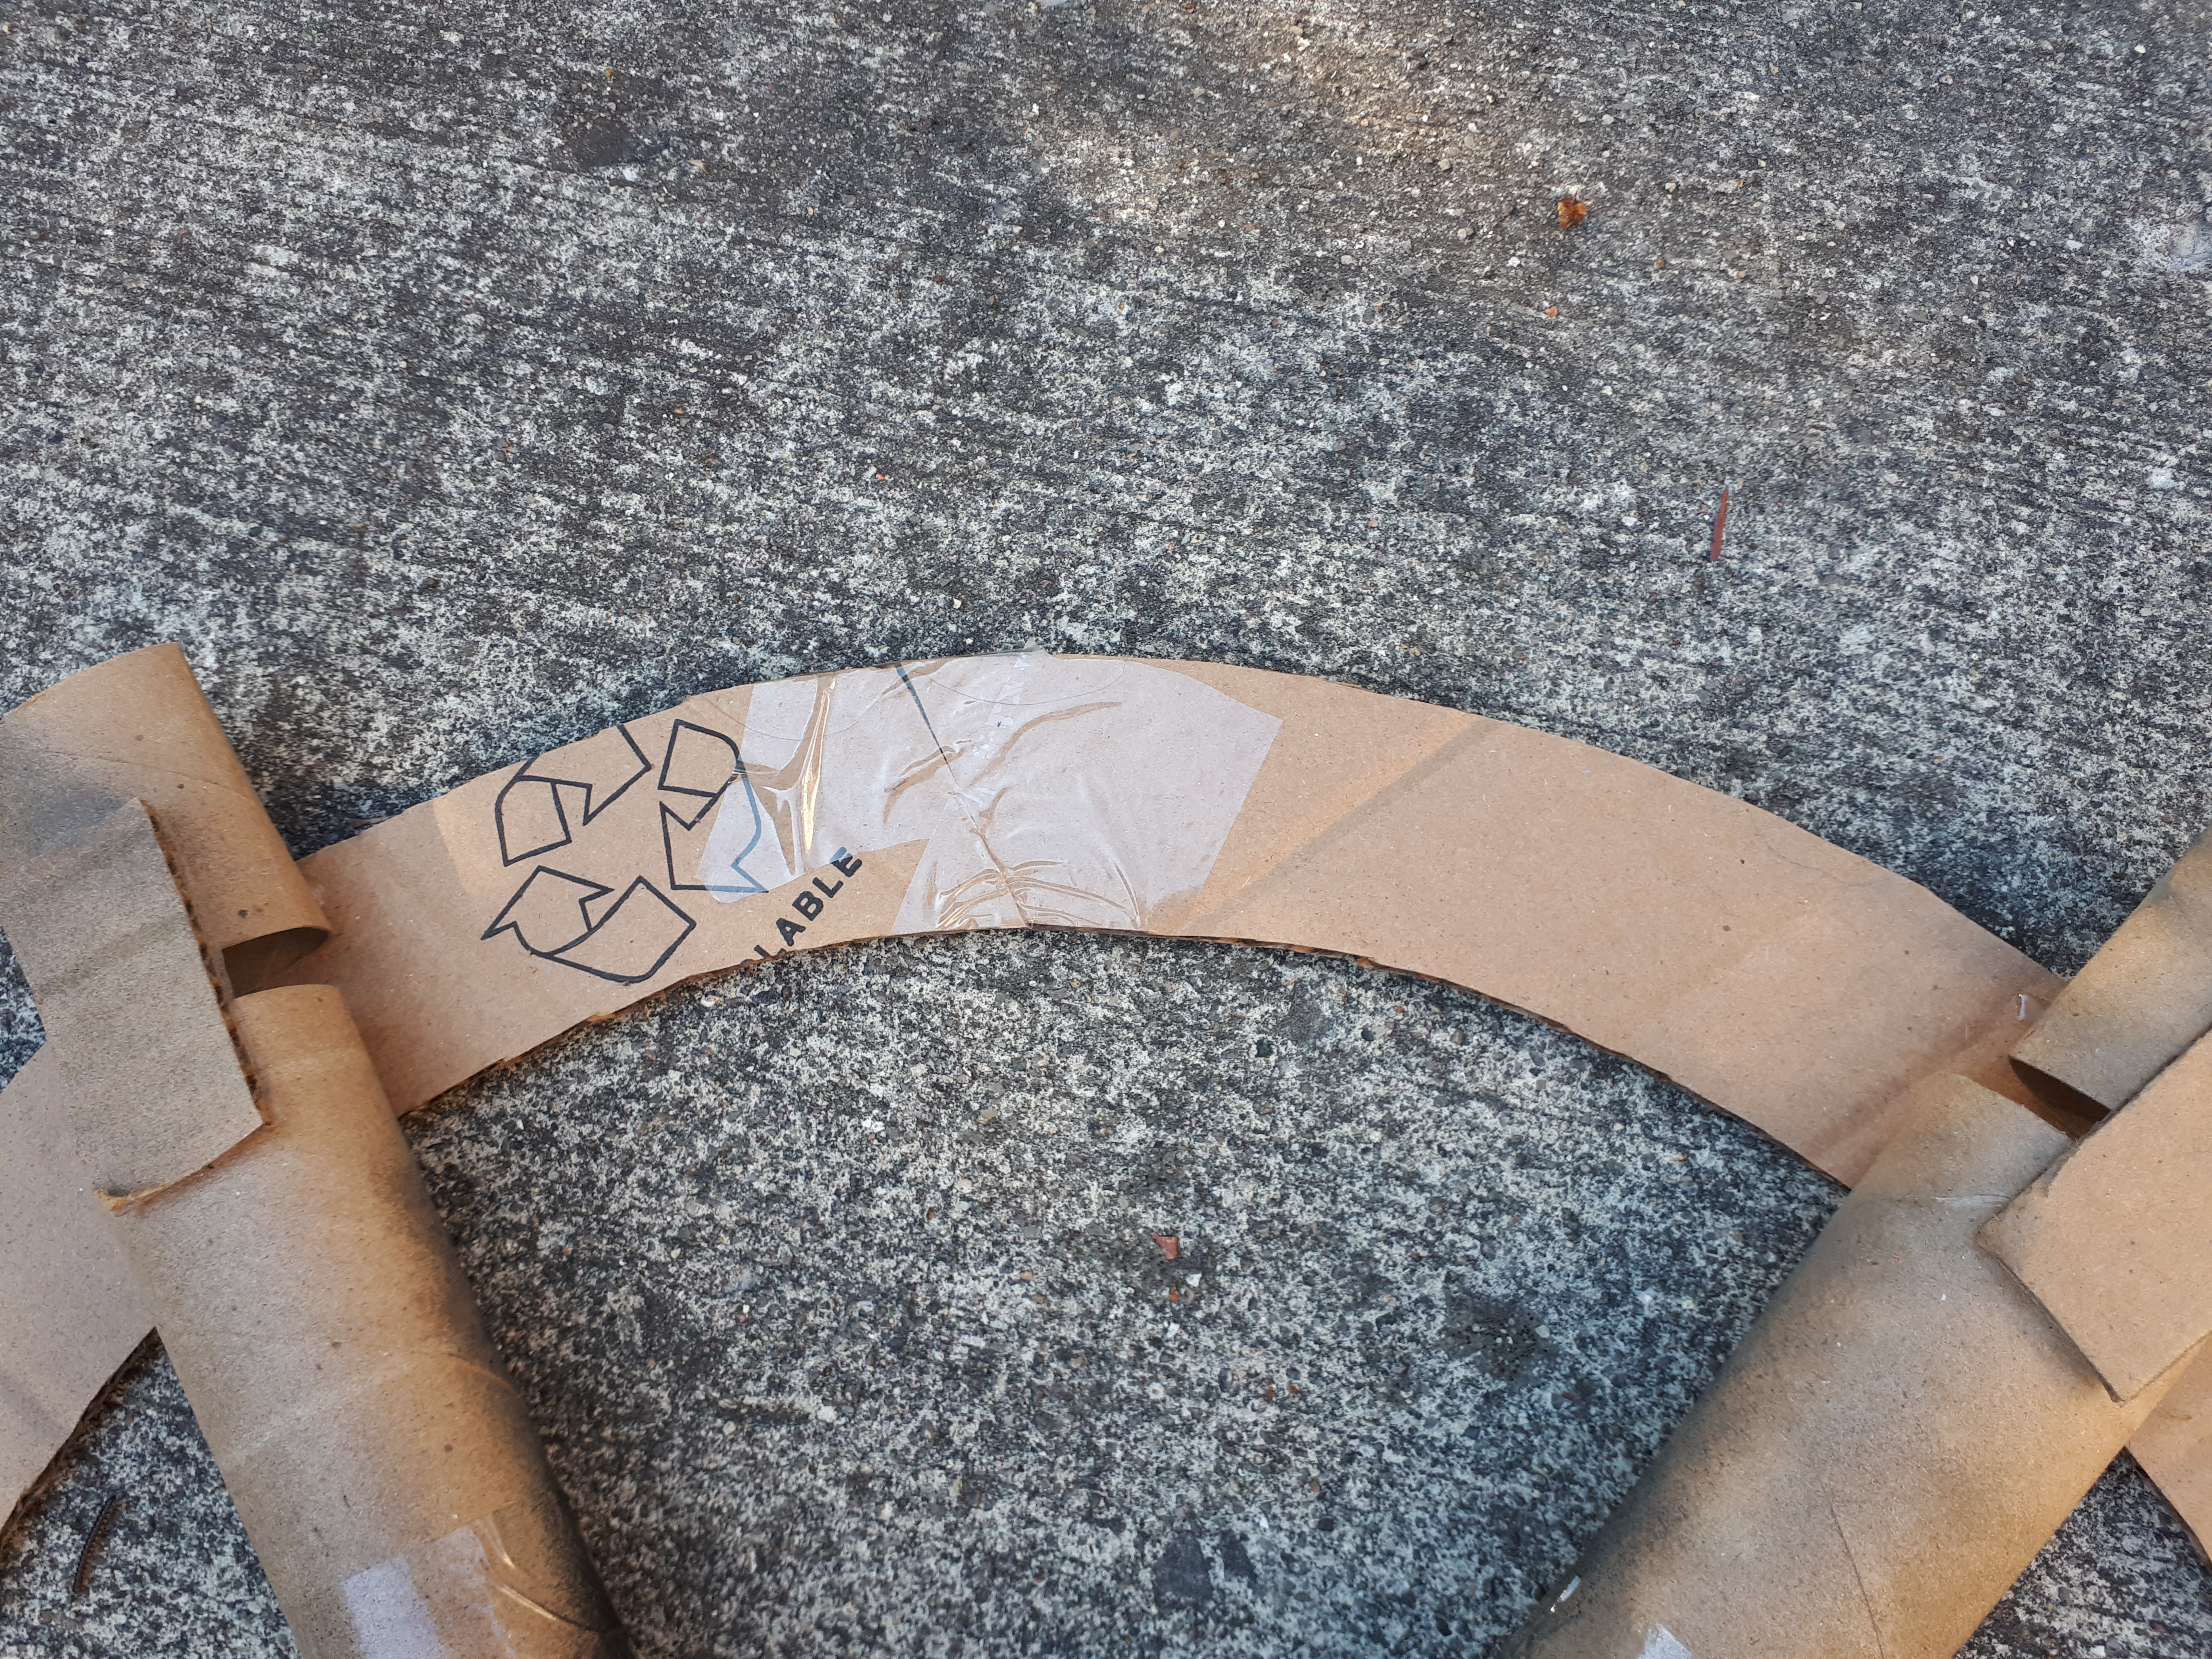
4. Cut out a large hollow circle. This circle will be the outside of the ship’s wheel. I found this really difficult. I am terrible at drawing in the first place, let alone a circle that should be symmetrical- which mine didn’t end up being. My cardboard box wasn’t quite big enough to make the circle, so I cut out four semi-circles and taped them together. I adjusted the toilet paper rolls to make it look like it all fit together nicely, even though it is not a circle in the slightest.
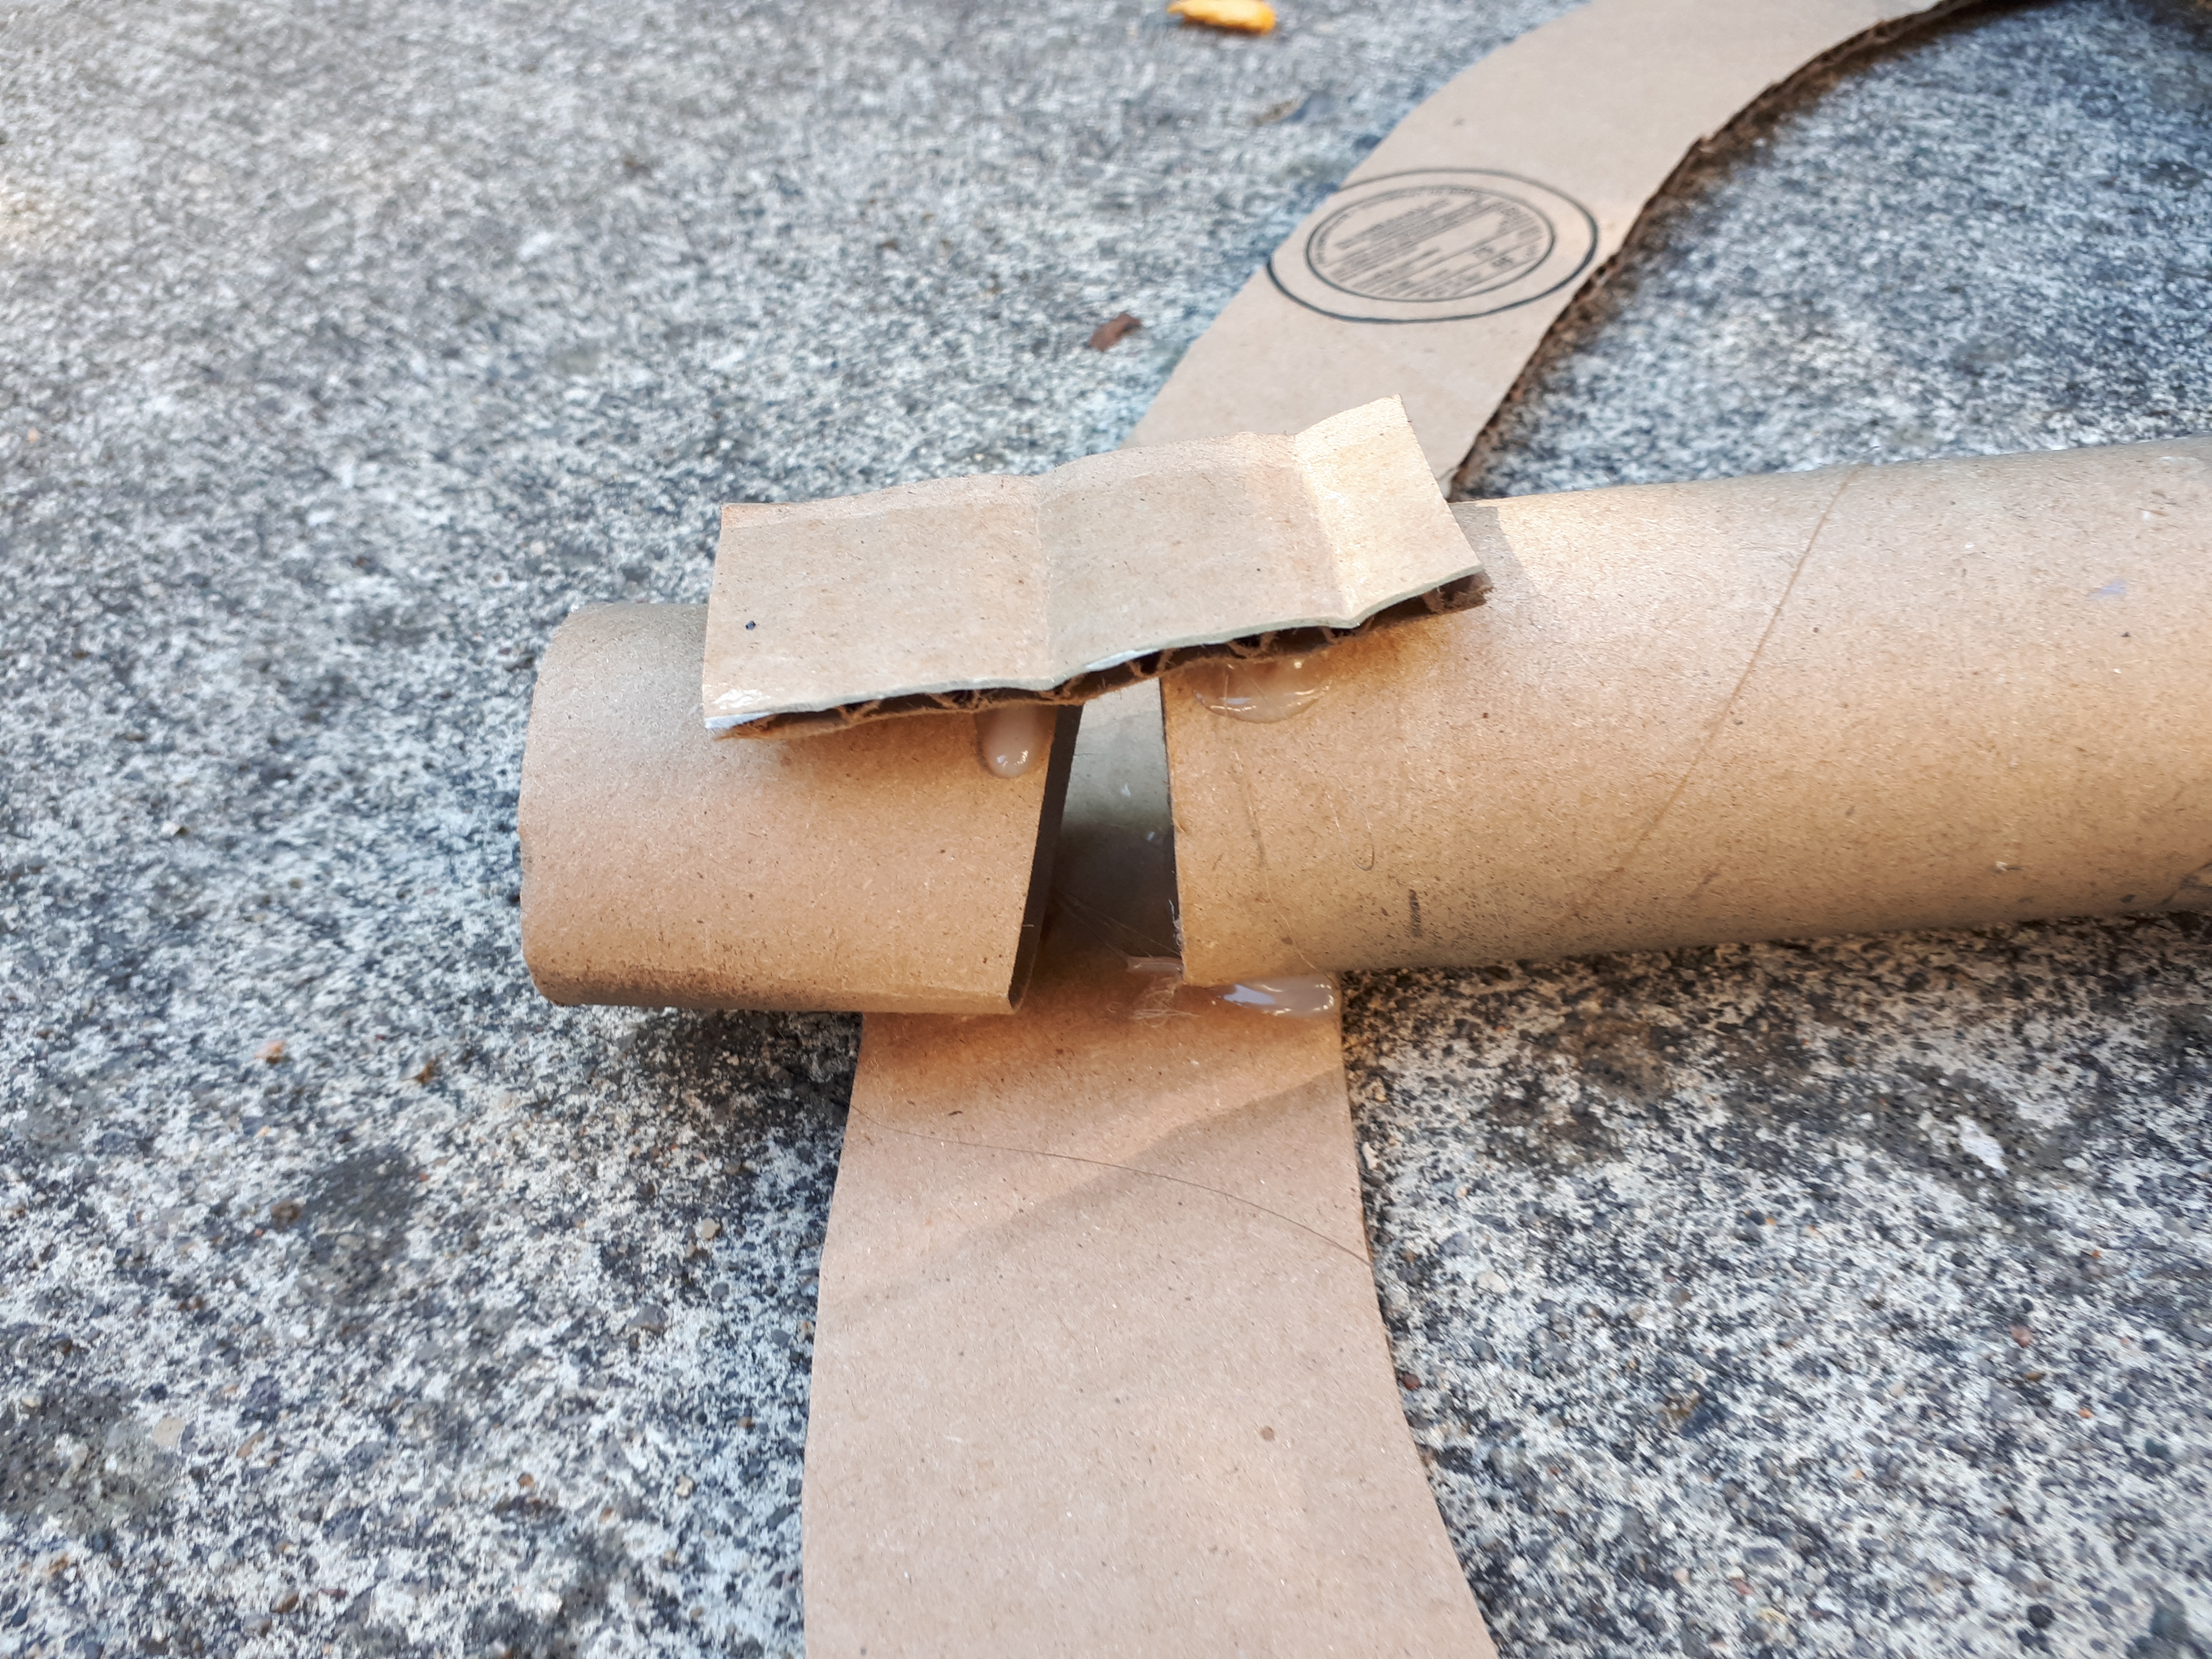
5. Cut out five 2-inch by 1-inch pieces of cardboard. We will use these to secure the toilet paper rolls on the back. The front will be held together by the big circle of cardboard and the back will be held together with these little rectangles.
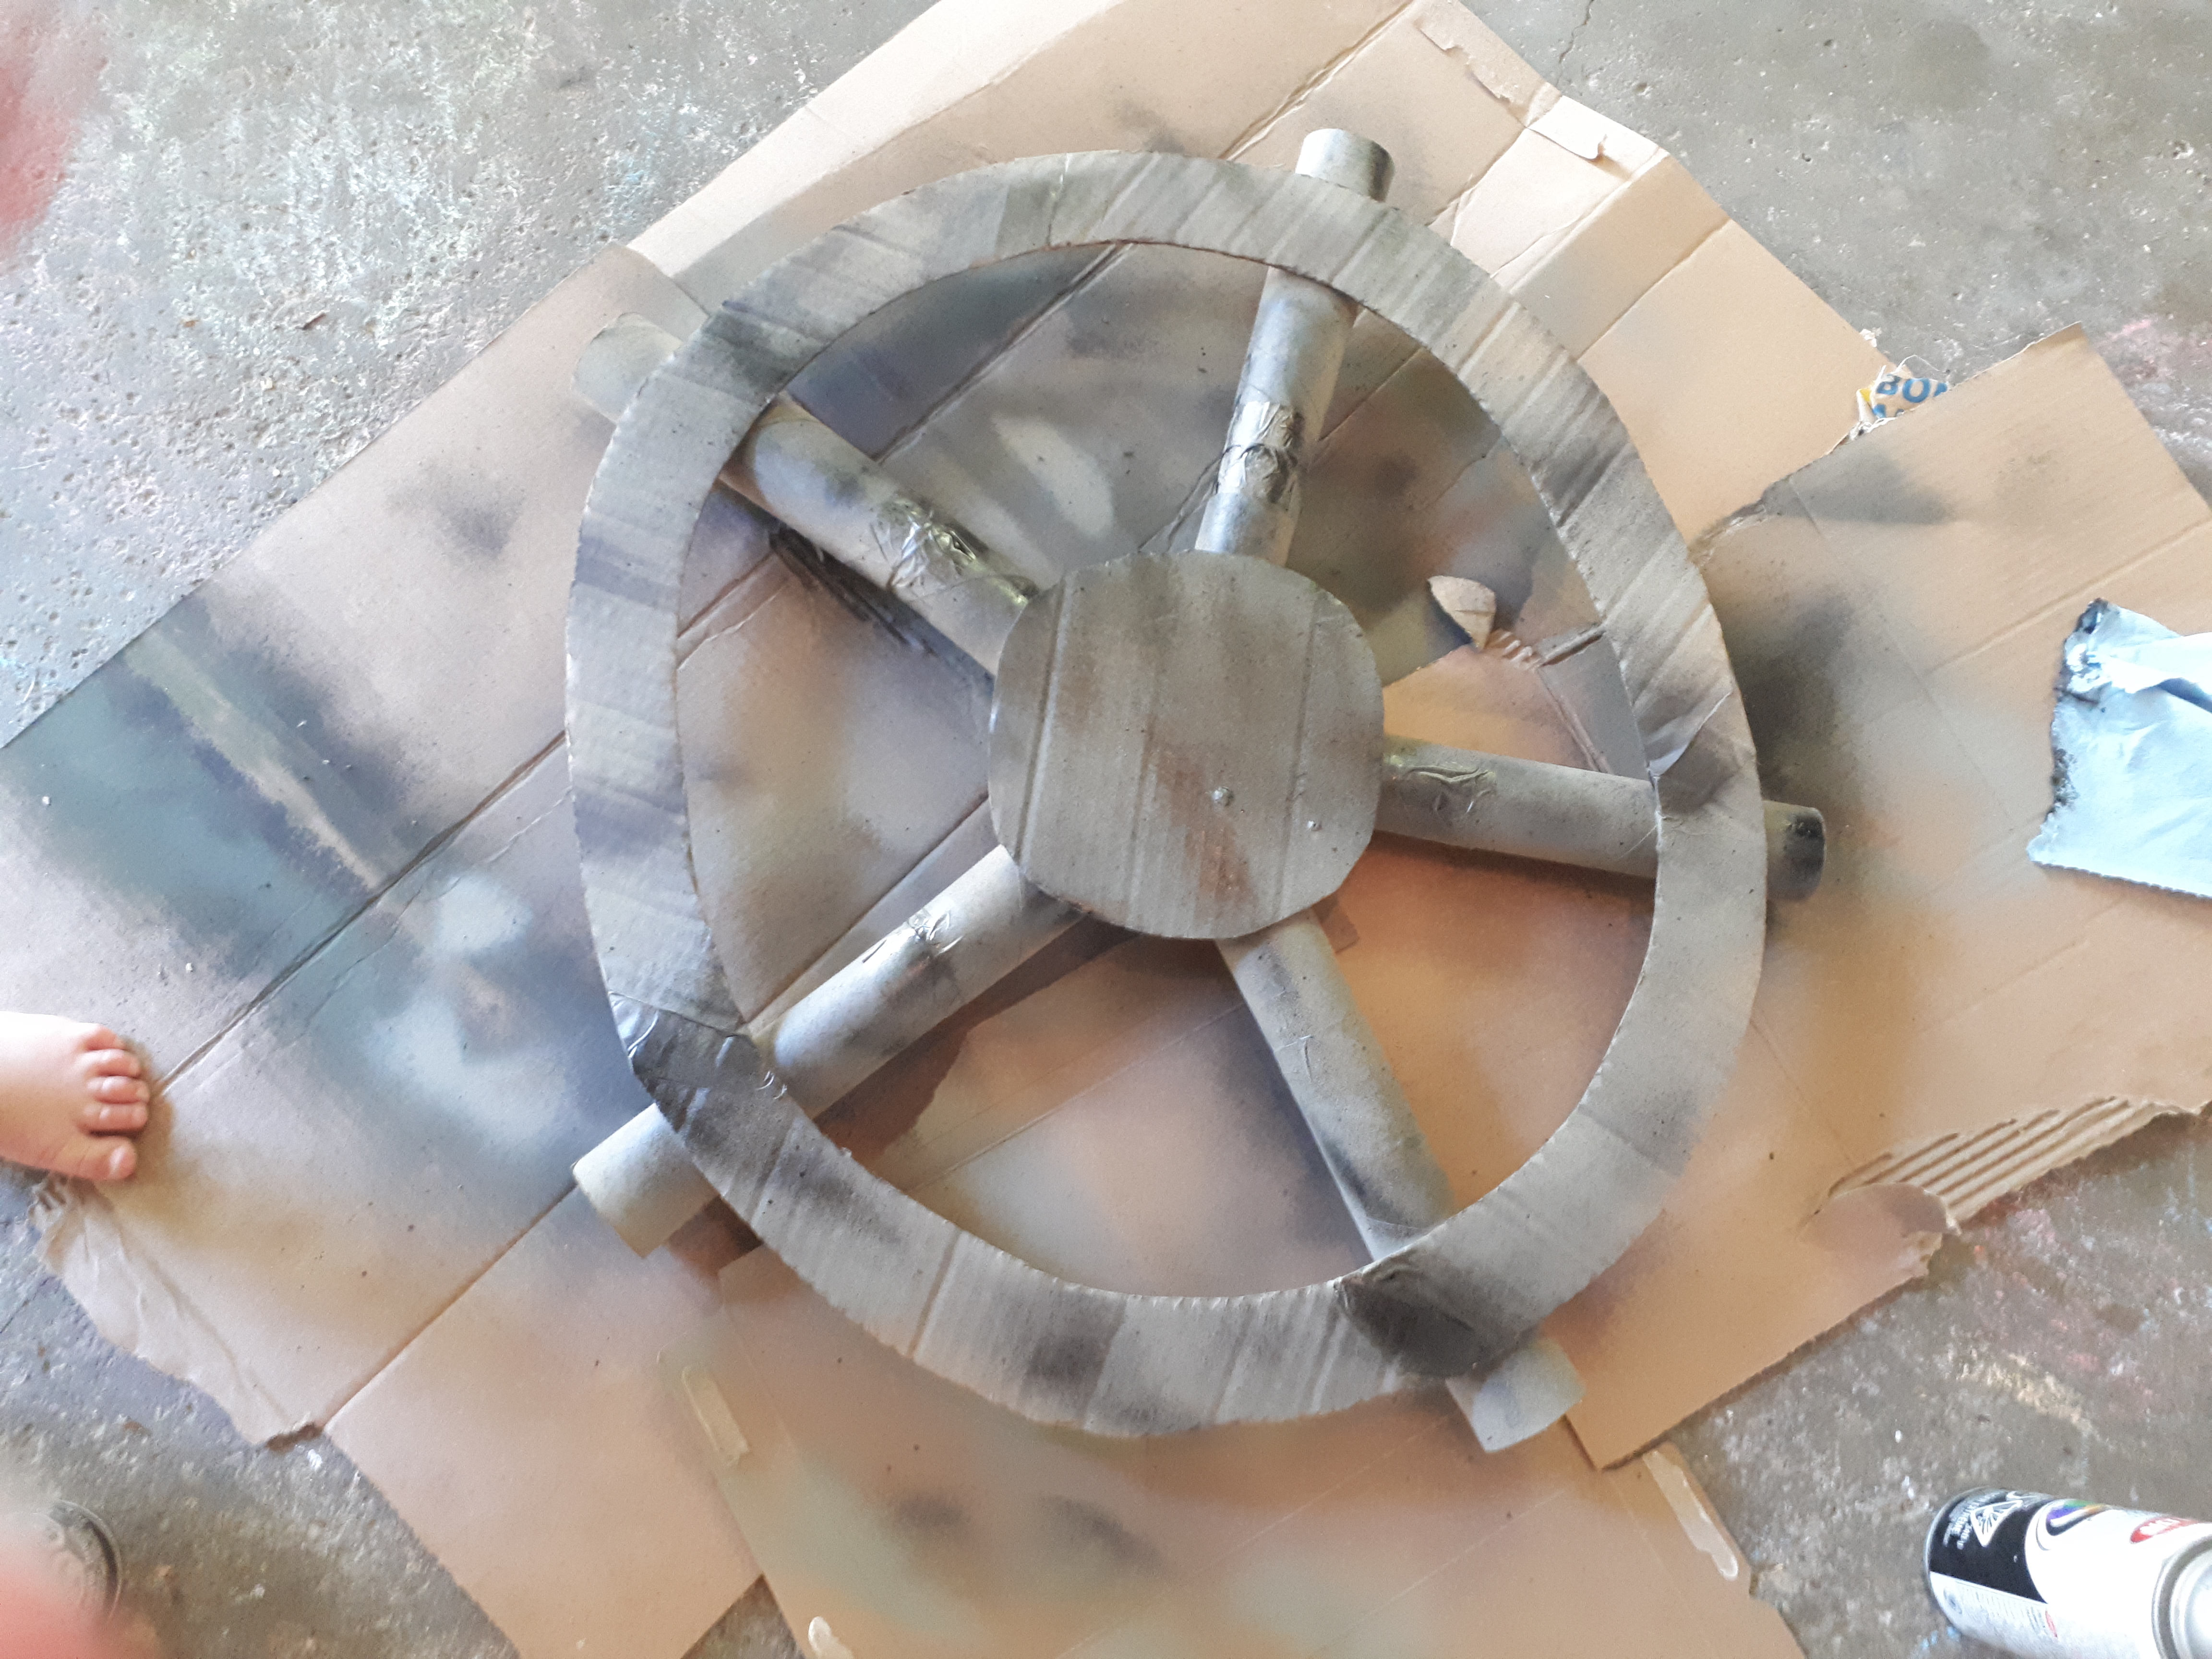
6. Lay out your wheel. Put it all together where you think it looks nice. This might be a good time to refer to the picture at the top of the instructions.
7. Using a hot glue gun glue your wheel together.
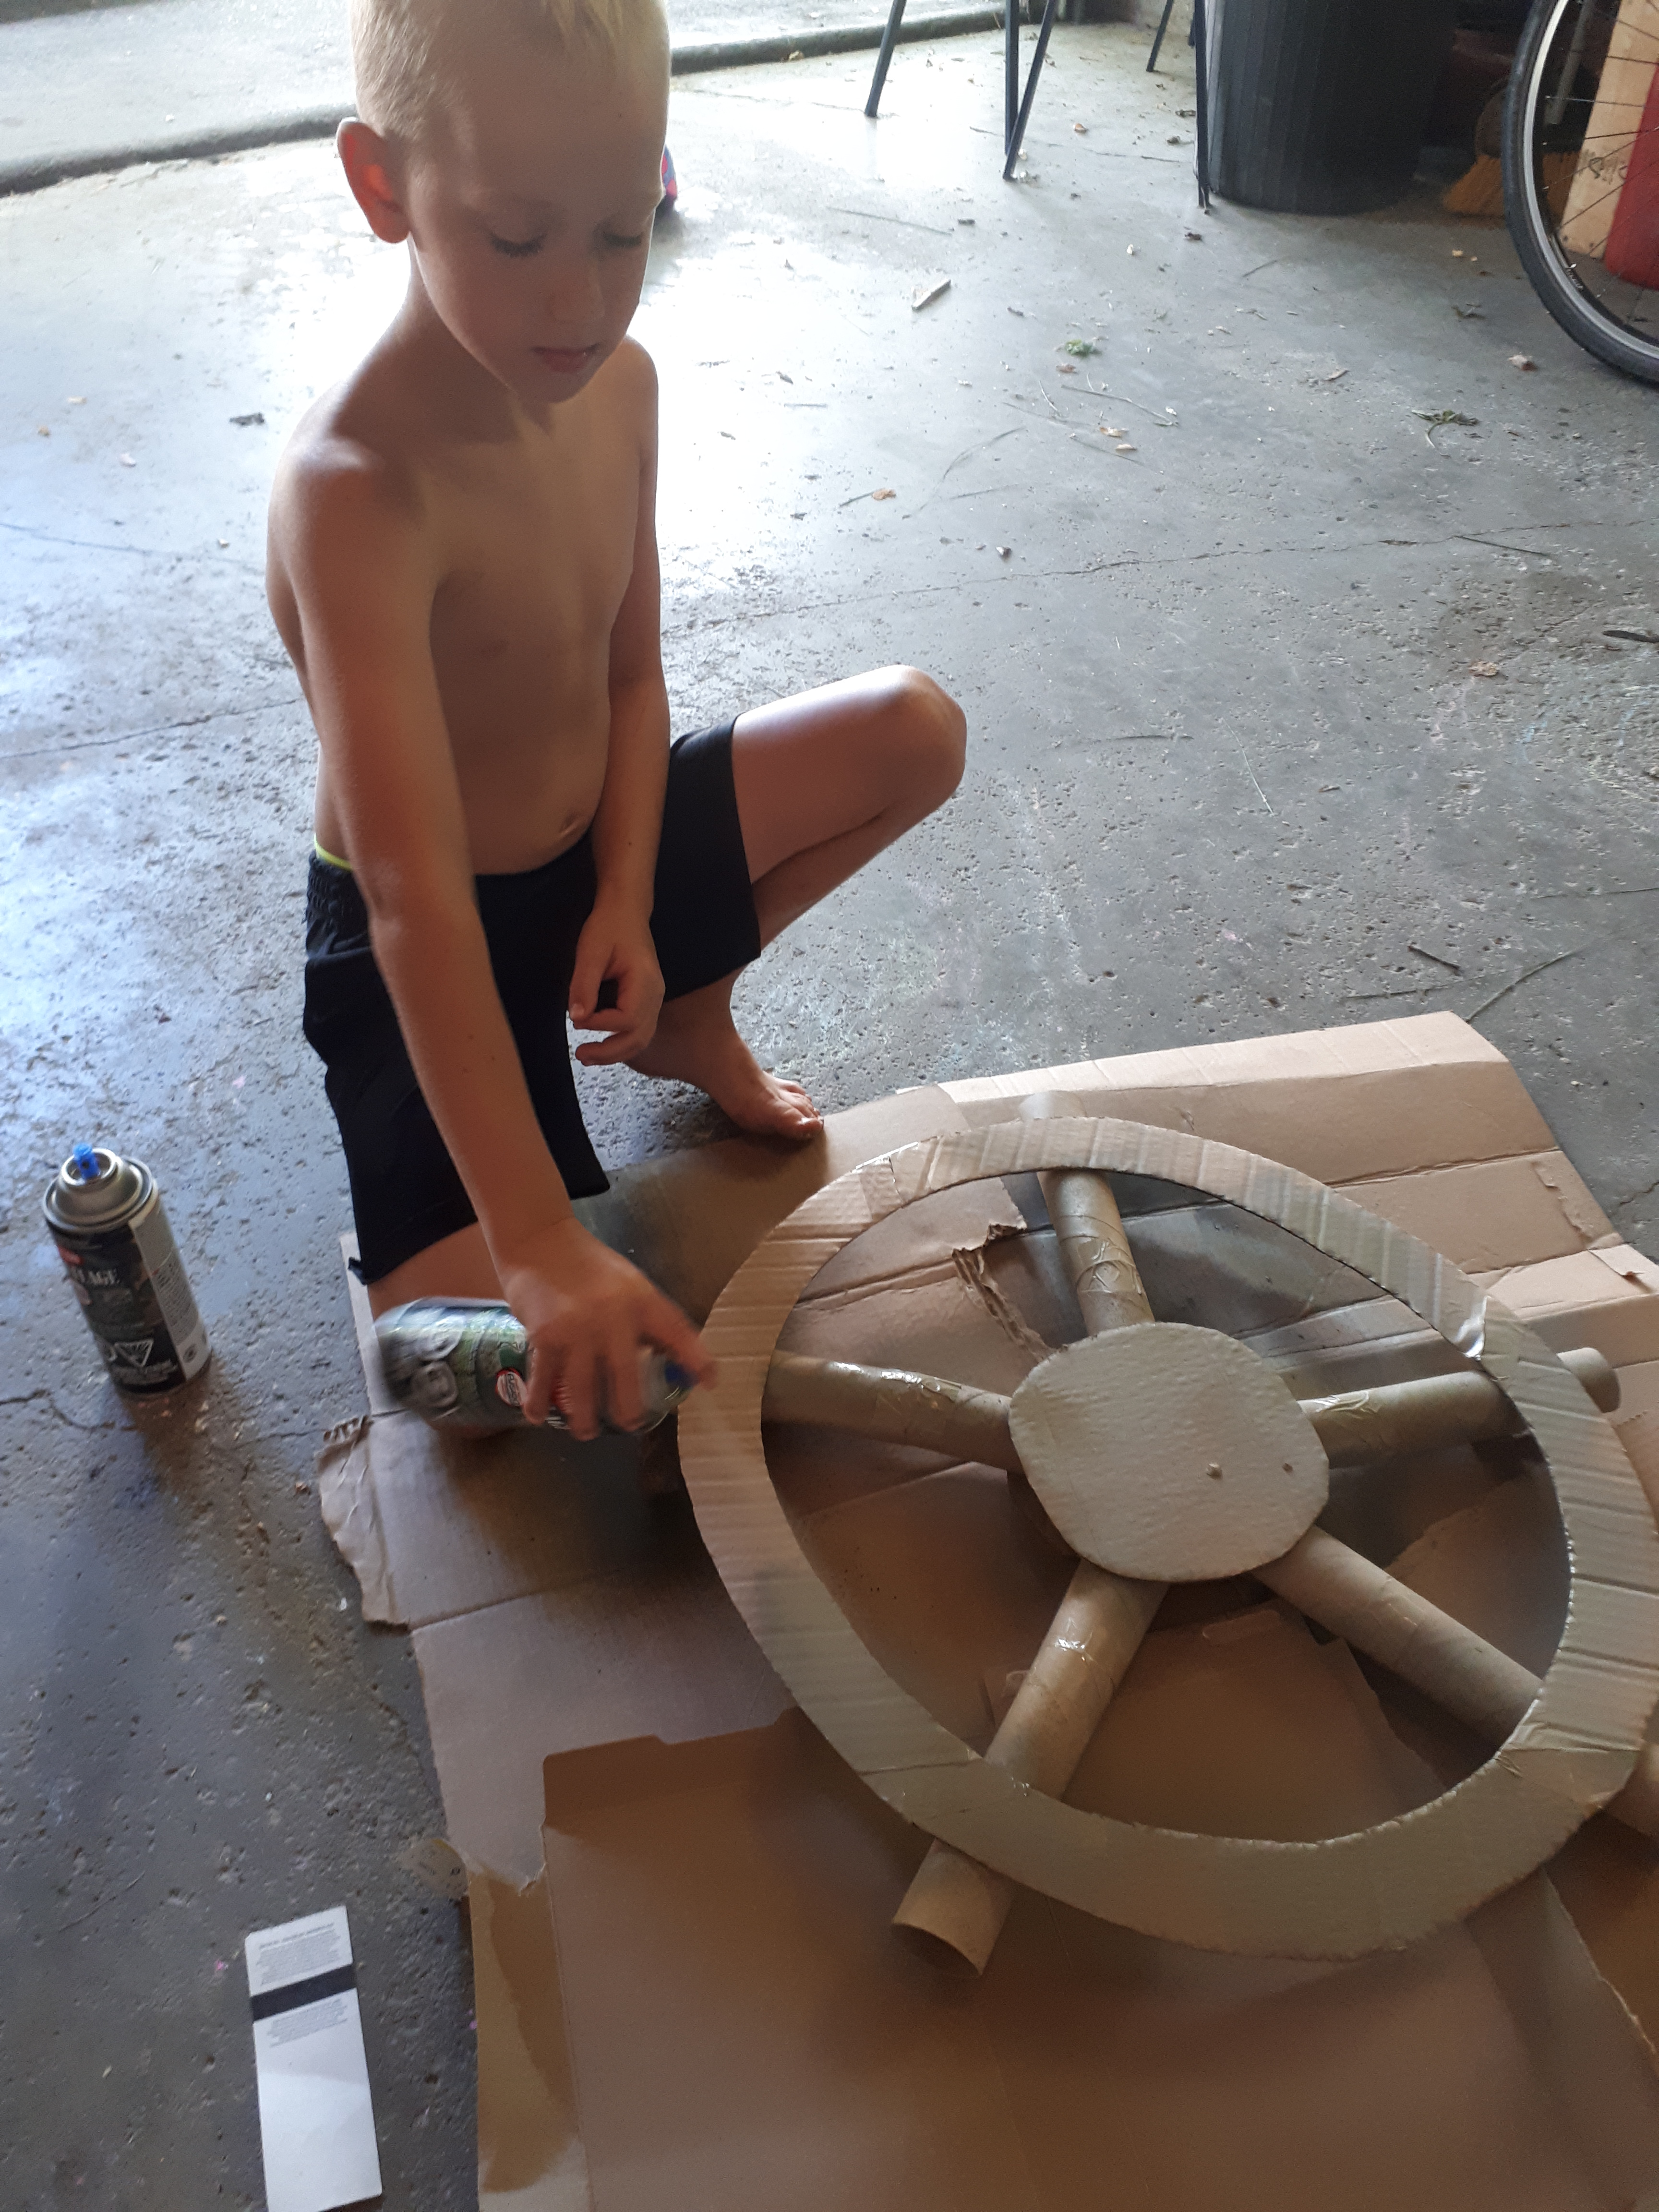
8. Spray paint your wheel. We sprayed the whole thing with light brown, and then darkened it up with a mist of black. I’m a firm believer in using what you’ve got, so when we looked in the garage and saw that we didn’t have the dark brown we thought we did we just used the next best thing. Allow the wheel to dry.
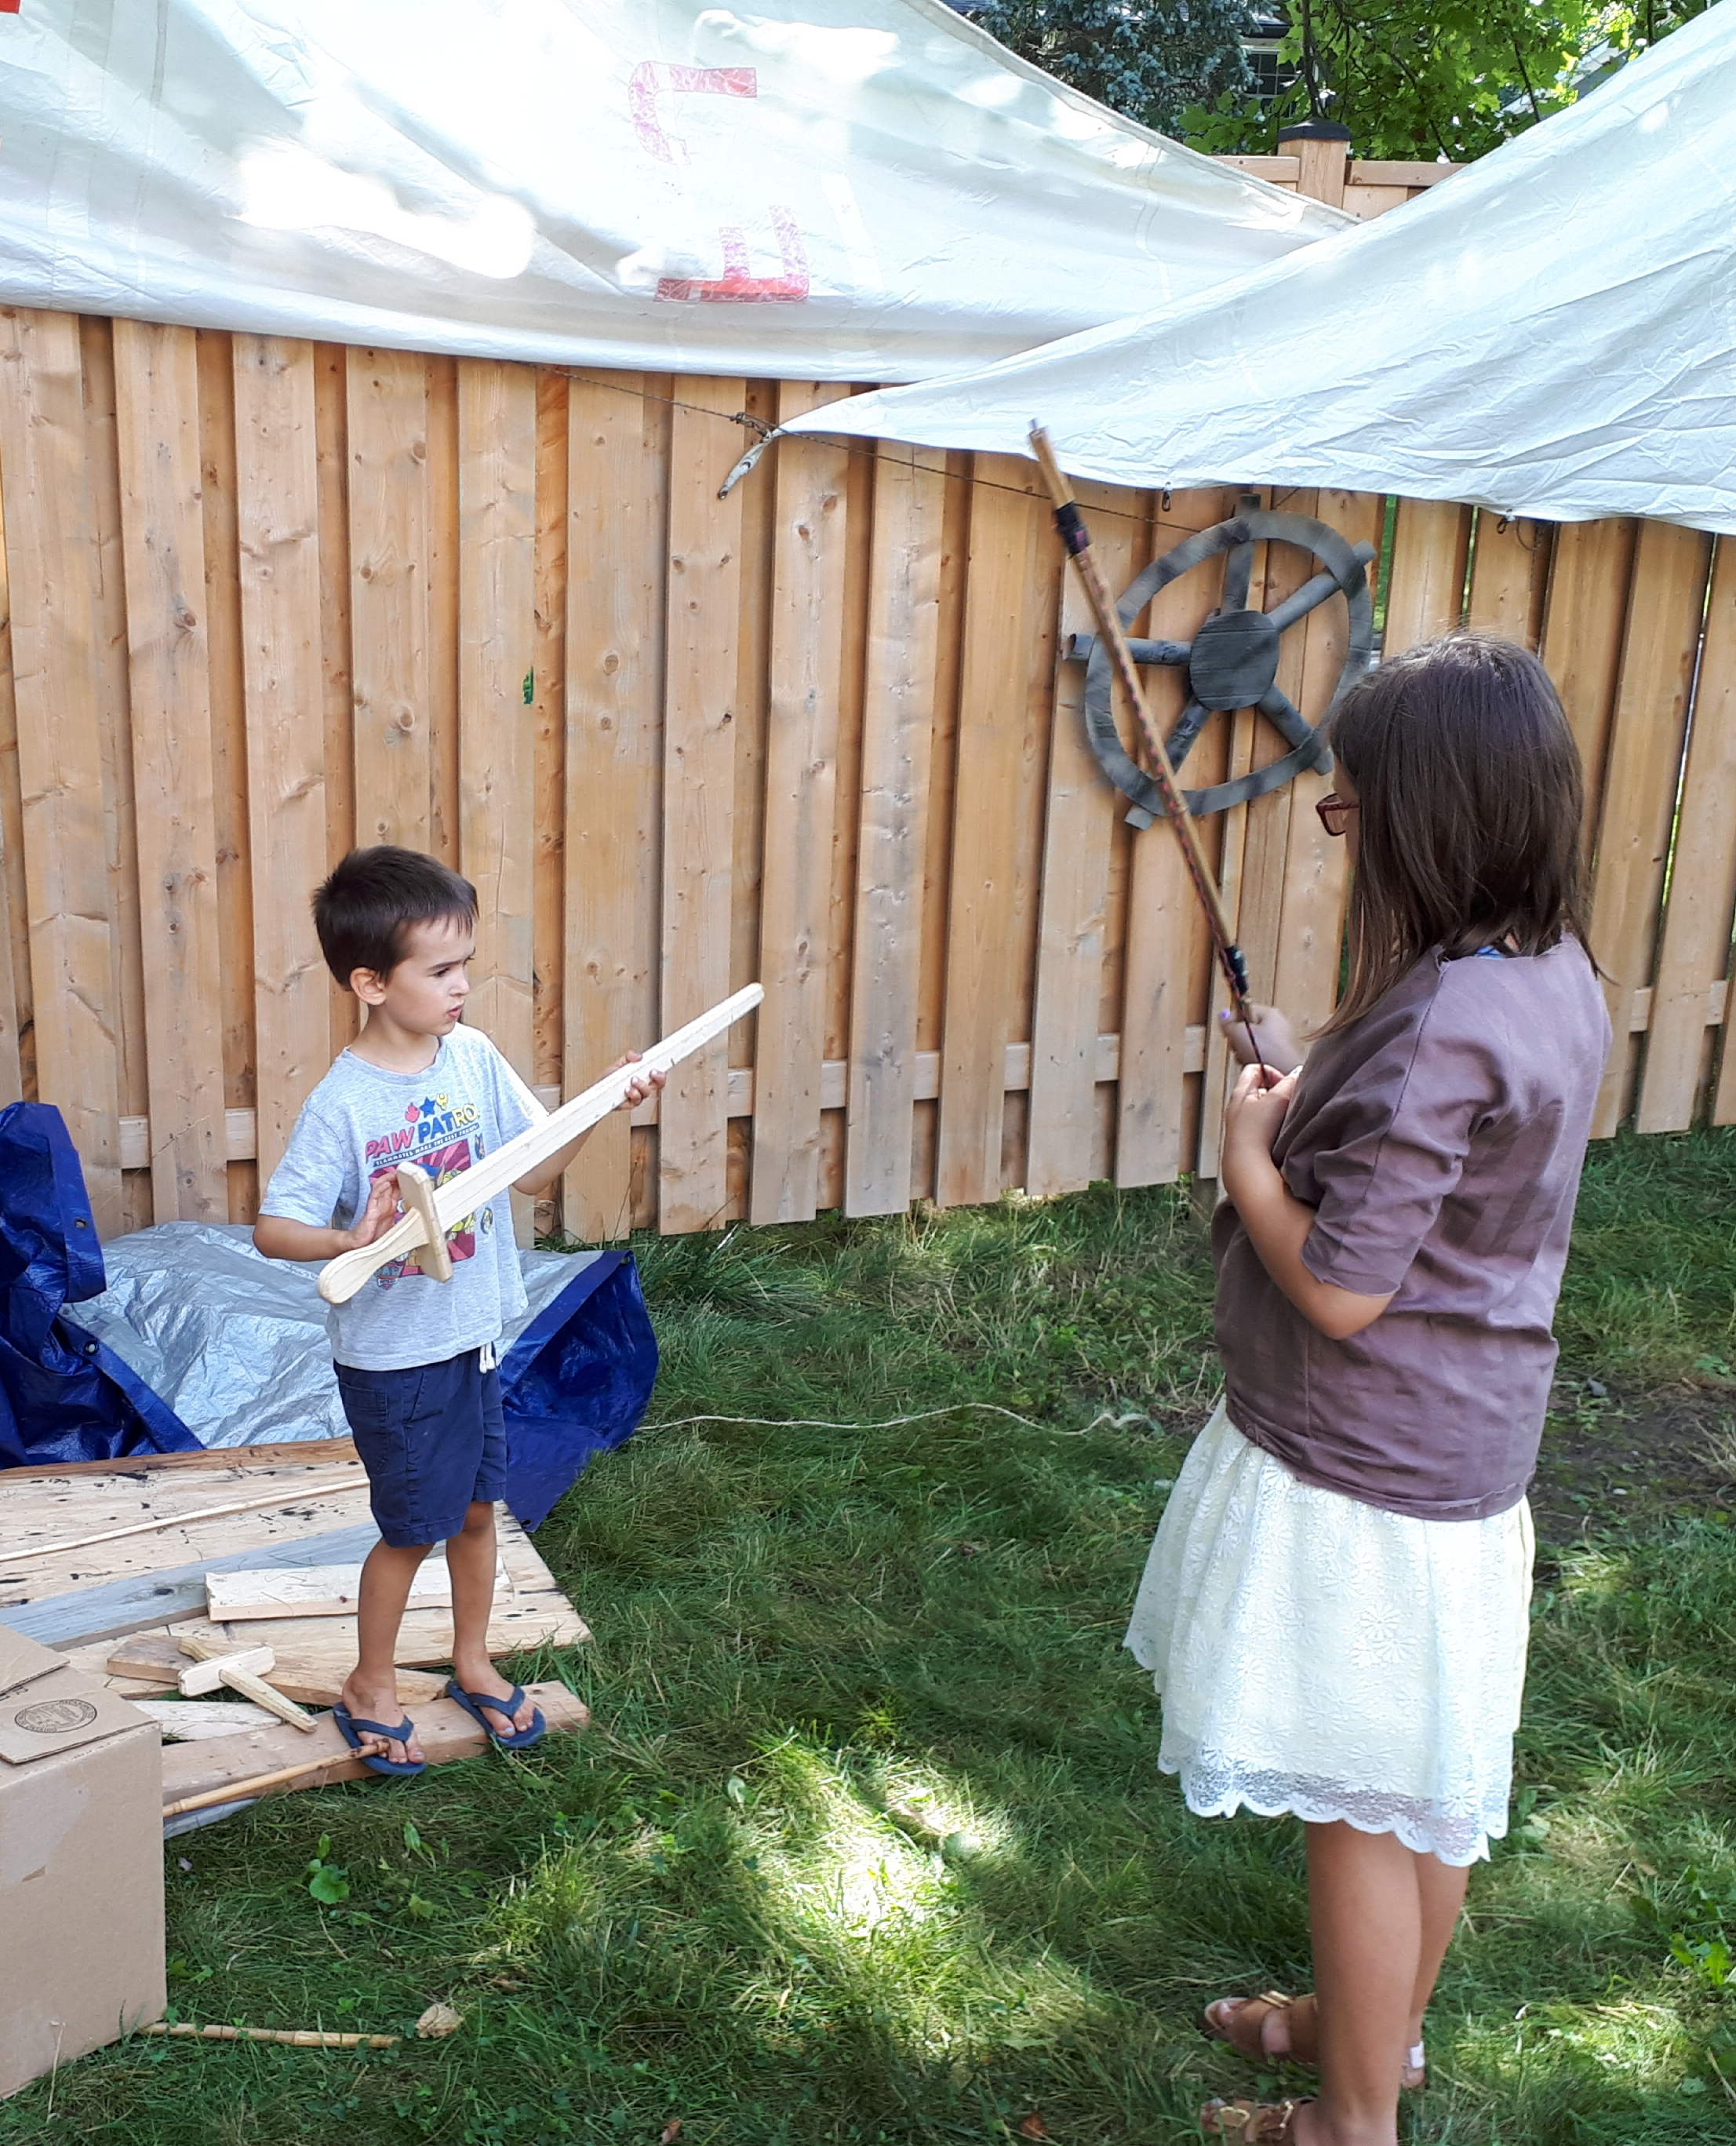
We used this wheel as part of the shipwreck in our Robinson Crusoe party. It was a really great party, and I’ll give you a full report on that in the next couple of weeks! Until then, thanks for visiting and Happy Crafting!


One thought on “DIY Cardboard Ship’s Wheel”