

At Goodwill three weeks ago my son found an illustrated easy-read chapter book version of Robinson Crusoe. He asked for it – begged me for it actually – and I bought it. After all, it was only $1.50, we’re trying to encourage reading, and he’s obsessed with Swiss Family Robinson. I figured that since both parties were shipwrecked on a deserted island and both have Robinson in their names my son would become equally attached to Robinson Crusoe. Boy was that an understatement. He’s probably had it read to him 10 times since then and looks through it very frequently all by himself. In fact, he now wants a Robinson Crusoe birthday party. That is the backstory of why on earth we’re making this awesome craft.

In the book Robinson is forced to make his own clothes and hat out of leather. In response to my son asking if we could make our own hats too, I told him that of course we can, and I’ll figure it out. Thankfully my first attempt worked perfectly. There’s a lot you could do with this basic formula. (A cloche hat out of felt, perhaps?) Here’s a post for all of you who’ve ever wondered how to make a hat out of fabric…that might actually be no one at all. Haha! But I encourage you to try it out. It was very fulfilling to make a hat out of glue!
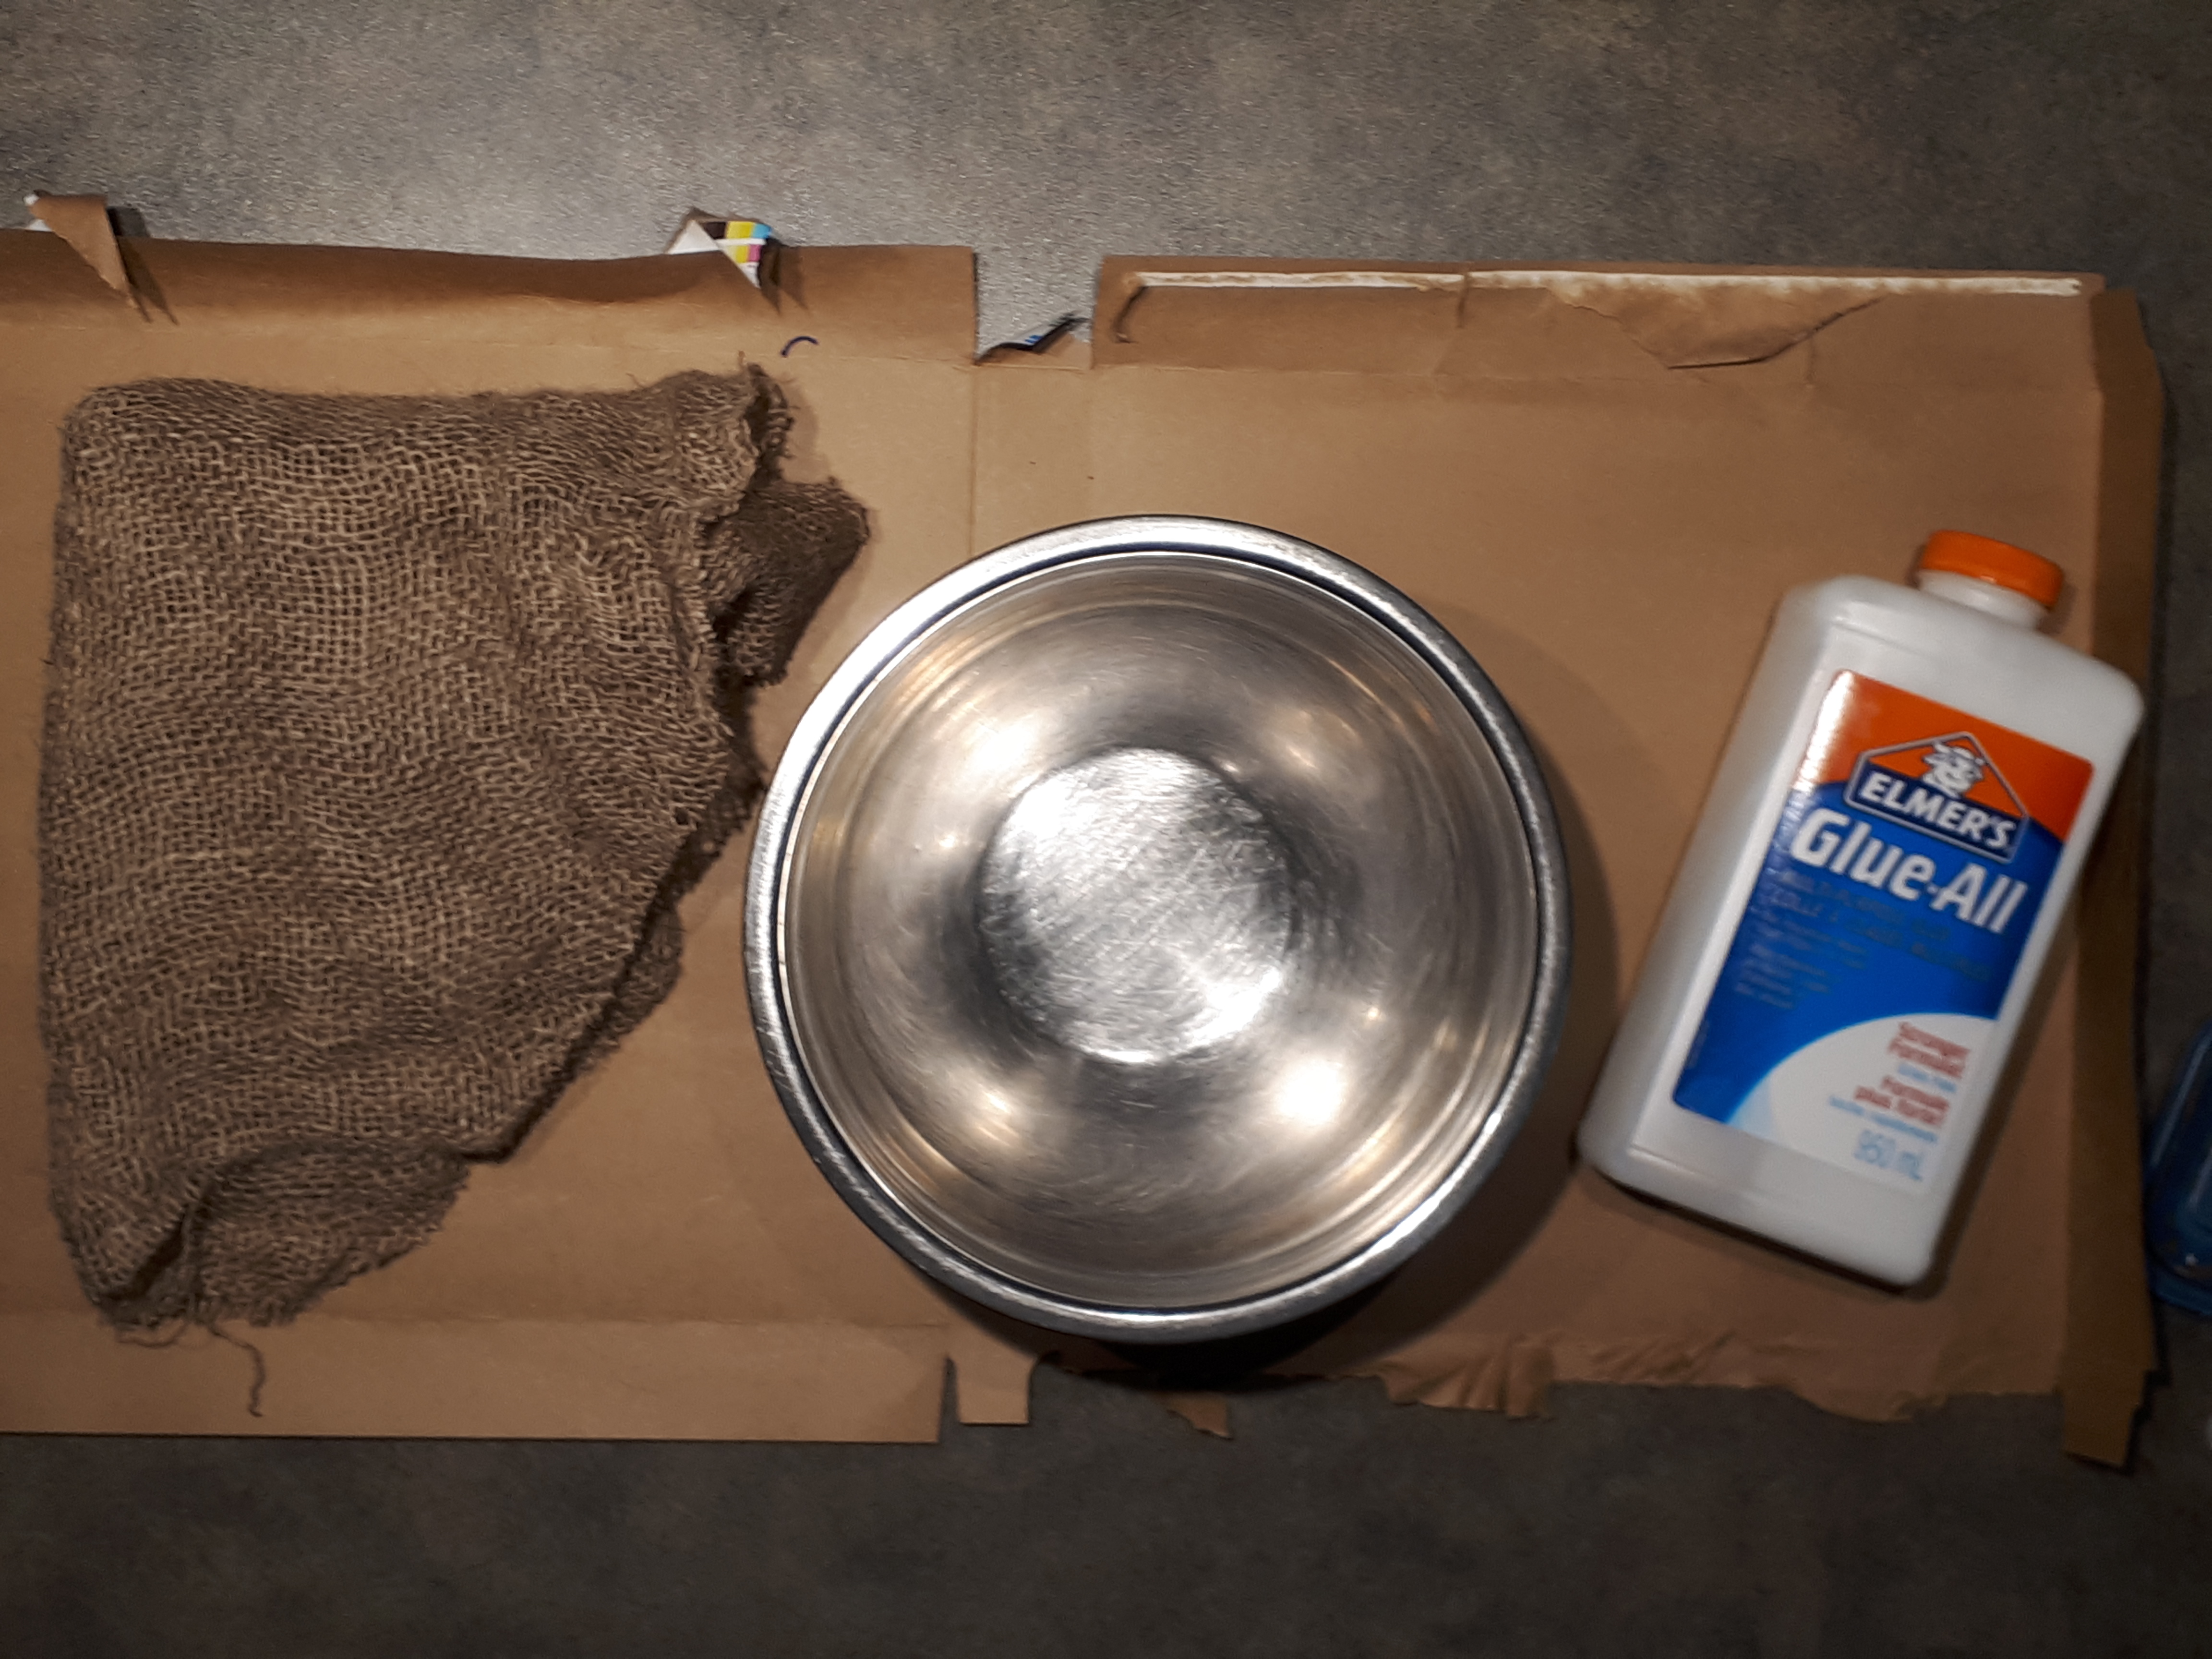
Supplies:
- Burlap
- Scissors
- White glue
- Saran wrap
- Bowl
- Twine (optional)
- Cardboard box to work on to keep your surface clean (optional)
Instructions:
- Measure out burlap to fit the head for which you intend to make a hat. I just draped the burlap over my head and cut it out accordingly. For a great tip on how to easily cut burlap (so you don’t get all those frayed edges) check out this post.
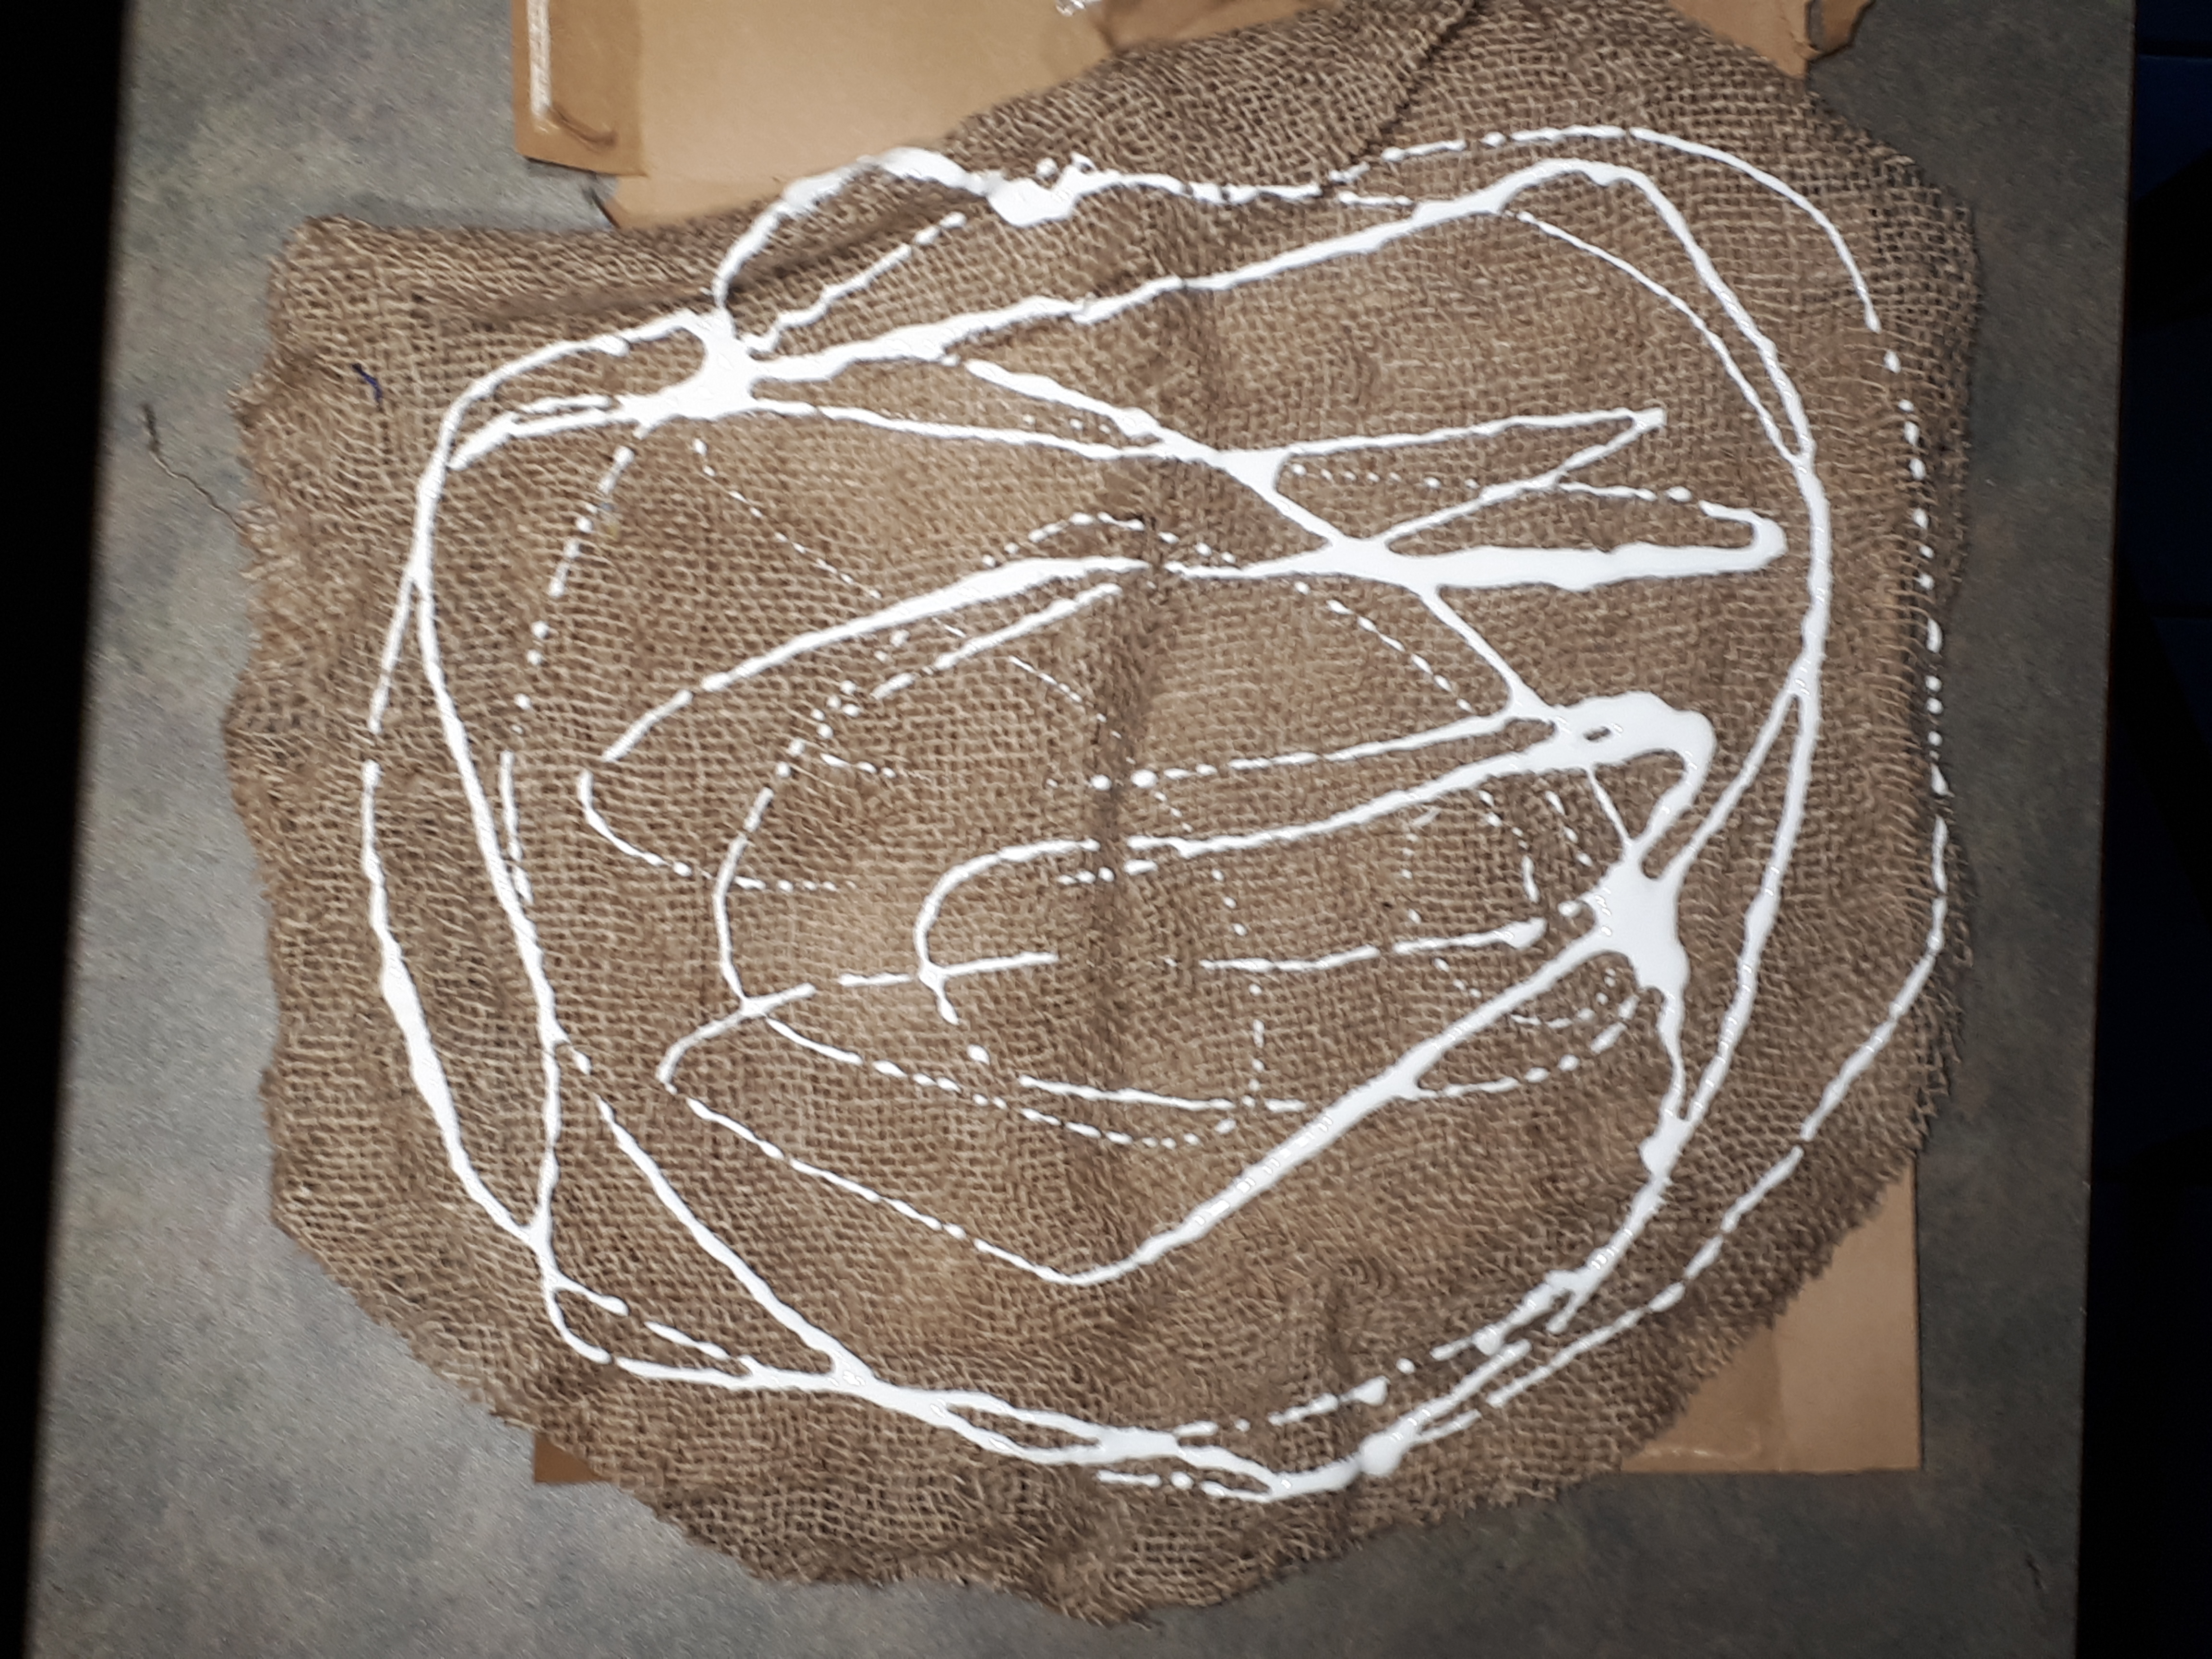
2. Drizzle white glue on your burlap. It doesn’t take too much glue to cover the burlap. You also don’t want it to be soaked; just enough to tell that it all has glue on it.
3. Scrunch and knead the burlap to get every section of it wet.
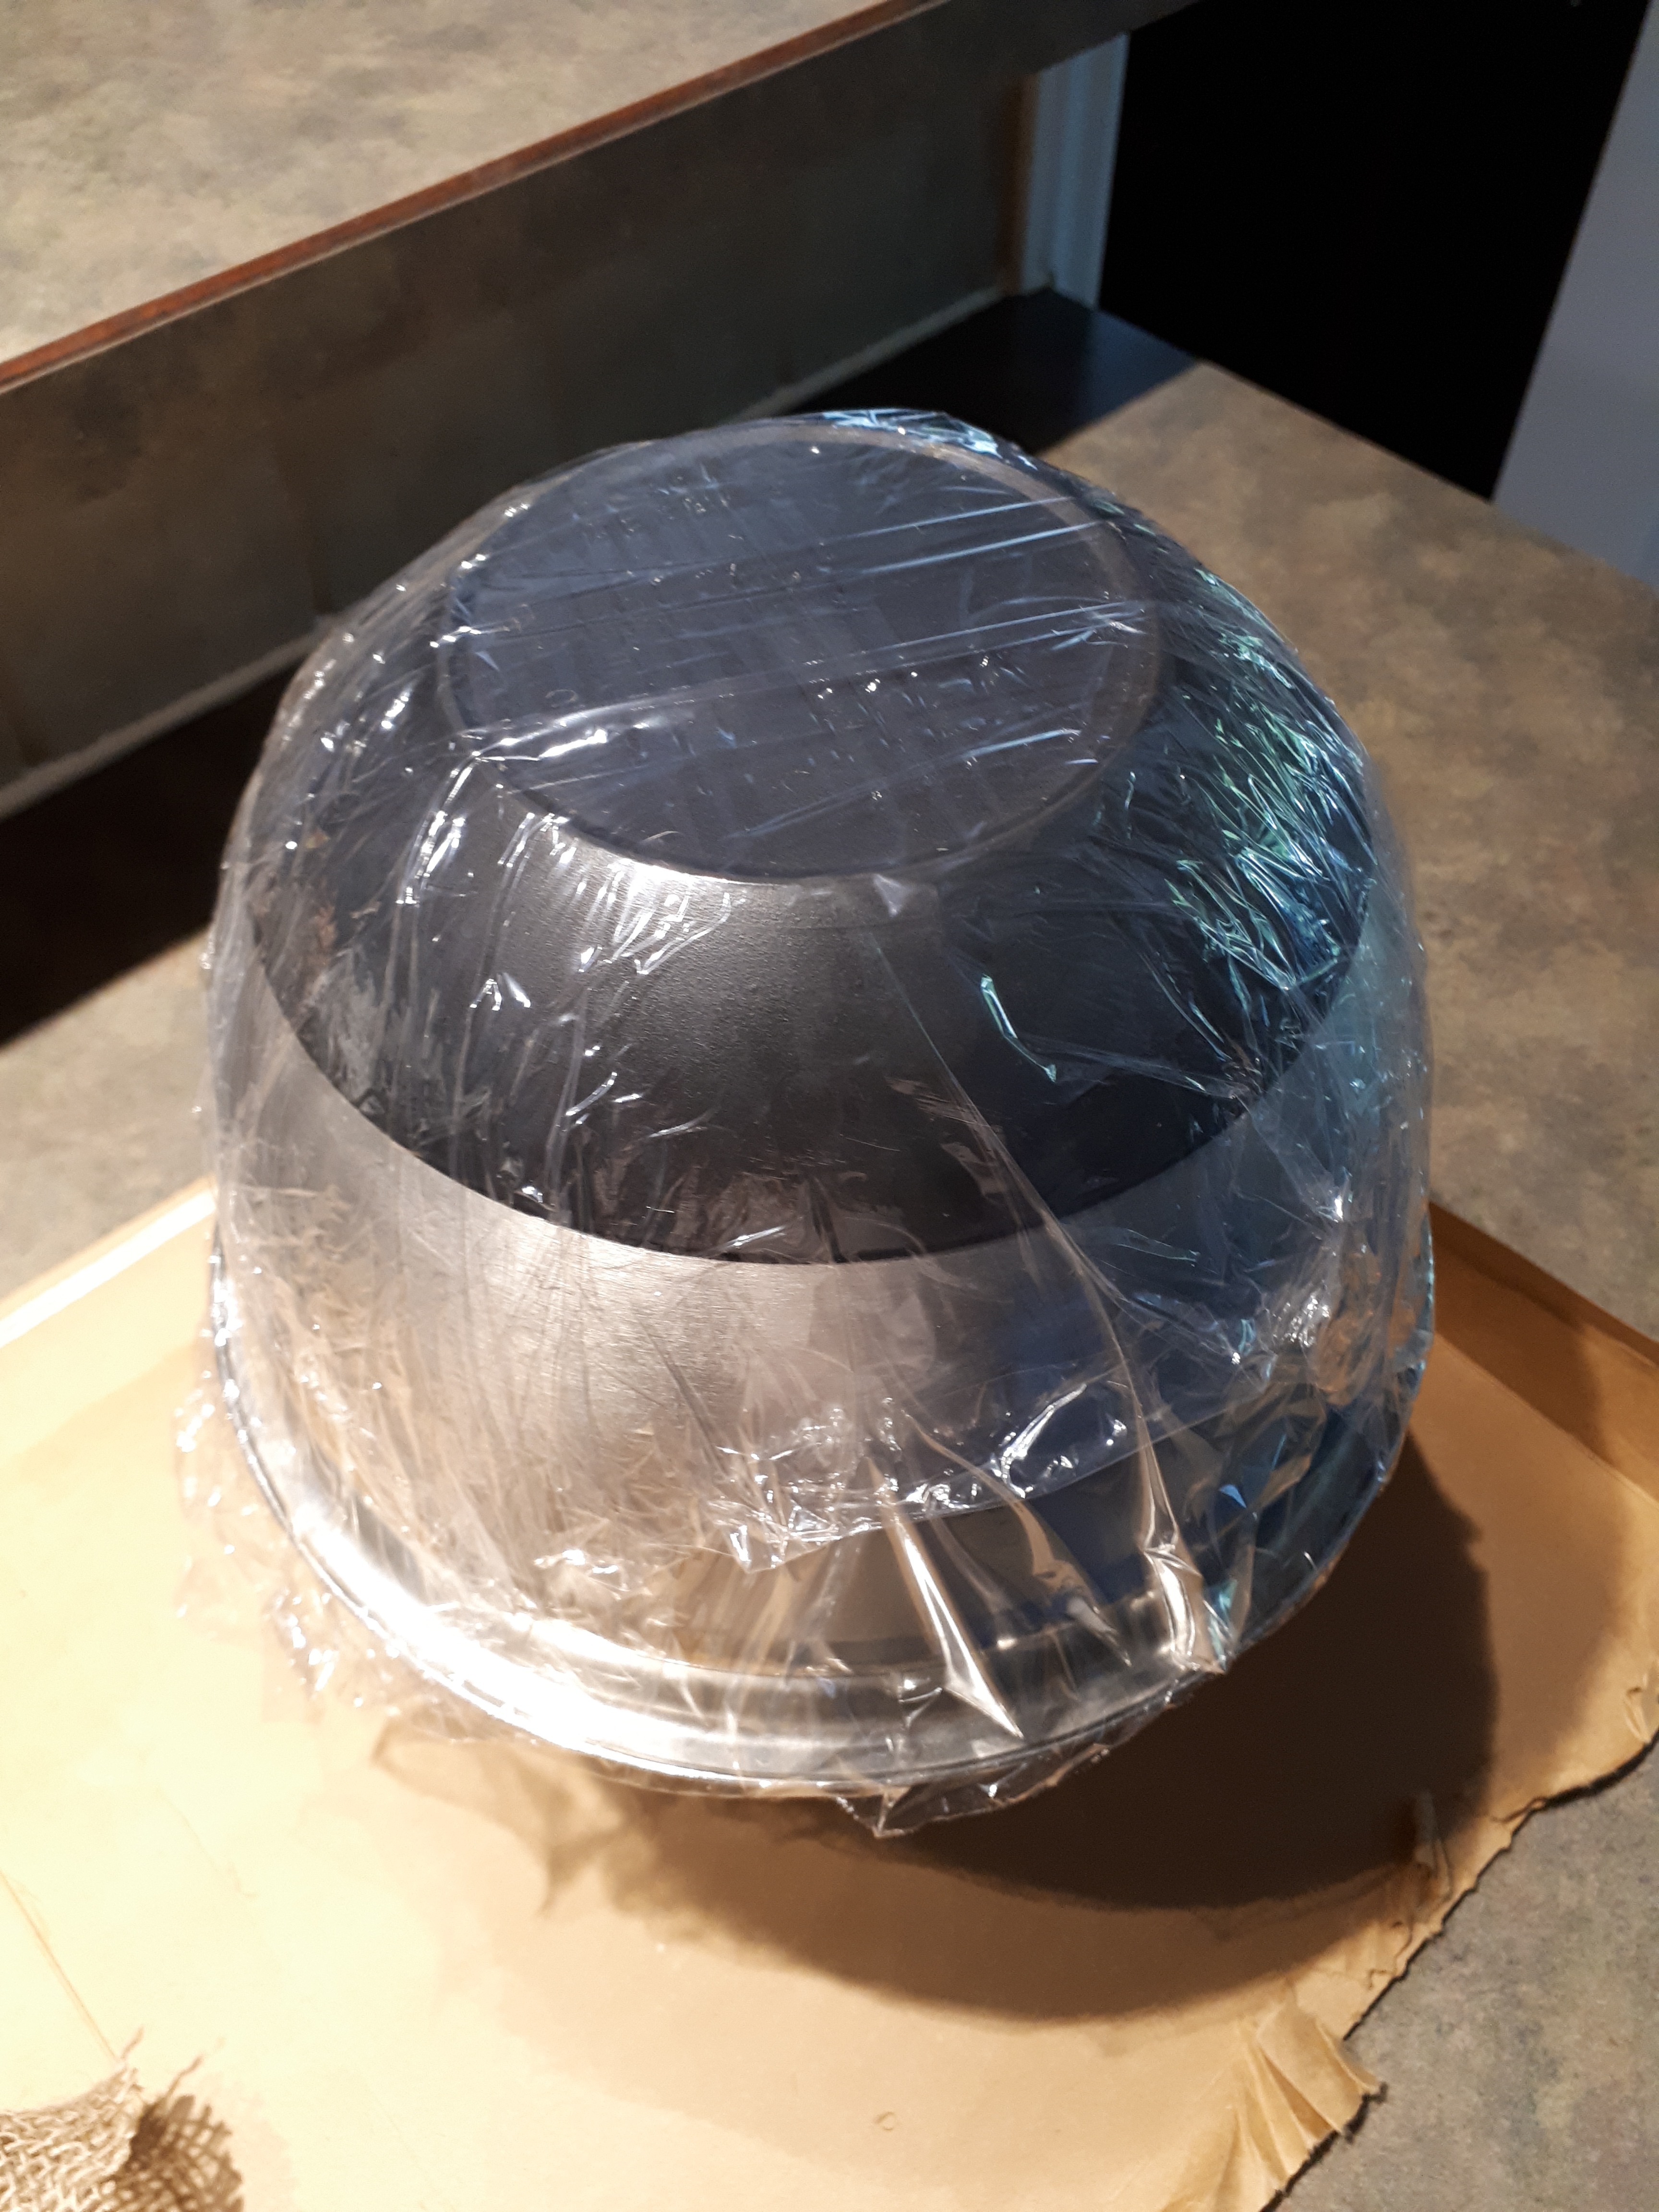
4. Cover a head-sized bowl in saran wrap to make for easy removal of the dried hat. This step also means that you don’t have to scrape dried glue from your bowl. I propped my bowl up on a pitcher so the corners of the hat could droop down without touching the counter/cardboard.
5. Drape the burlap evenly over the bowl, smoothing it out as you go. Some of it will bunch a bit and that’s okay.

6. Tie the twine around the hat where you want the brim to start. I tied mine in a bow because I wanted it to look island chic adorable.
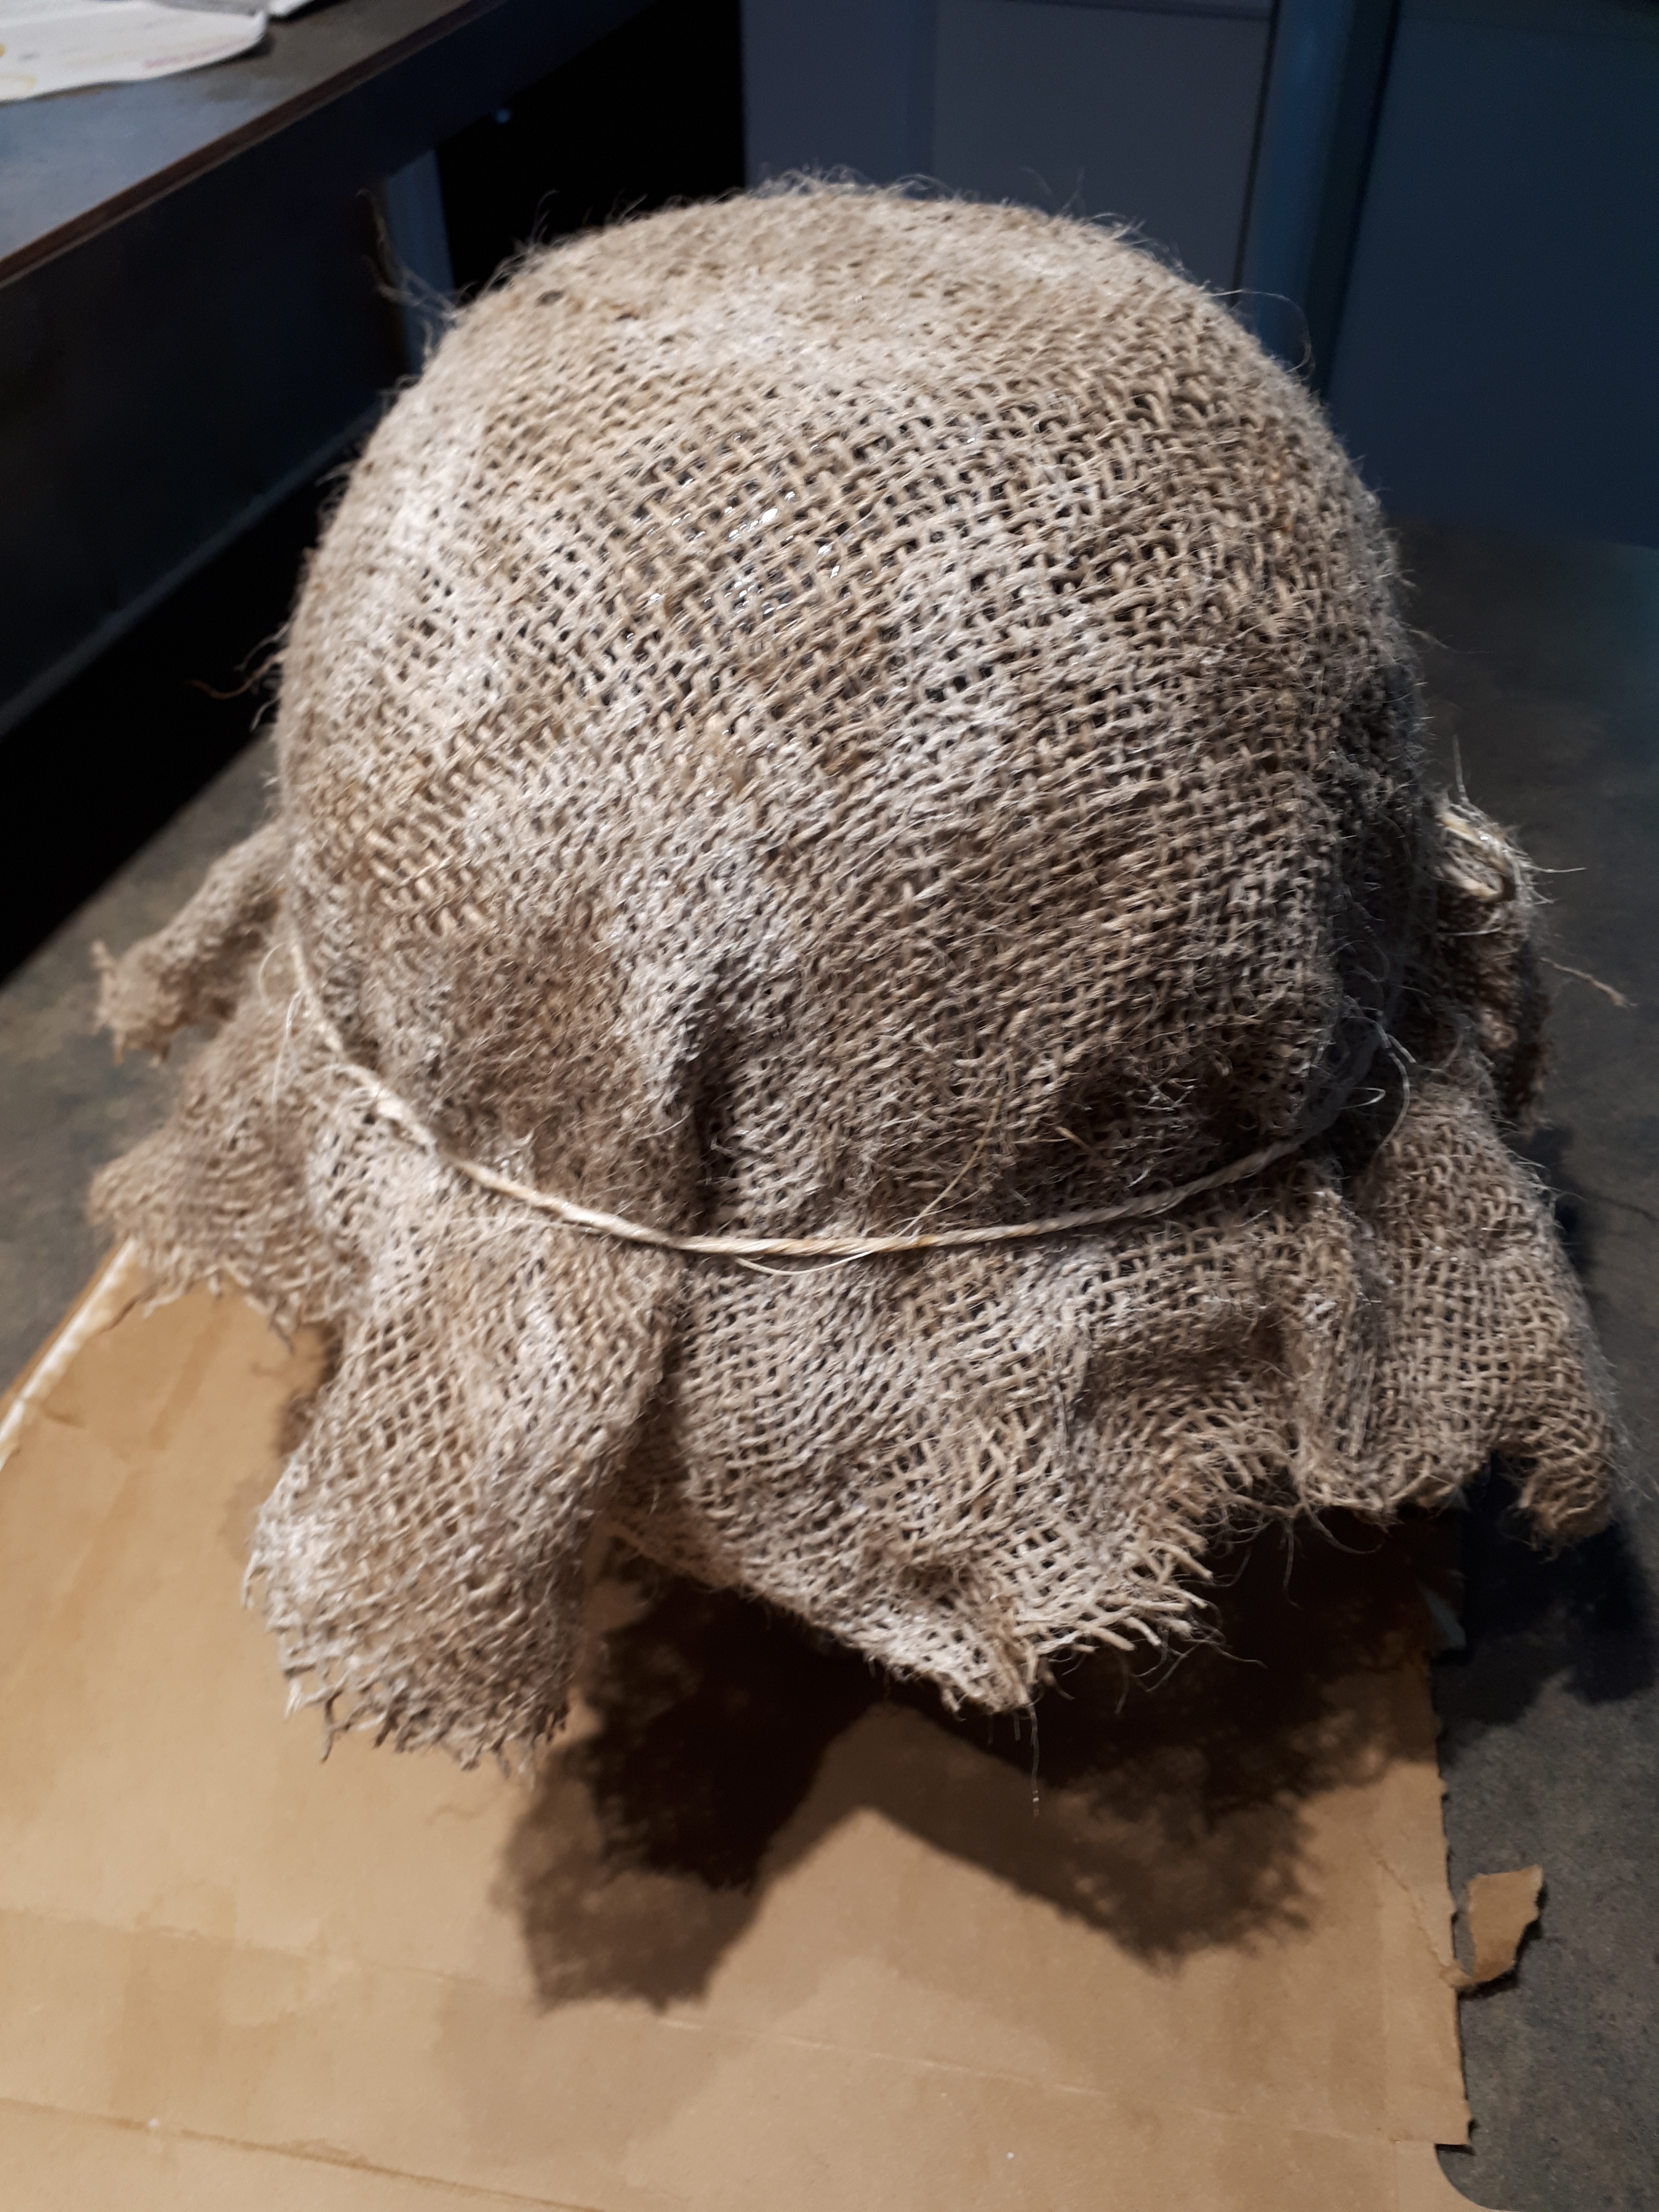
7. Allow your hat to dry. Mine dried in about 3 hours. When it had sat for about two I removed it from the bowl. This allowed more air flow through the burlap and it dried more quickly.
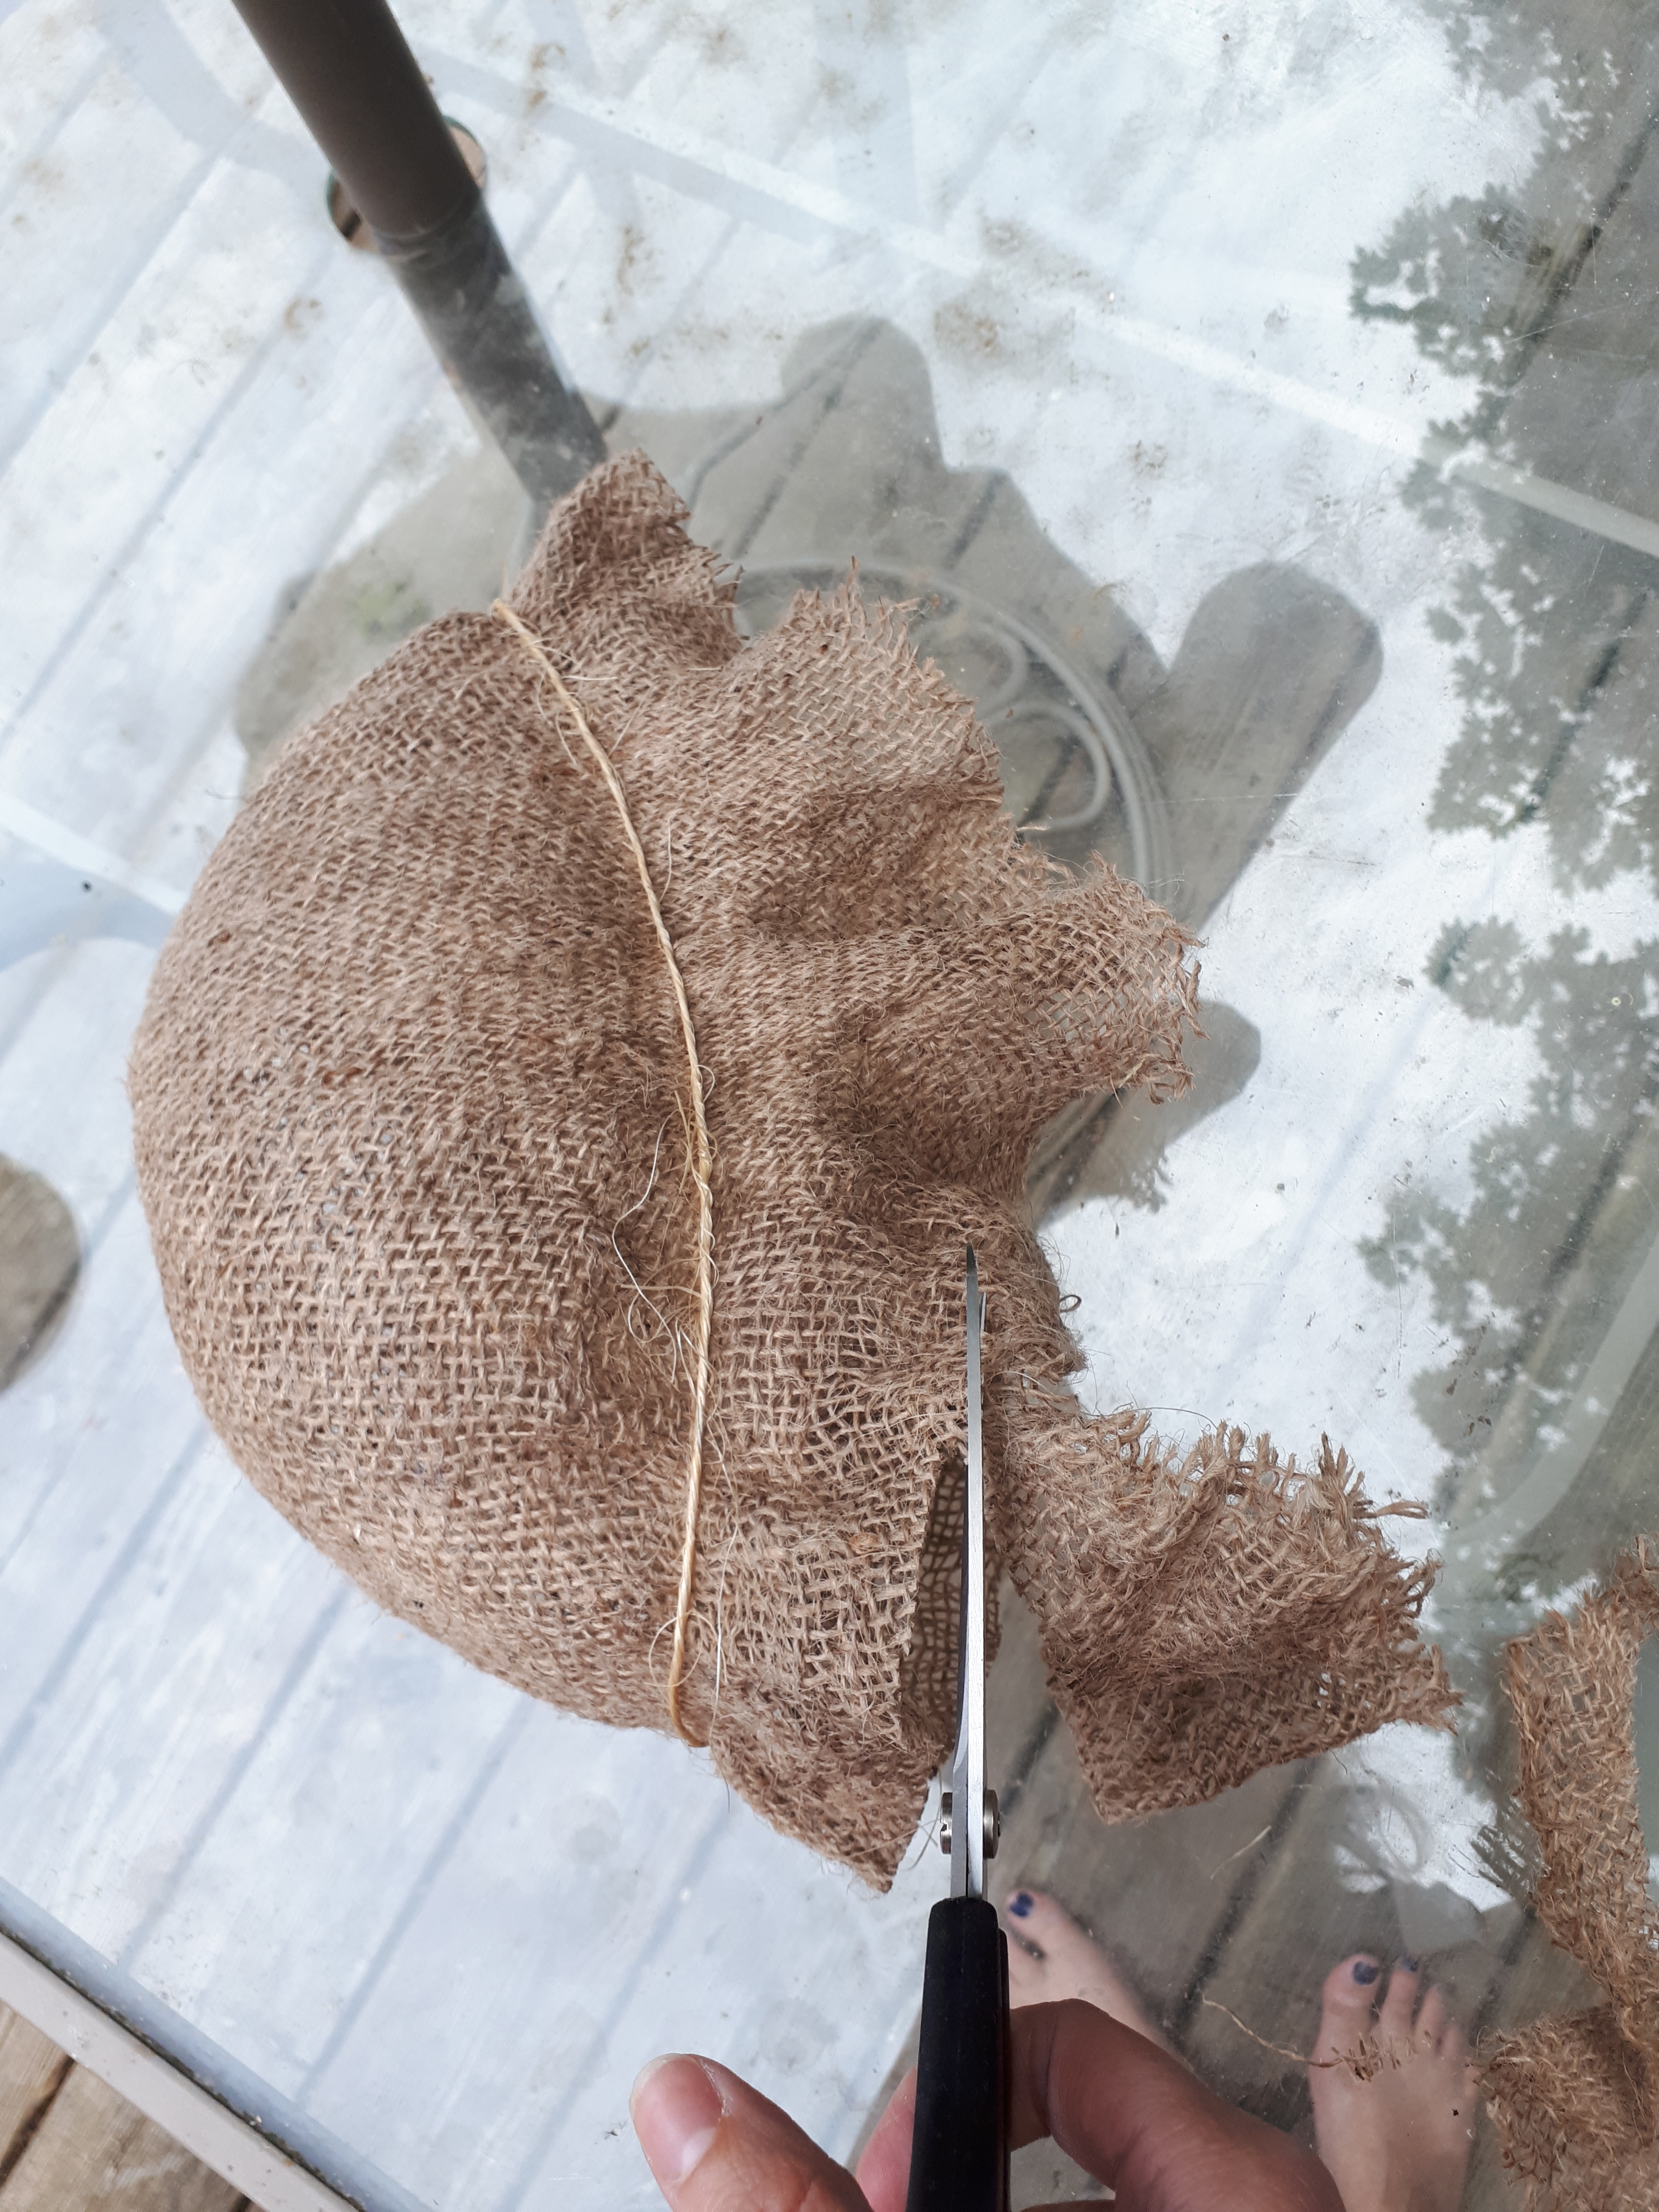
8. Trim the corners off the hat. I chose to cut mine about two inches from the brim to the edge.
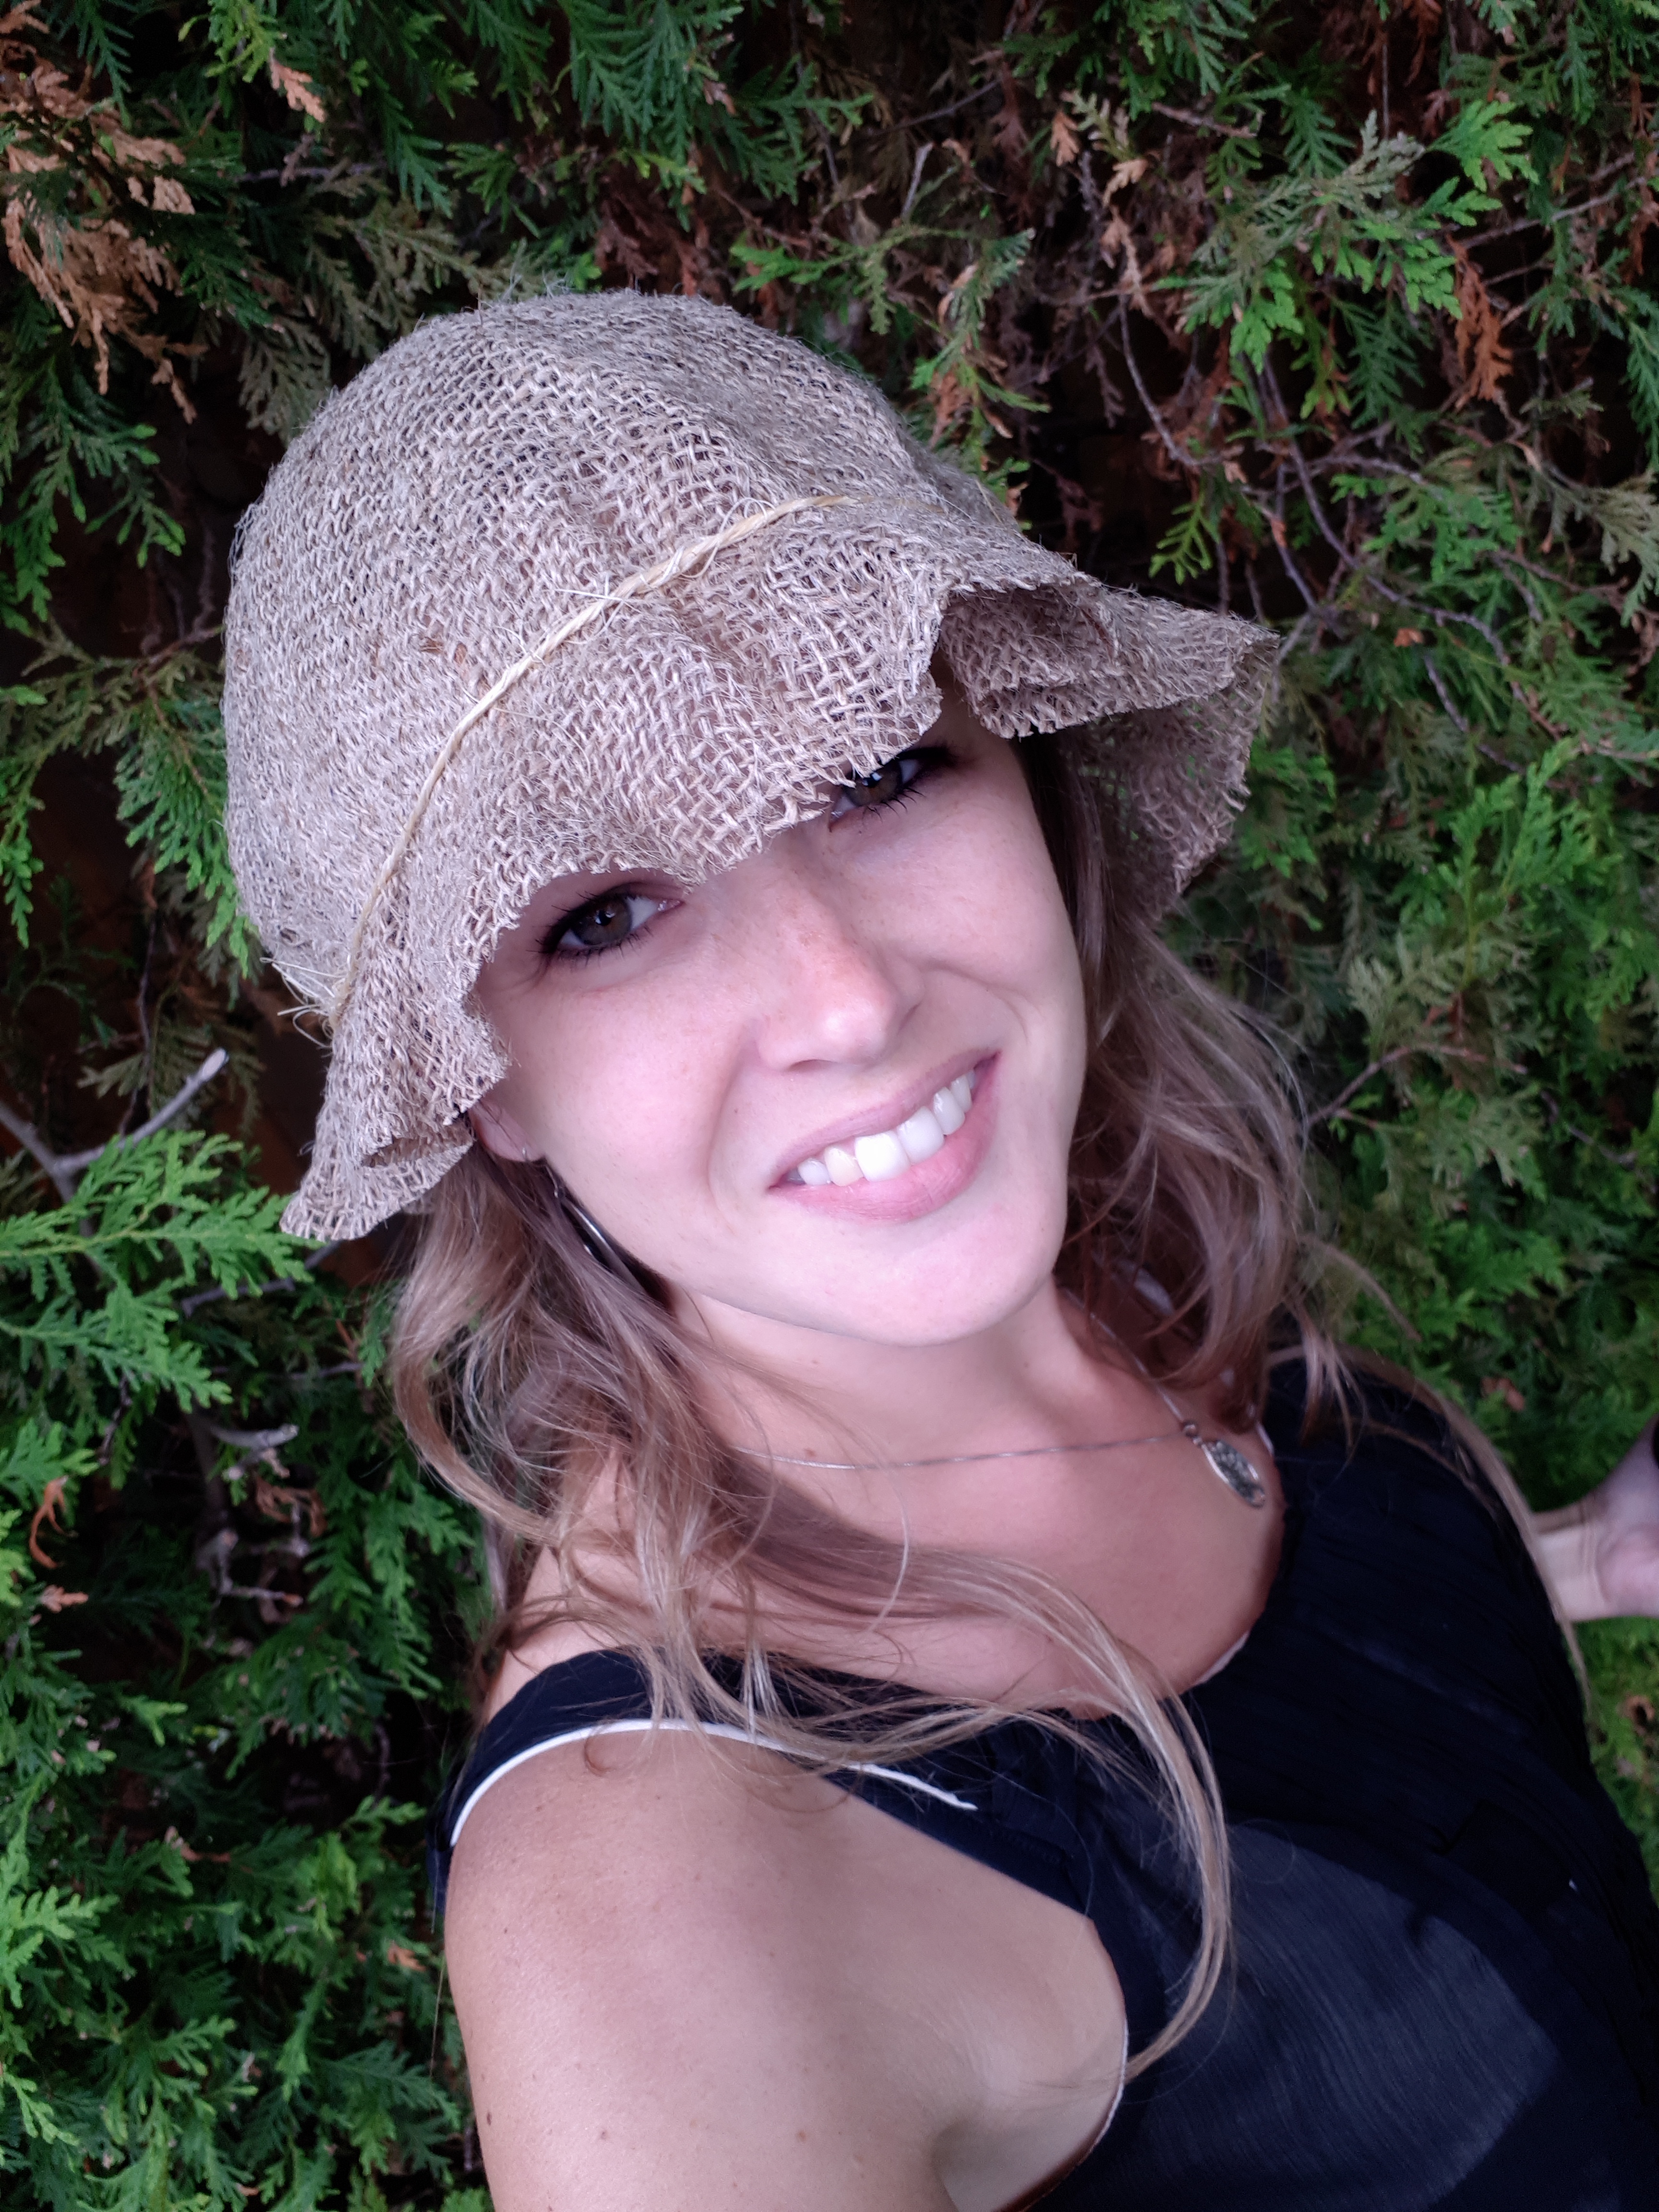
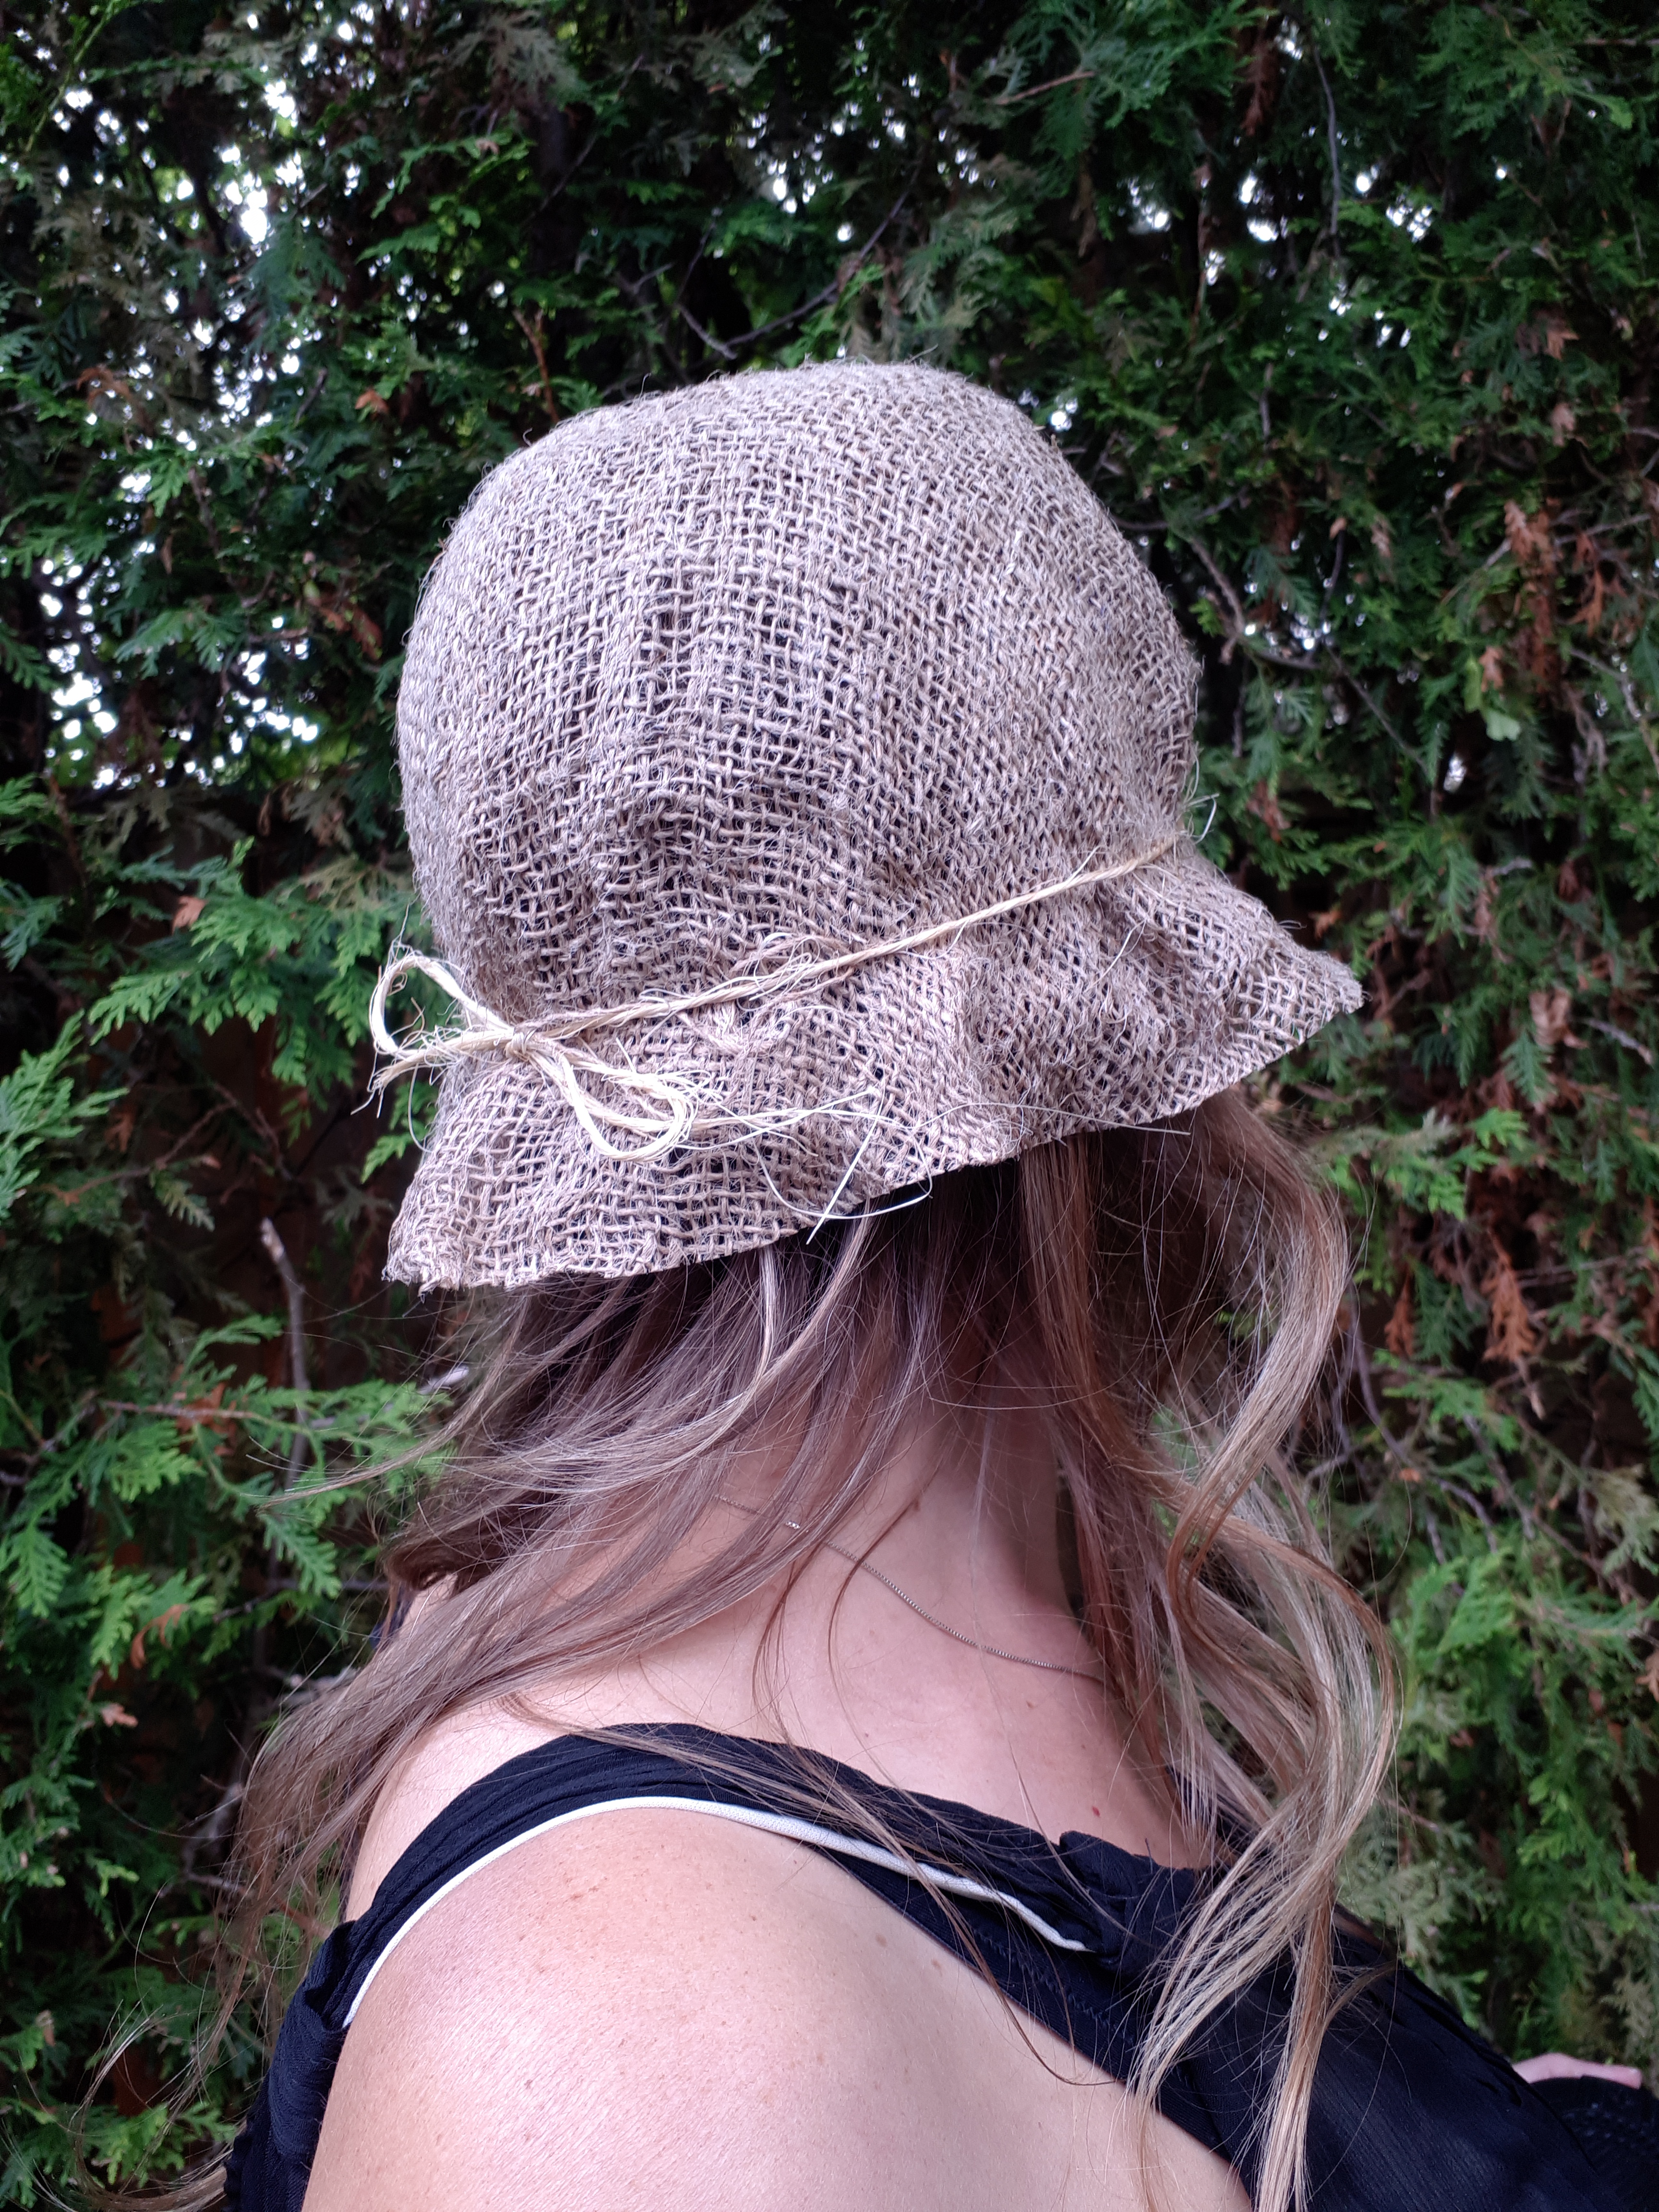
Isn’t it so cute? I got my burlap from empty firewood bags at a National Park, so it was a bit scratchy. When we make them for my son’s party I’ll get some softer stuff. When I showed the completed hat to my son his little face lit right up! I can’t wait to make one for everybody at the party. It will be so adorable!
If you have extra burlap and are looking for some ways to craft it away be sure to read Toilet Paper Napkin Rings and Burlap Banner, which will look so sweet at picnics or Backyard BBQs. You can also read about one of my favourite crafts, Burlap Coasters. This little mock-sewing project is a great way for the littlest crafters to practice fine motor skills or get those older kids to get creative!

I love it!!! You could even fancy it up for people like your daughter!!
LikeLike
I love it! You could even decorate it so a girl who loves sparkly things would love it, too!!
LikeLike
I love it!!! You could even fancy it up for people like your daughter!!
LikeLike