
I have been trying (mostly unsuccessfully) to get all the clutter out of our homeschool cupboard. We have the bottom of our china cabinet that we use exclusively for our daily homeschool things: reading curriculum, devotional, printing books, math curriculum, clipboards, headphones, markers, pencil crayons, glue sticks and sundry, I could go on and on. As you can probably imagine, the cupboard is chaos. Every year I try to make it better and better, but I’m never happy with it.
This year I thought to myself, “If I could just get the odd shaped bulky items out of there it would be a big help.” So I took out the clipboards, tin pails of pencils, etc., and the headphones. So. Much. Better.
Now to where was I going to move the chaos? Certainly not back into the cupboard. Not into another cupboard or room when we use them so frequently. I know! I’ll make a board to hang them from! So I did. And here it is:
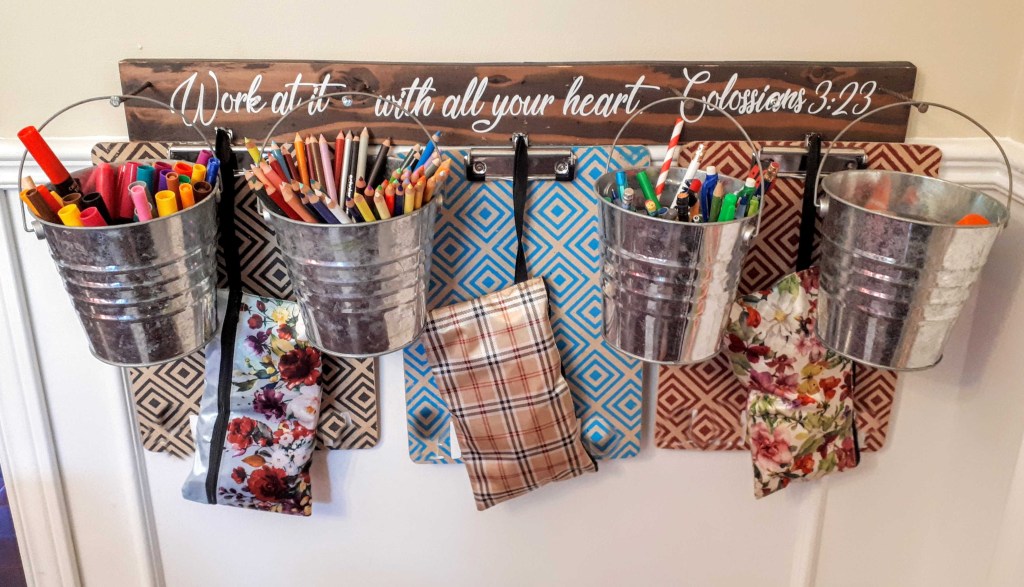
I already had this stained board, so all I did was measure and hammer in four huge nails, and then three smaller nails underneath, finishing it off by whipping up the decal. The hardest part was deciding how far apart I wanted the pails to hang. I chose to leave a wider gap in the middle rather than to space them evenly. And I use the word “chose” very loosely here, as I didn’t mean to space them so far apart in the middle. But I don’t care. Really.
My husband and I have been talking to the children a lot about work ethic recently, so I decided to use my Cricut cutting machine to write a simplified version the Bible verse, “Whatever you do, work at it with all your heart, as working for the Lord, not for man.” Colossians 3:23. I used this adhesive vinyl.
I bought the pails and the clipboards at Dollarama a year or more ago and they’ve made sorting and storing all the little creative implements so easy! The little bags have each child’s headphones in them.
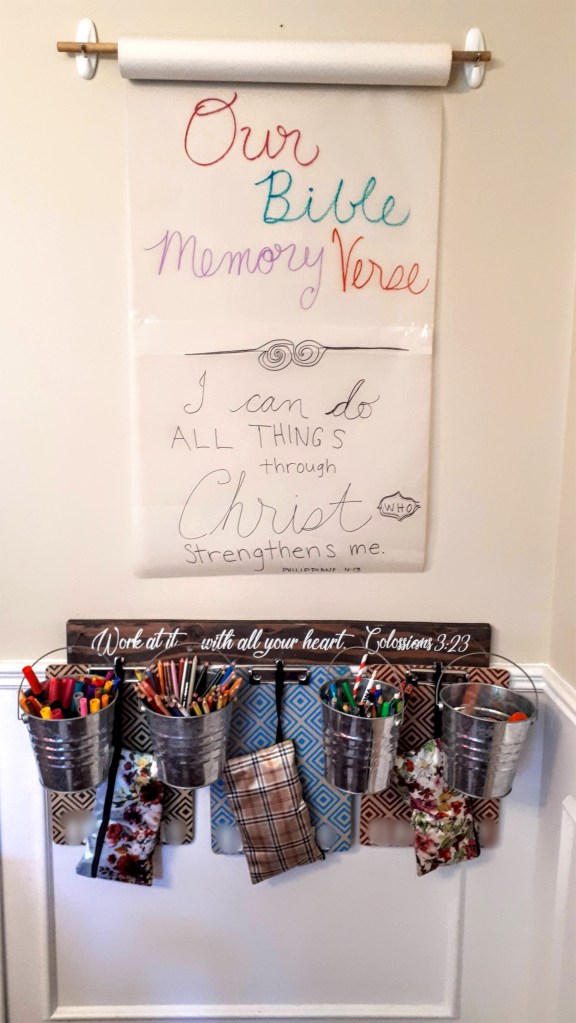
To finish off this wall I moved my white board to the opposite wall (I made my dry erase board from a picture frame. Do you remember that craft? You can find the tutorial by clicking here.), and wanted to hang up this drafting paper (that we’ve had for 16 years and haven’t used in 14) but I couldn’t think how to manage it. Then my Mother-in-Law came over and told me to just use command hooks and a wooden dowel. Bloody brilliant. It’s been up for a month and working perfectly. If you want to try it out too, I used these Command Hooks from Amazon.

I showed you how I painted words on my bulletin board on this post: Brighten Up Your Bulletin Board.
I am so, so happy with this corner! Not only did it give us extra space in our homeschool cupboard, but it makes the things we use so often so accessible! And I made this board in just a couple of hours (including making and sticking the decal, but not including staining the board).
I hope you are having success in making your home organized. It makes such a huge difference in my state of mind if things all have a place to go!

