
Every Friday night my family has Friday Night Family Movie Night Supper Downstairs. Seriously, that’s what we call it. My kids will say, “Is tonight Friday Night Family Movie Night Supper Downstairs?” It’s quite the mouthful, and was especially cute when my son couldn’t yet speak properly and would call it “Friday Night Family Movie Night Dupper Downdairs.” 😂 Kids, am I right?
Anyway, since December we have been watching Little House on the Prairie. Friends of ours let us borrow the first NINE seasons! It’s wonderful because you never have to wonder if it’s gonna be appropriate, or stupid, or boring. Every single episode (so far) is fantastic. (Although at first I cried at about 98% of them, and actually left the house completely once because I couldn’t handle one where a baby dies.) And, BONUS, they talk about God and the Bible all the time. Also, my kids say, “Yes, ma’am” to me when I tell them to do things. It’s hilarious and adorable!
The kids want to look like the kids in Little House on the Prairie, too. My son wants to wear overalls like the boys do in the show (I bought these on Amazon and they’re awesome!). And my daughters wanted sleeping caps. Now, THAT I can make. I made sleeping caps for two of my nieces a couple of years ago when they slept over, so I knew I could do it! These Little House on the Prairie sleeping caps are so simple and quick to make that they are a great beginner sewer project. Take a look!
Supplies:
- Piece of fabric that fits from about your child’s neck to their eyes one way, and below their ears the other
- Sewing machine is what I used, but if you could definitely pull this off with a needle, thread and time
- Scissors
- Fabric elastic, about 18 inches long, depending on the size of head
Instructions:
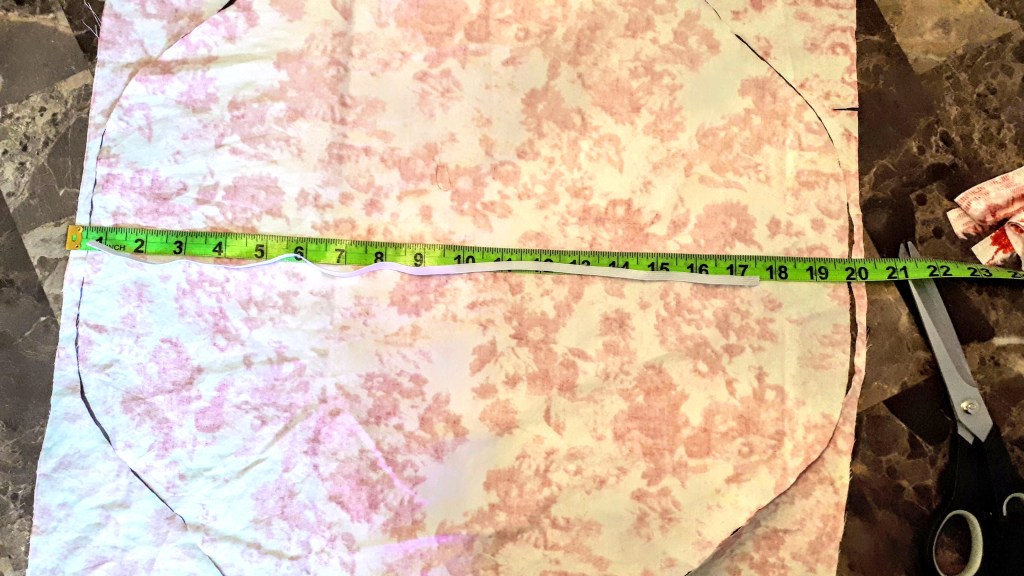
- Cut your fabric into a circle. Have you ever made a paper snowflake by folding paper in half a bunch, then trimming the end? That’s what you do here, except with fabric. The picture below is of me trimming the end with this circle-making technique. If you have no idea what I’m talking about, and think you may have stumbled across the craziest blogger, then check out the webpage Science Sparks: Making Science Fun for Kids, which has a succinctly elegant step-by-step description, with lots of pictures.

When you open it up it will look something like this:

Notice all the wavy edges of mine? That’s completely fine, because in the end the edges will be all bunched up and you won’t be able to tell that it’s not a perfect circle.
2. Measure the elastic. I measured my elastic by stretching it around my daughters’ heads. You want it a bit stretchy so it will hold onto their head, but not too tight that it’s uncomfortable. Remember it’s for sleeping in, so it will be even more irritating at night than it would have been in the daytime.
3. Pin in the elastic. Sewing in the elastic was simple, also, but I couldn’t sew and take pictures at the same time, so here’s the description:
A. Fold the fabric in half, with the pretty side (technical term: right sides) facing in.
B. Pin one end of the elastic about an inch from the edge, on the fold.
C. Find the middle of the elastic and pin it to the other end of the fold, about an inch from the edge.
D. Pin the last end of the elastic so it’s overlapping with the first end.
By pinning it this way it ensures that the elastic is even all the way around the sleeping cap.
4. Sewing in the elastic. Start with one half of the hat, from pin to pin. The elastic will be much smaller than the fabric so, keeping the elastic about an inch from the edge of the cap (you won’t be able to tell if the line wobbles a bit), pull the elastic tight, and bunch up the fabric evenly along it. Sew.
Now do the same thing with the second half of the elastic/hat, making sure to overlap the elastic ends.
You’re done!
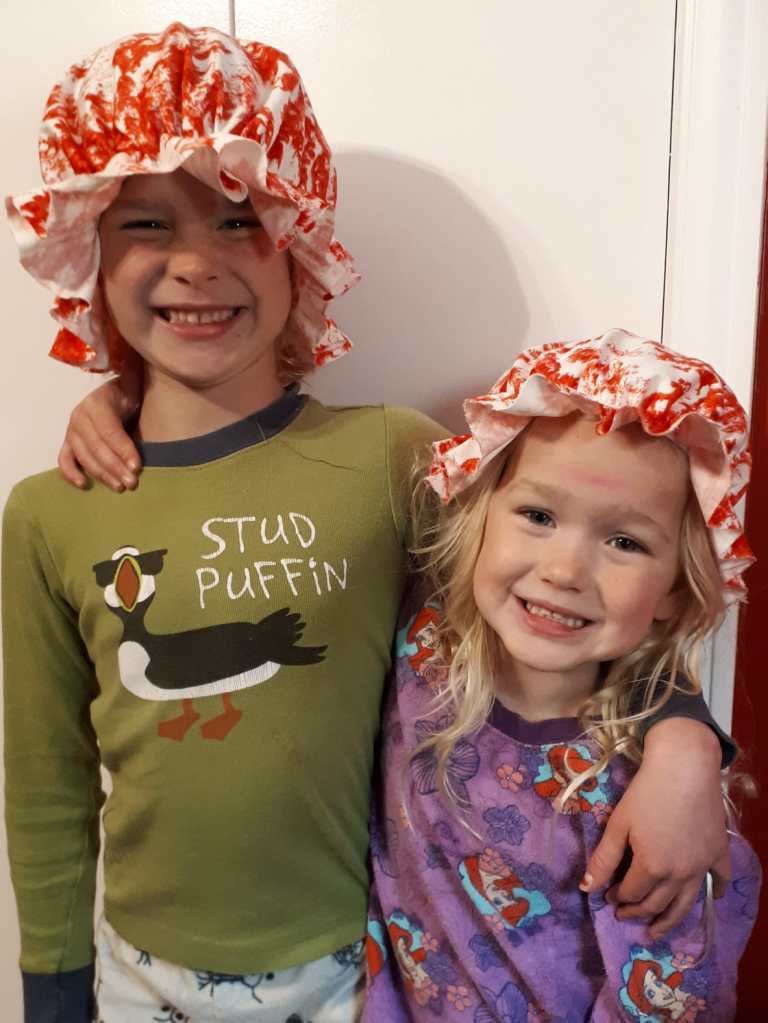
Look at those happy little faces! They were so thrilled by their caps!


So adorable 😊
LikeLiked by 2 people
Thank you! Going in to check on the girls later, and seeing them sleeping in their caps was so sweet!
LikeLiked by 2 people
Precious!! I love it!!
LikeLiked by 1 person
Precious!! I love it!!
LikeLiked by 1 person
😊Thank you, Janette!!
LikeLiked by 1 person