
Today, we’re going to do another fall themed craft! This one is great for any age (if you’ve got enough supervision). I did it with 3 girls: my 11- and 9-year-old nieces, and my 3-year-old daughter. The short form of this post is: dump a bunch of fall leaves and flowers on a table, give each girl a wreath and tell her to get creative. However, if you’ve looking for more detailed instructions and suggestions keep reading! Also, I’ve included a couple of ideas on how to turn this into a fall wreath party. Come take a look!
Invitations:
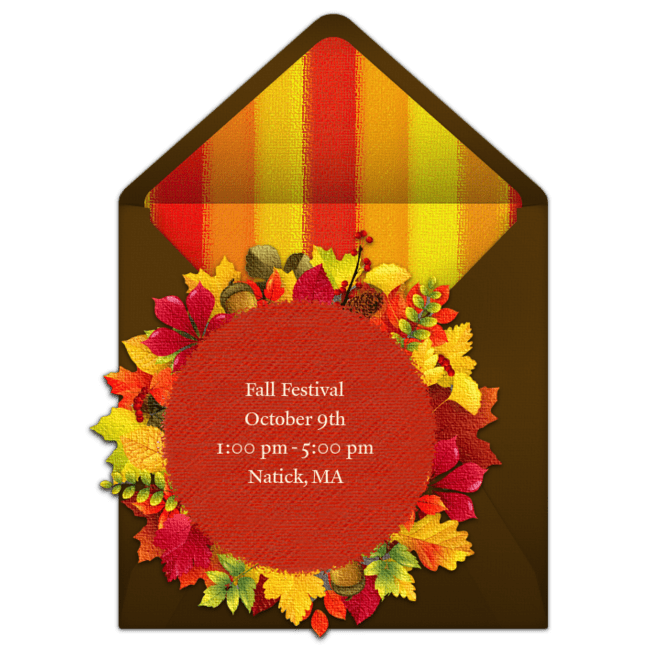
I always use Punchbowl.com for my invitations. This wreath invitation is perfect for this party! There are so many more fall invitations to choose from, and a lot of them are free. Punchbowl invitations also include options like R.S.V.P. and potluck.
Activity: DIY Fall Wreath
DIY Wreath Supplies:
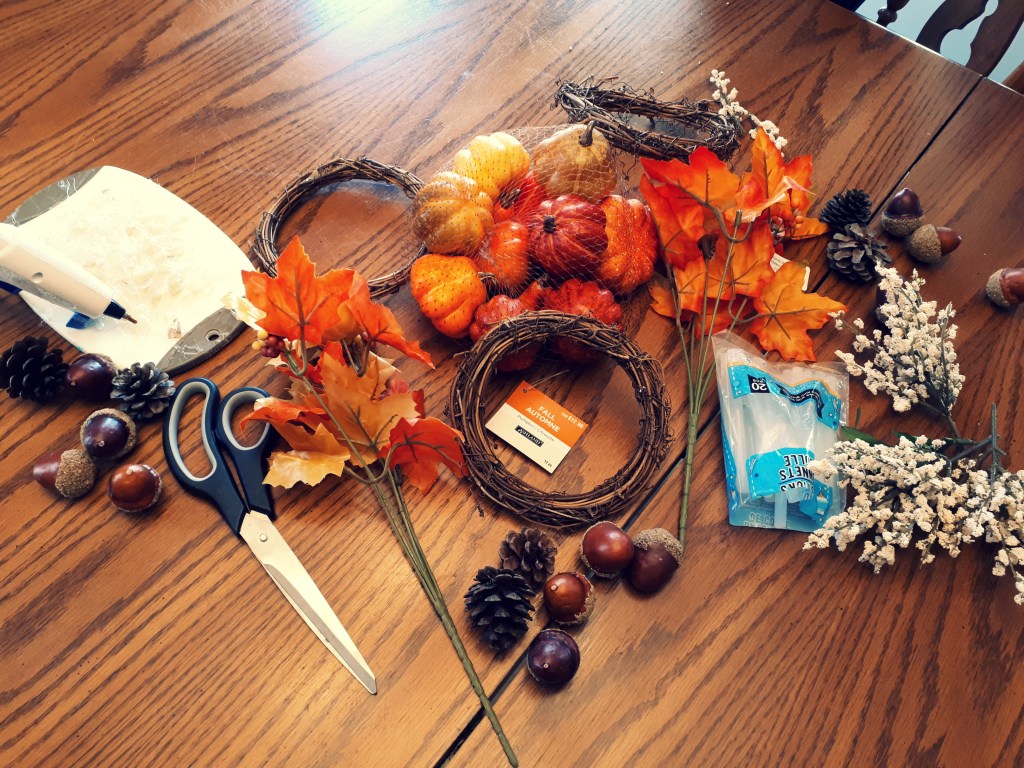
There are so many supplies to choose from here. A lot of the supplies on the list are optional. I think the non-optional ones will be obvious!
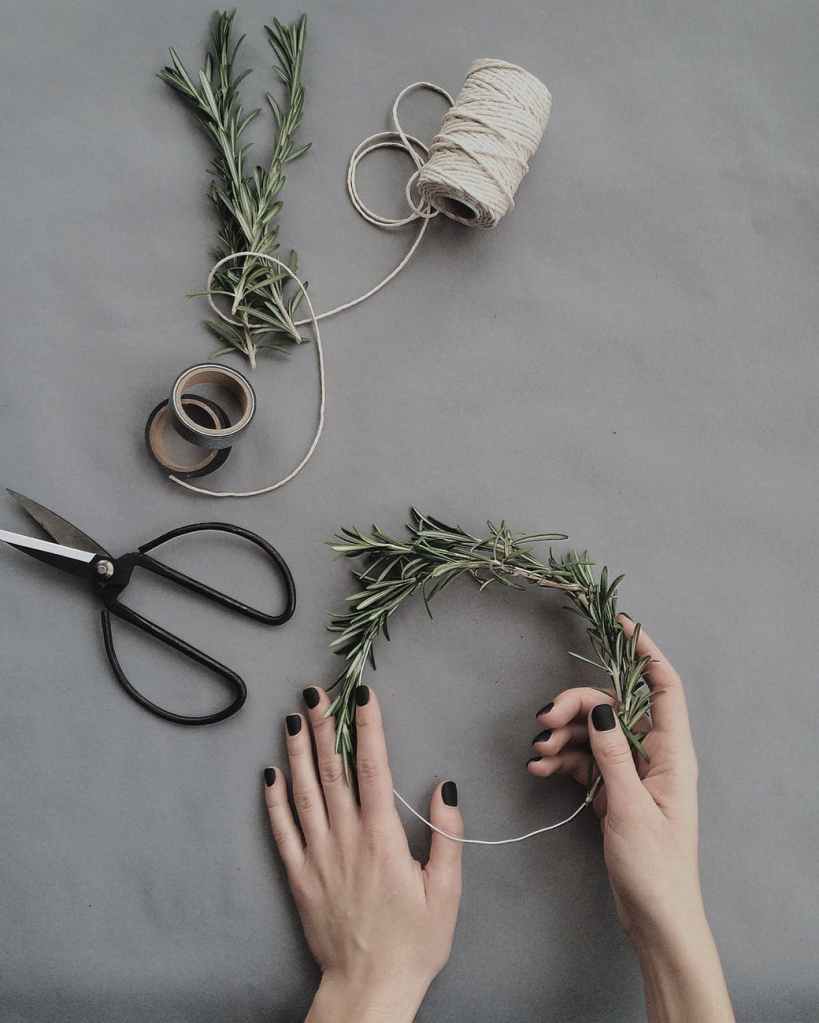
- Wreath. You can use a grapevine wreath like we did, or you could use a wire hoop, wooden hoop, or even cardboard wrapped in burlap or ribbon. Once you’ve made this oh-so-important decision you can move on to the really fun part!
- Fall flowers
- Small gourds
- Pine cones
- Acorns
- Leaves
- Twigs
- Bark
- Ribbon
- Burlap
- Chalk board (see the picture below)
- Scissors
- Glue gun and glue
Instructions:
- Set up your crafters at the table (a friend of mine hosted a DIY wreath bachelorette a couple of weeks ago! How fun is that?), each with a wreath. Either distribute the wreath decorations, or have them at a central location.
- Each person designs their own wreath. They can cut up the flowers, or have whole stems, they can decorate a small section, or fill the whole thing. Tell them to try out multiple designs before settling on one. Pine cones look really interesting turned in all directions, what else can they think of?
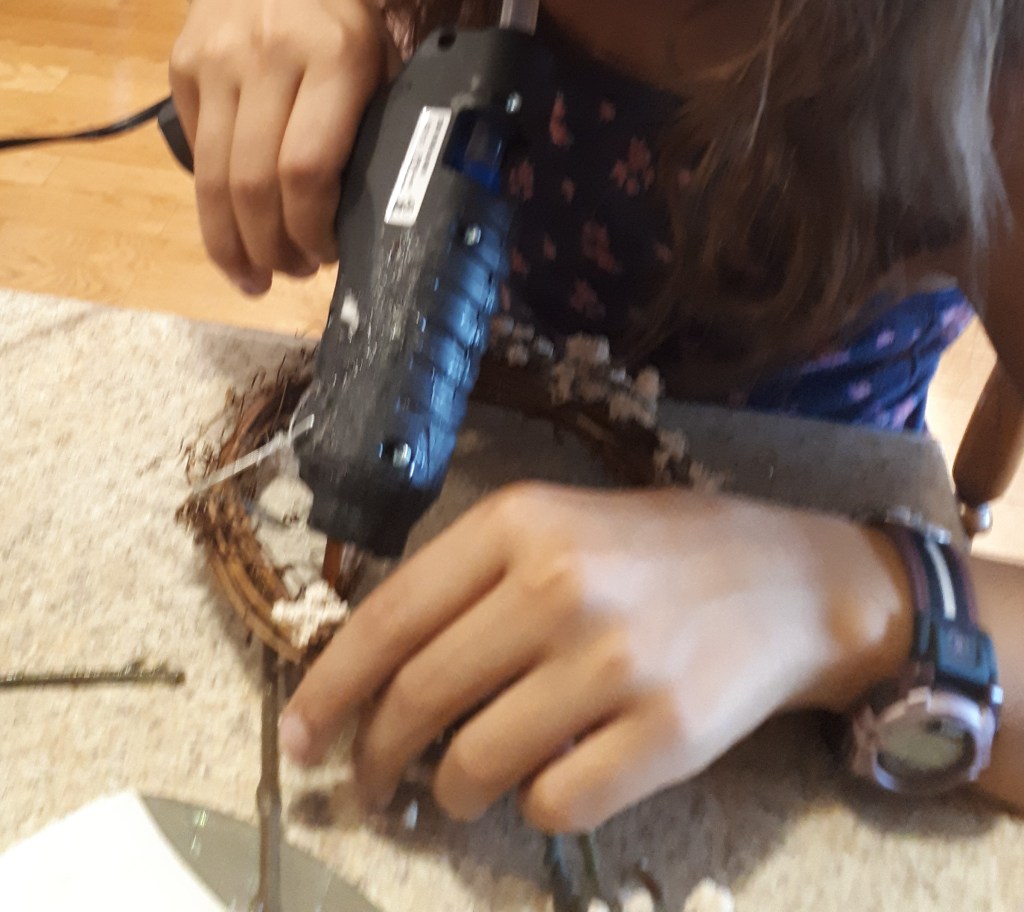
- Have an adult use a hot glue gun to attach all the pieces. If the kids are old enough (as my niece above is) you can let them glue their own. If you have a lot of people who can glue their own (like a group of adults) have multiple glue guns. You can even ask guests to bring their own.
- Optional: To hang the wreaths tie a piece of twine or yarn to the top of each wreath. Give each guest a suction-cup hook or a command hook so they can hang their wreath from a window or door.
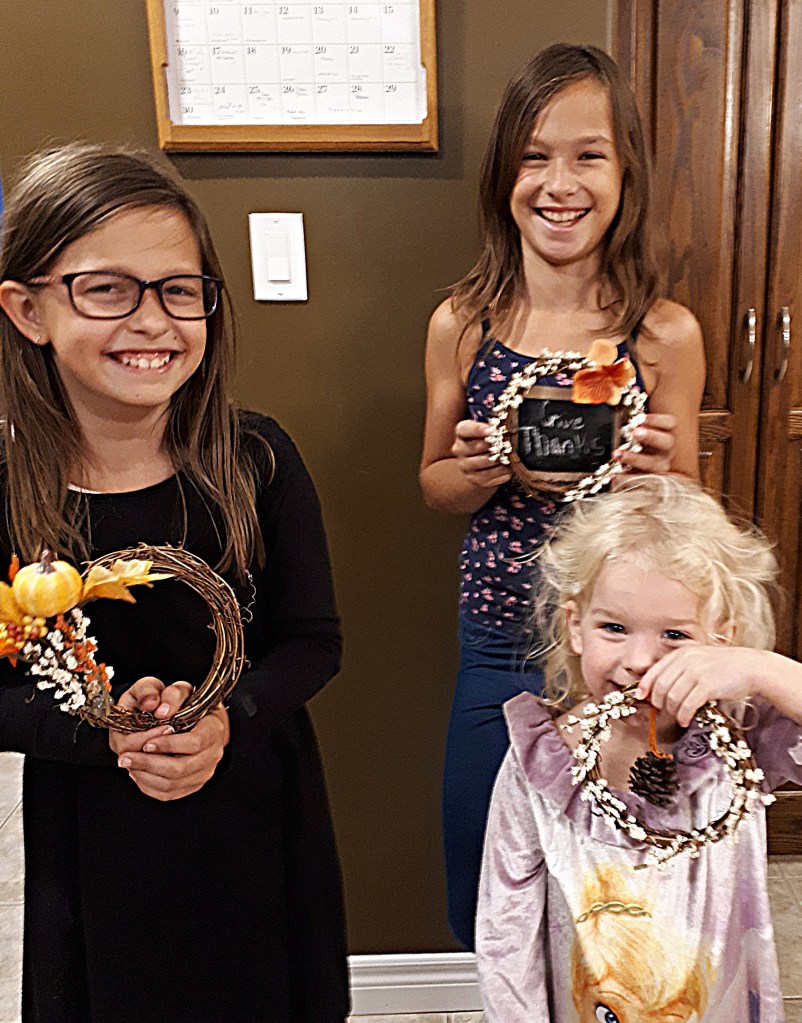
Don’t they look lovely!? And the wreaths are nice, too! Next up is some more craft ideas!
Jack-O-Lantern Craft:
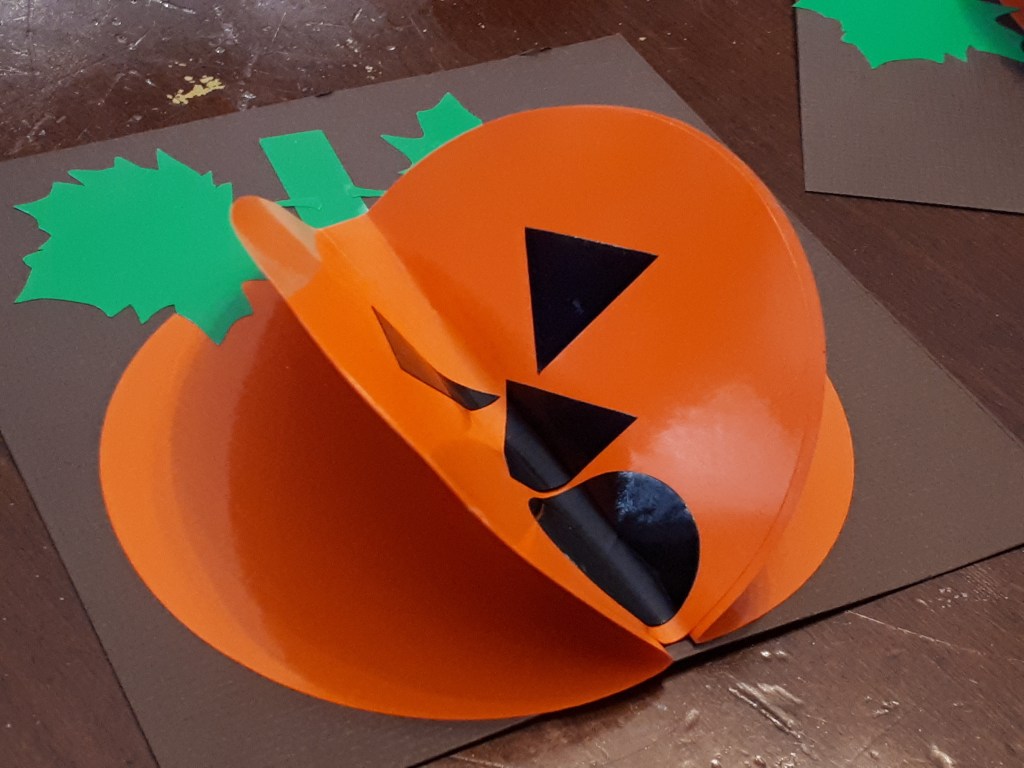
To learn how to make this Jack-O-Lantern craft please click here.
Yarn Pumpkin Craft:
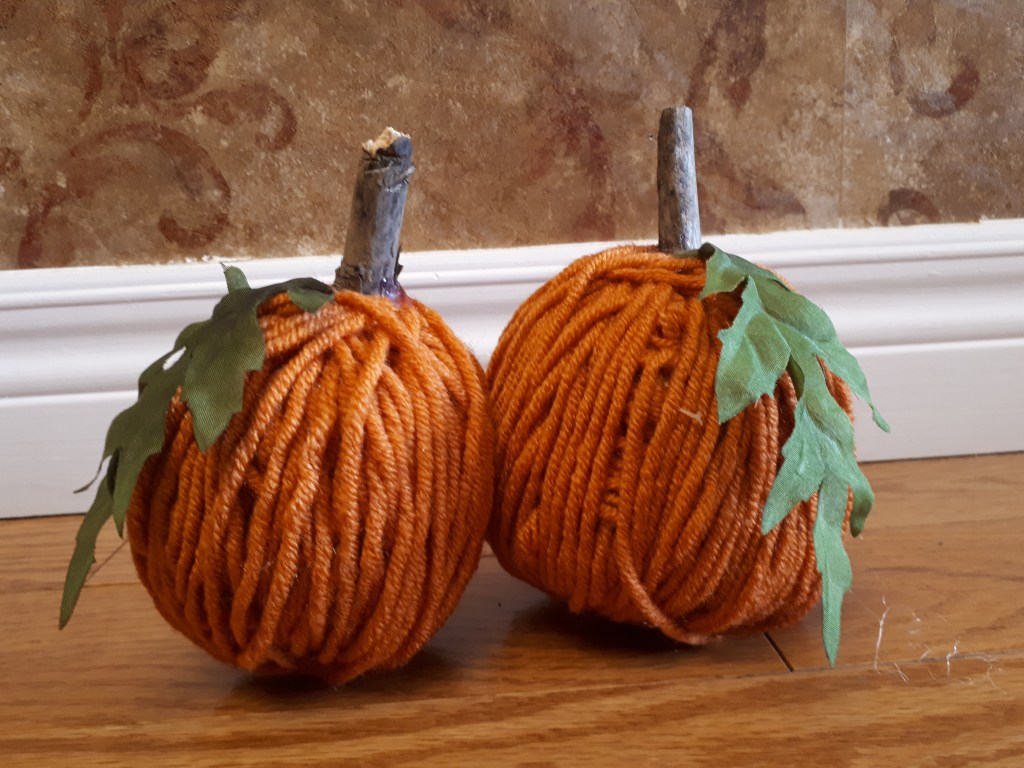
Okay, here’s a cute one! To get the instructions for this awesome craft please click here.
Food:

For a wreath party you should definitely have all food in a wreath shape, for example: vegetable tray, fruit tray, charcuterie board, and baguette sandwiches all shaped into circles. Finish your feast off with cupcakes in the shape of a wreath. There are lots of pictures of these on Pinterest. I haven’t done it myself, but I’m sure it wouldn’t be too tricky, and it would look adorable.
Game: Wreath Toss

Put a variety of pumpkins with long stems in a group. Have each player stand a distance away from the pumpkins. Take turns letting the children toss several wreaths, attempting to get the wreaths around the stems. The person who tosses the most wreathes over the pumpkin stems wins!
Decorations:
Table Centrepiece:

To read the tutorial on this Centrepiece check out my post: Thanksgiving Table Display.
The instructions for the napkin holder in the background can be found here.
Autumn Display:
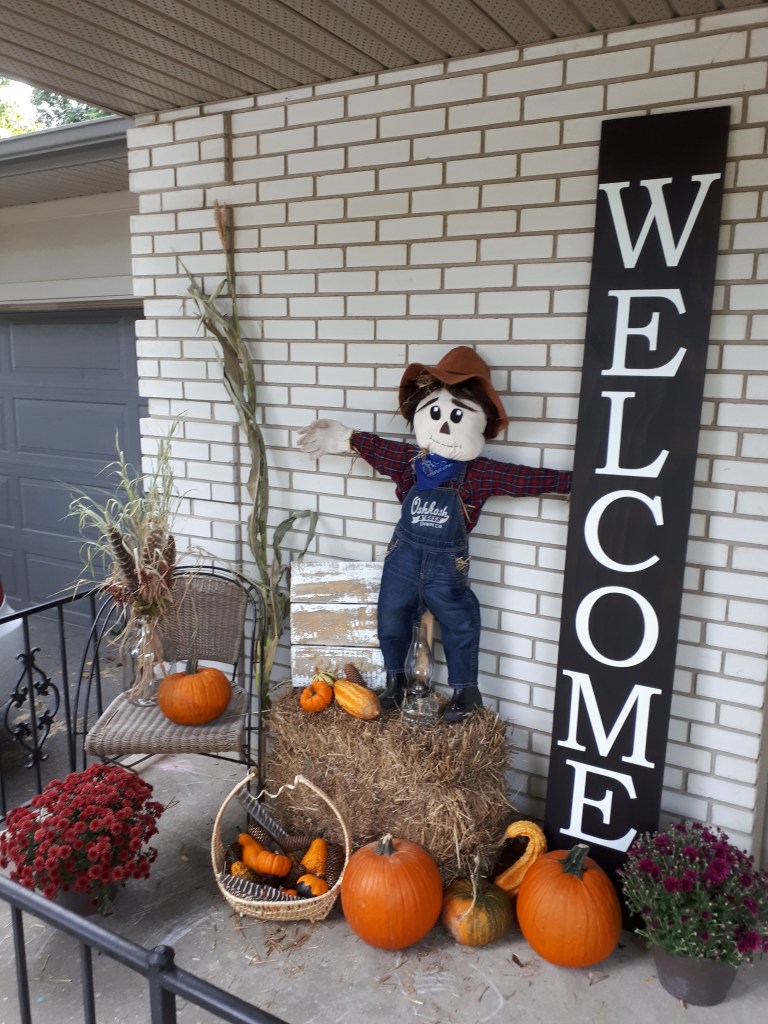
This display could easily be moved indoors to decorate a room (maybe not the straw…) To learn how I made my fall display please click on this link.
I hope these ideas help you have a very happy fall! It’s such a beautiful time of year, and a great reminder to thank God for all the blessings we have in our lives. I’m so thankful for YOU! The faithful readers, the occasional readers, and even the one-time readers. Thanks for making But First We Craft a success!
