
Happy Thanksgiving!
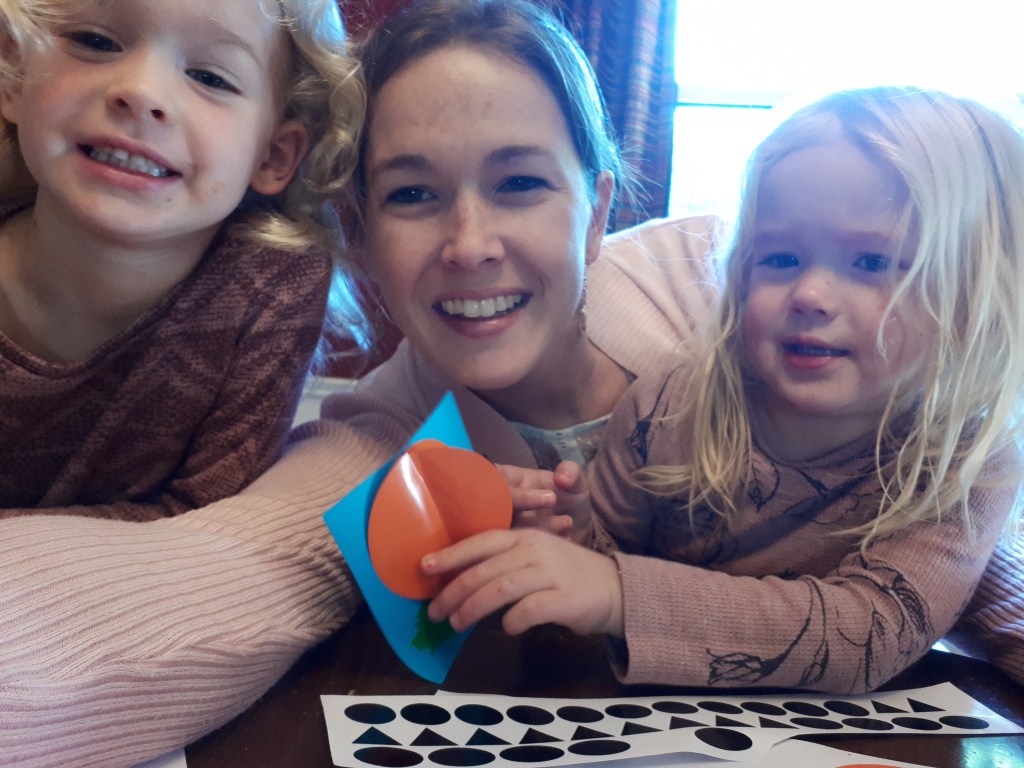
If you’re not Canadian you probably think I’ve got my calendar all mixed up. But for us Canadians, Thanksgiving is just a few short days away. YAY! I love thanksgiving. I love the changing leaves, the delicious Thanksgiving dinner (which, this year, my sister-in-law tells me is, “mystery meat.” 🤔 I’m feeling a touch apprehensive…like I should be sneaking in some chicken nuggets…or a turkey drumstick…) and THE DECORATIONS AND CRAFTS!!!!! ✨ I’ve just finished my porch display (which you can see on Instagram), and I think I’ll reuse my Table Decor and toilet paper roll napkin holders. (Click on the links for the tutorials), but I find I’m in need of a craft for my kids. We’re homeschooling so I think I need to pay more attention to the build up to, and education of, our various holidays. This started off as a pumpkin craft, but I changed it to be Jack-O-Lanterns because my eldest daughter is in JK and she’s learning colours and shapes. This will also help my two-year-old (three on Saturday!), even though points out triangles all. the. time.
There are two ways of doing this craft. I used my Cricut machine with adhesive vinyl, but you could use paper, scissors and glue. So, if you choose the paper method just substitute the vocabulary accordingly. It’s pretty straight-forward so there’s nothing to worry about!
Supplies:
- Orange adhesive vinyl
- Green adhesive vinyl
- Black adhesive vinyl
- Card stock in various colours
- Cricut
- If you don’t have a cutting machine use construction paper, scissors and glue. You can use a glass to trace the circles.
Instructions:
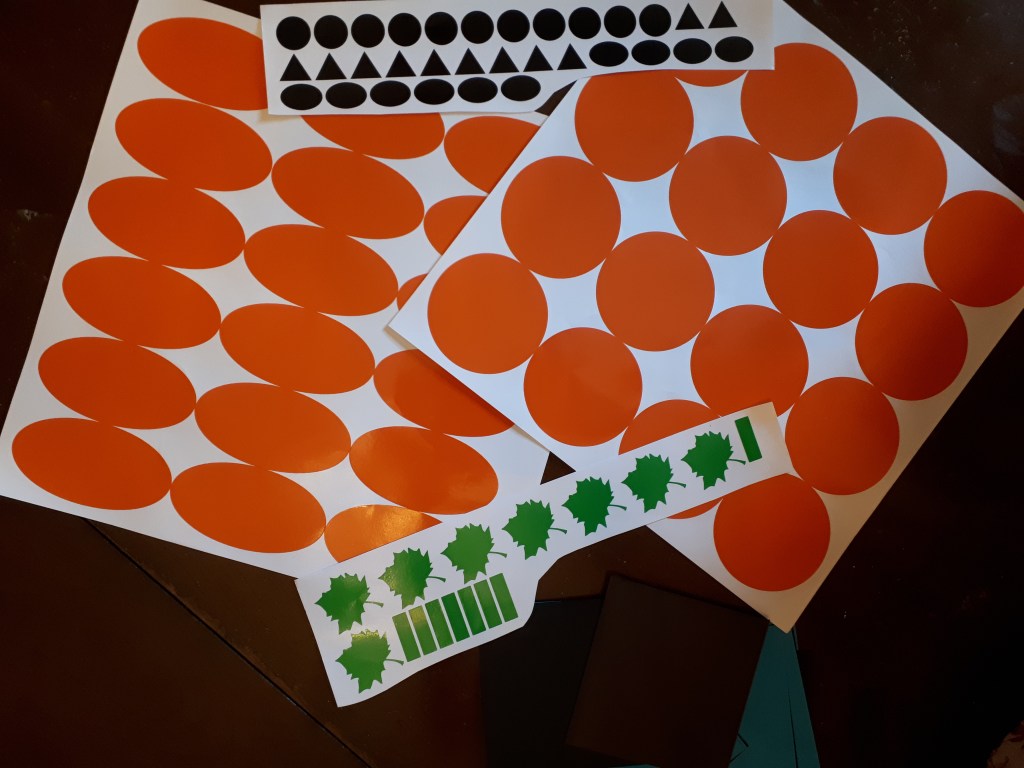
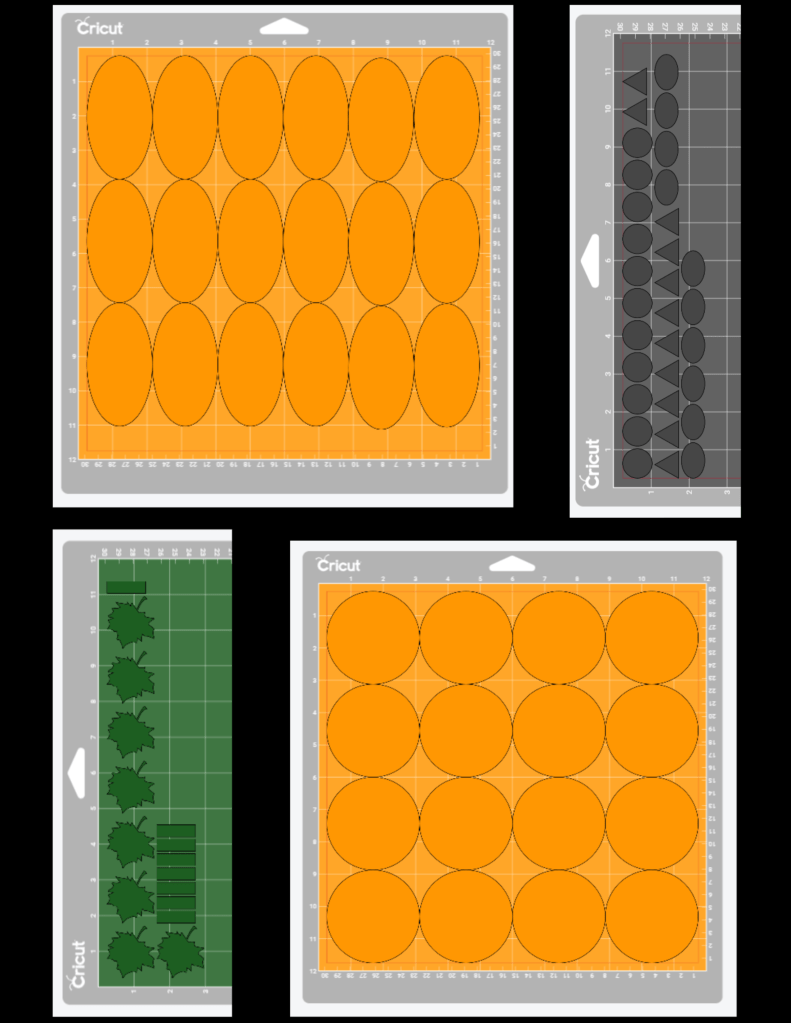
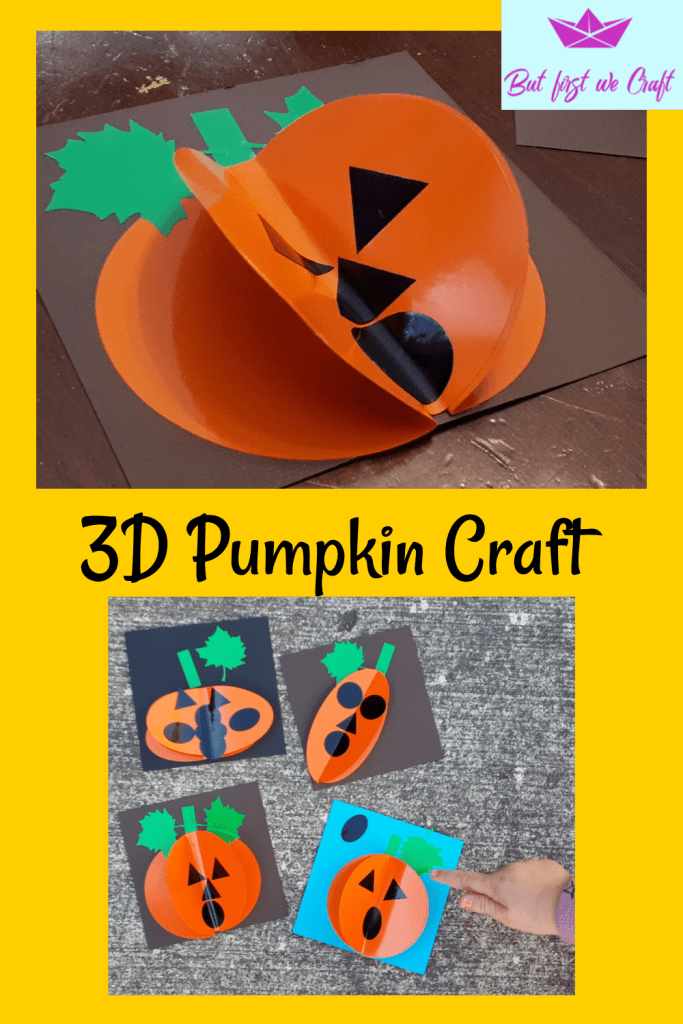
- Use your cutting machine to cut out big orange circles (my circles are 3 inches in diameter), big orange ovals, small green rectangles, small black triangles, small black circles and green leaves. If you don’t want the trouble of finding leaves just use the basic shapes. Here is how my Cricut mats looked:
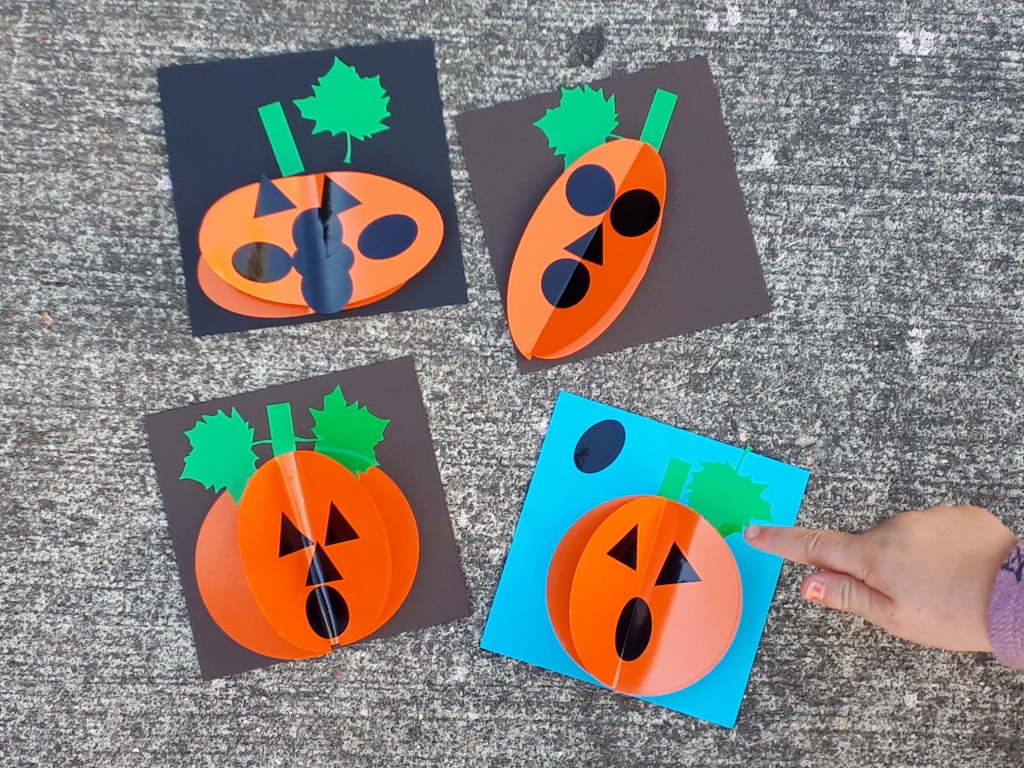
The big circles and ovals will become the pumpkins, the rectangles will be the stems, and the small shapes will become the faces. If you’re using paper you can have the children draw on the faces and the stem, or you can provide black paper and have them cut out their own faces. It doesn’t really matter if they look like triangles, etc, the kids will do their best and have practice with those lovely fine motor skills.
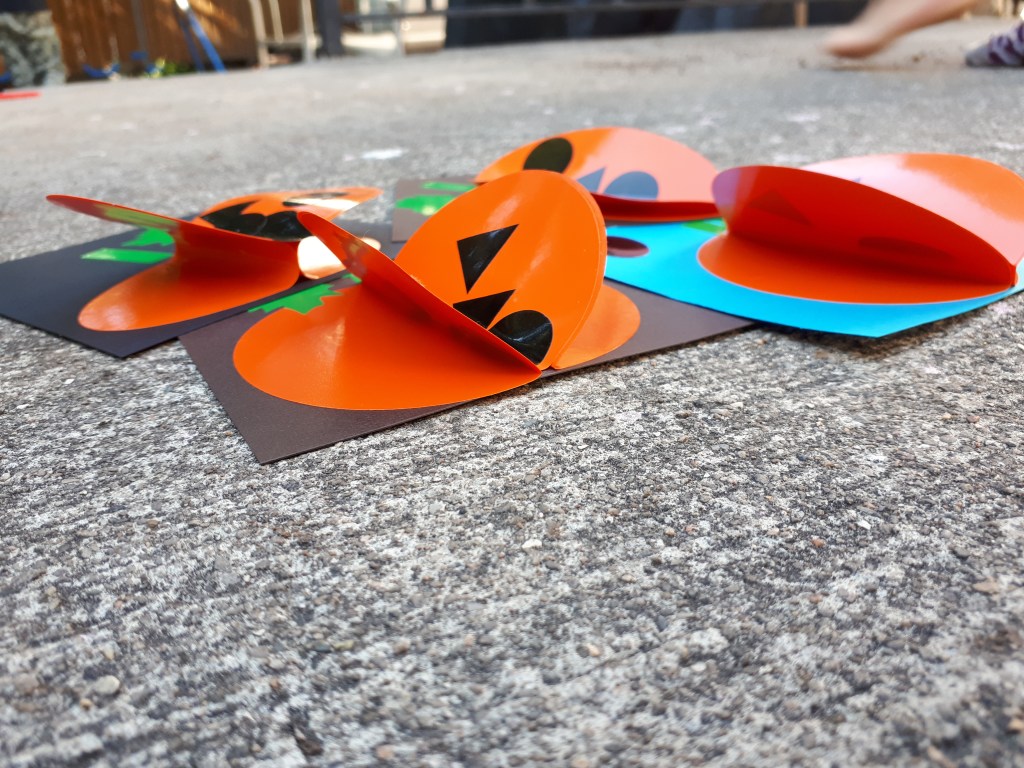
2. Can you see here how this works? Each pumpkin takes three circles, one to face the front, and one on each side, sticking half to the front pumpkin and half to the card stock. If you’re using the same sizes as me, the pumpkin should sit very near the bottom of the card stock so there’s room for the stem and leaf. If you’re using the paper method fold each circle in half so they’re easy to glue together.
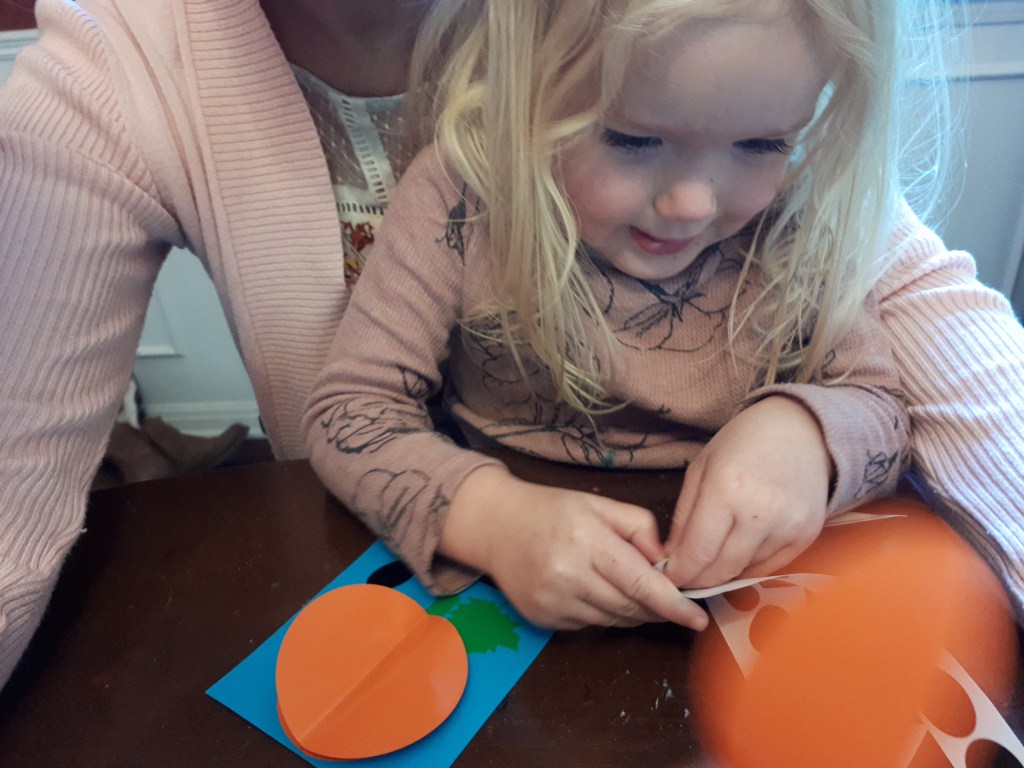
3. Add in your stem. Just pull up the top of the pumpkin a bit and slide that stem into place.
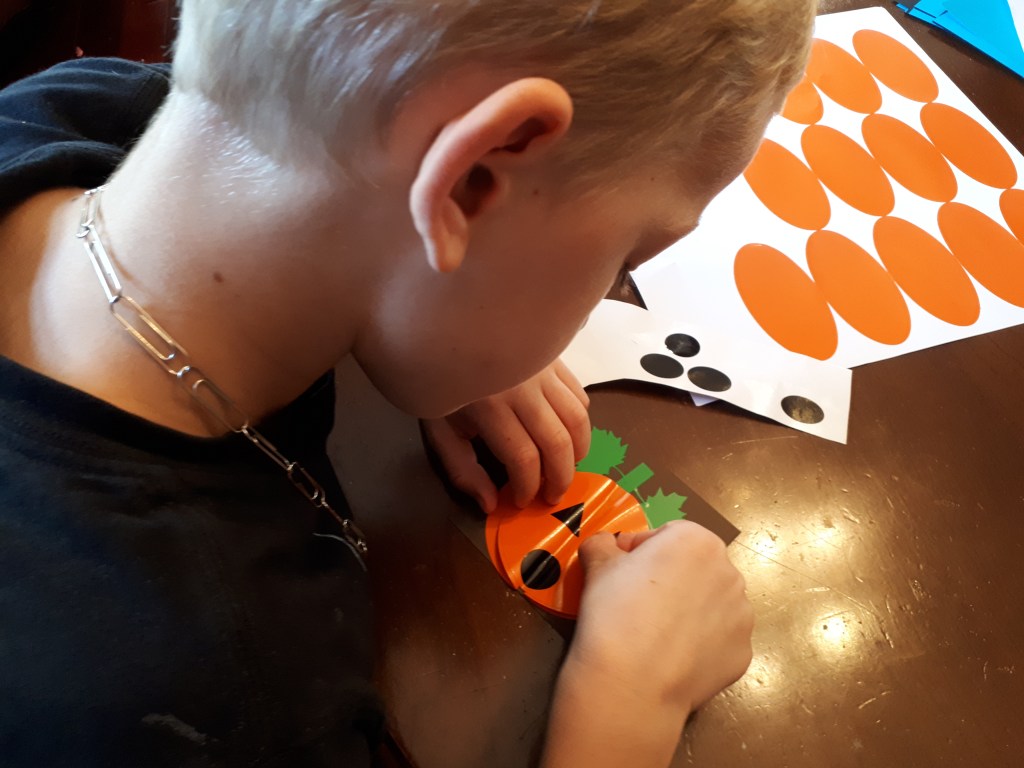
4. Decorate the face!
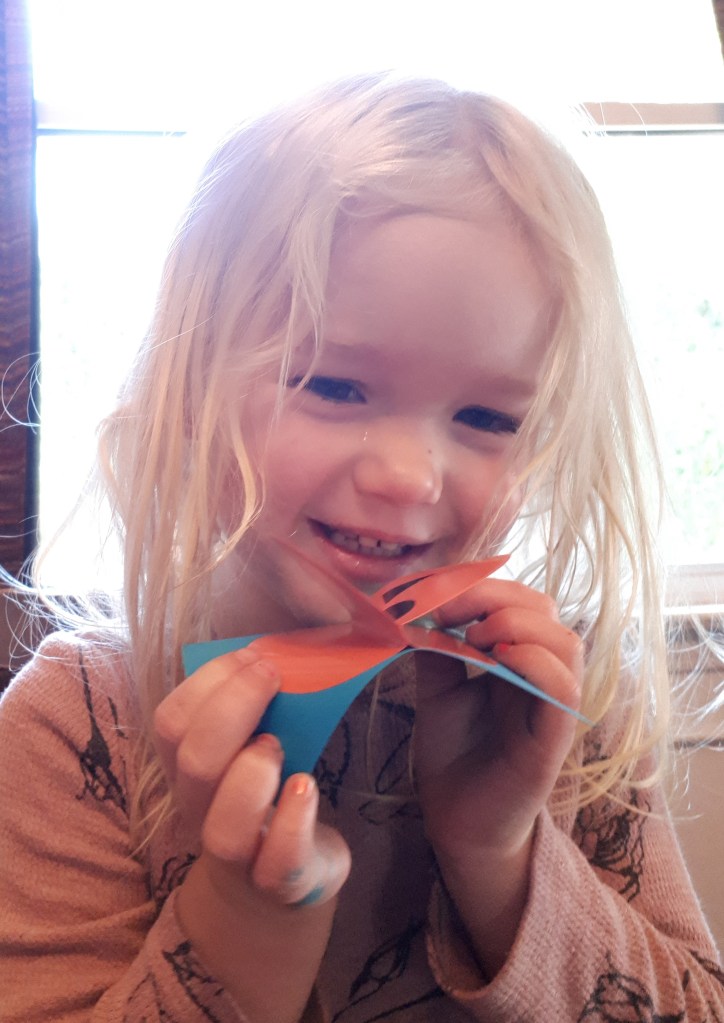
Would you look at how proud of herself she is? Such a happy little ragamuffin! 💕
You could use these as place cards for dinner, or for Thanksgiving cards, or to hang on walls as decorations. You could make big ones or small ones. You can do this craft with big kids or with small kids. This is a very versatile craft! You could also make them as pumpkins this week, and then decorate them into Jack-O-Lanterns in a couple of weeks. Let me know what you did! I’d also love to hear any guesses as to what this “mystery meat” is that I’m eating on Saturday! Happy Thanksgiving!

One thought on “Jack-O-Lantern Craft”