

When I walked into my church library last Sunday I saw the most adorable pumpkins made from books. I love books. I LOOOOVE BOOOOKS! So much. So when I saw these adorable pumpkins I could hardly wait to get to Goodwill to pick some books to carve into pumpkins (ya, I went there). Maybe you even have some books lying around the place that you could use. I made two pumpkins; a little pumpkin and a big pumpkin. If I wanted to I could still read the big pumpkin; the rounded edge didn’t cut off any of the words. So if you if you don’t want to actually destroy a book in the name of crafting just pick one with large margins, and glue the cover back on after fall ends. Trust me: this craft is too gourd to be true. 😉
Supplies:
- Book
- Scissors
- Orange paint
- Paintbrush
- Artificial Leaves
- Cinnamon stick
- Hot glue gun and glue
Instructions:
1. Remove the Cover

Using your scissors (or an exacto knife) cut the cover off the book. There’s a nice little gap in the spine of a book in between the pages and the cover. Just slide your scissors in and slowly cut. You can recycle the cover, we won’t be needing it.

2. Trim the Corners:

Using your scissors again round the edges of the pages to get the shape of a pumpkin. Maybe don’t pick a book with 1024 pages like I did. Literally. I don’t know what I was thinking. I tried many methods, and had a very sore and borderline blistered thumb by the end of it. I tried using an exacto knife that didn’t cut the pages very well, but successfully scratched my counter (🤦♀️). So I wouldn’t recommend that method. The way that worked best for me is this: I trimmed the first couple of pages (with scissors) then dropped the last page to make a template for the next section. Then I lifted all those pages but the last one to make a template for the next section, etc. This worked really well. You just need to make sure your spine is straight or it won’t match up properly when you’re done.

3. Paint the Edges:

My son took this picture for me, along with several others, all of which were blurry. This was the best of the options. I’m sure you get the idea, though. All you do here is lightly paint the edges of the pages of the book. Don’t soak them or they’ll stick together too much once they’re dry. Then just let the book sit there for a couple of hours to dry fully. When you think it should be dry gently feel it to be sure. If it’s not, give it some more time. If you try to craft prematurely you’ll get streaks on the pumpkin, or lose chunks of paint, which could ruin the effect. Once it’s dry fluff the pages (as if you’re scanning through trying to find something), but still be gently because it could still scratch.
4. Glue the book into a pumpkin shape:
Somehow I managed to take exactly no pictures of this part. Luckily, it’s just as easy as the title of this step indicates. Stand the book up and thoughoughly glue the edges of the spine together with hot glue. It should be two thin strips of fabric turned together to form a circle. Next adhere the front and back pages together, also with hot glue. You have to stick the pages together quickly, so it doesn’t dry before you can stick the front page to the back page. If you want you can glue these pages together in sections, i.e. glue the first inch after the spine and stick them together, stick the next inch, etc. In the picture below, on the right side of the pumpkin, you can see where I glued my pages together.
5. Glue on your stem and leaves:
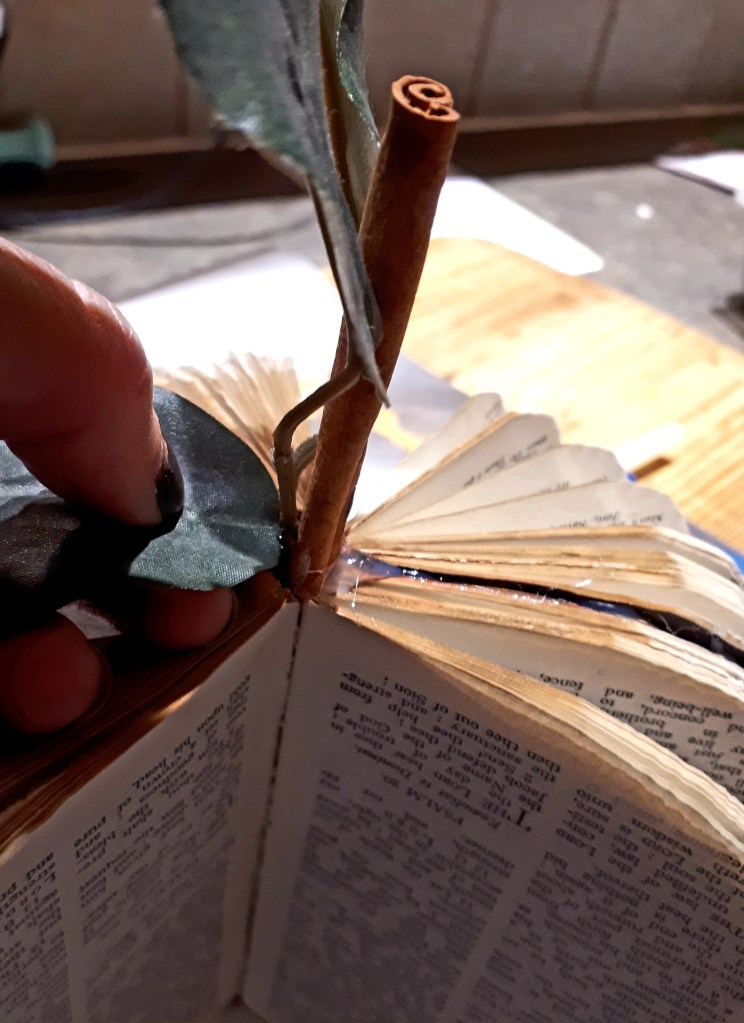
I used a cinnamon stick for my stem, the one at church used crumpled/twisted brown paper, you could also use a crushed or folded brown toilet paper roll. For my leaves I just grabbed a couple from the floor around the artificial tree in my living room🤷♀️. Now just put some glue into the hole of the spine and and shove in the stem and leaves. It was definitely an accident that I glued my stem and leaves into the bottom of my book. Oops. Oh well. It’s easy enough to fix…if it bothers you. It doesn’t bother me, though, so there it sits, bold as brass.

I have mine snuggled up on my cedar chest. They look so cute! I hope you try them out! If you liked this craft and are looking for other pumpkin related crafts be sure to check out our Yarn Pumpkins! It’s a craft that kids can do too! Happy Crafting!


One thought on “Book Made into a Pumpkin”