
Oven, Coffee and Tea
***Disclaimer: Do not try this without a parent if you’re a child. For this craft we will be using open flame, hot oven, hot tea and hot coffee. If you’re not careful you may be burned at every step!***
I have made many a craft, and hosted many a party, where I needed aged paper, or paper that looks like parchment. I can remember my mum helping me age paper in the oven for a school project in elementary school. I thought it was the coolest thing ever. Now, I’m teaching my son💗. I’ll show you my three methods for aging paper, too! And the pros and cons of each. My favourite is using tea, and I’ll tell you why it’s my favourite, and why sometimes it’s not practical.
Supplies for All Methods of Aging Paper:
Each method for aging paper will also have a list of supplies used in that method.
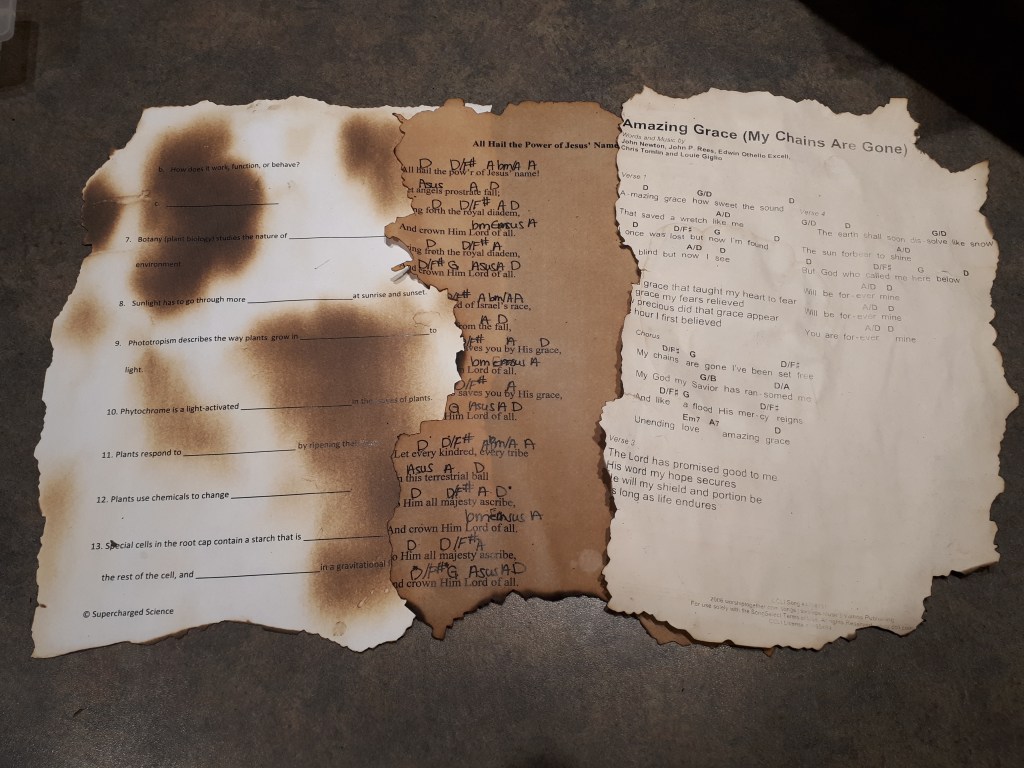
- Paper. Plain computer paper is my favourite. We used scrap paper for this tutorial. If you want something printed on it (from a computer) do that first. If you’re going to write on it, do that after aging it. I print and write and age in this order because aged paper will be more difficult to put through the printer because of the ragged edges (I haven’t tried it, but I can just imagine having to pull it back out of a jammed printer – no thanks!), and I’m concerned that pen or marker will smudge during the liquid aging process. Attempt a different order at your own peril!
- Lighter
Step One for All Methods of Aging Paper:
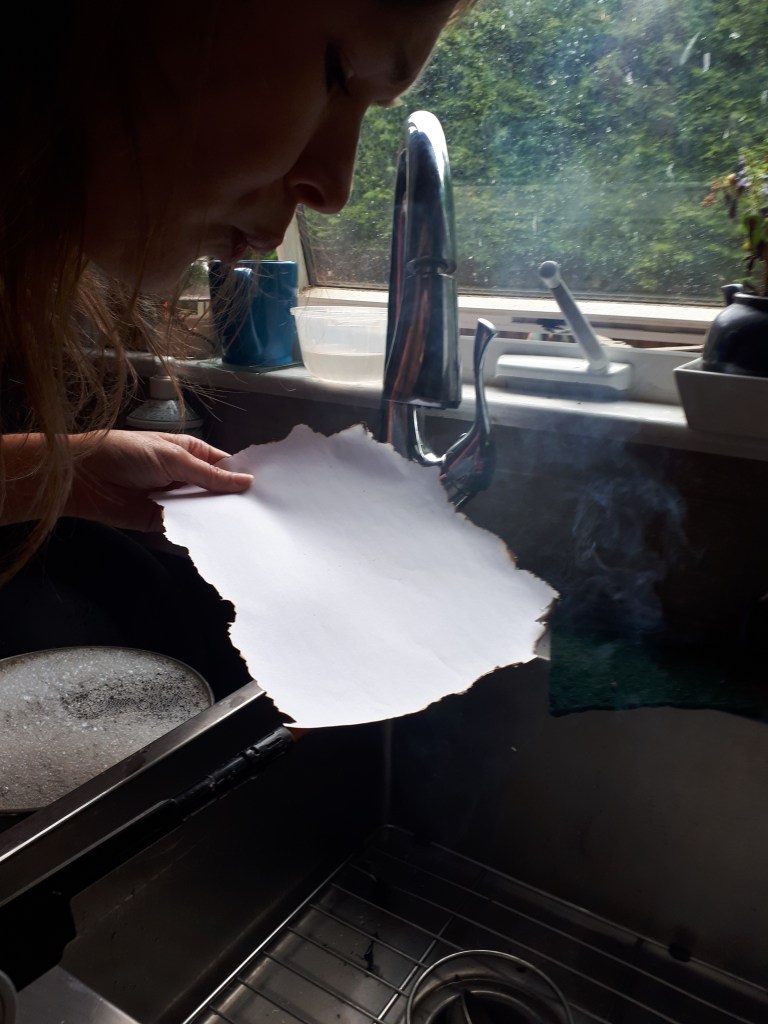
Standing over a sink, with water at the ready, burn the edges of the paper, a bit at a time. The goal here is to take the perfectly cut edge off the paper. (Another thing you could do is make your own paper! Check out this tutorial by my new friend Sarah-Jayne at Paper Scissors So!) You don’t need to burn much off, but if you do that’s okay, too! I usually do about half an edge at a time. If I do more the fire is liable to get out of control…hence doing it over a sink. Remember that fire goes up, so if you want to slow the flame’s progress tip the edge up, and if you want it to take more paper tip the page down.
Aging Paper Method 1: Oven
- Turn your oven on the broil setting, and move your oven rack to the highest rack (or second highest; you don’t want it to catch fire).
- Place your paper with the burnt edges onto a cookie sheet and slide it into the oven.
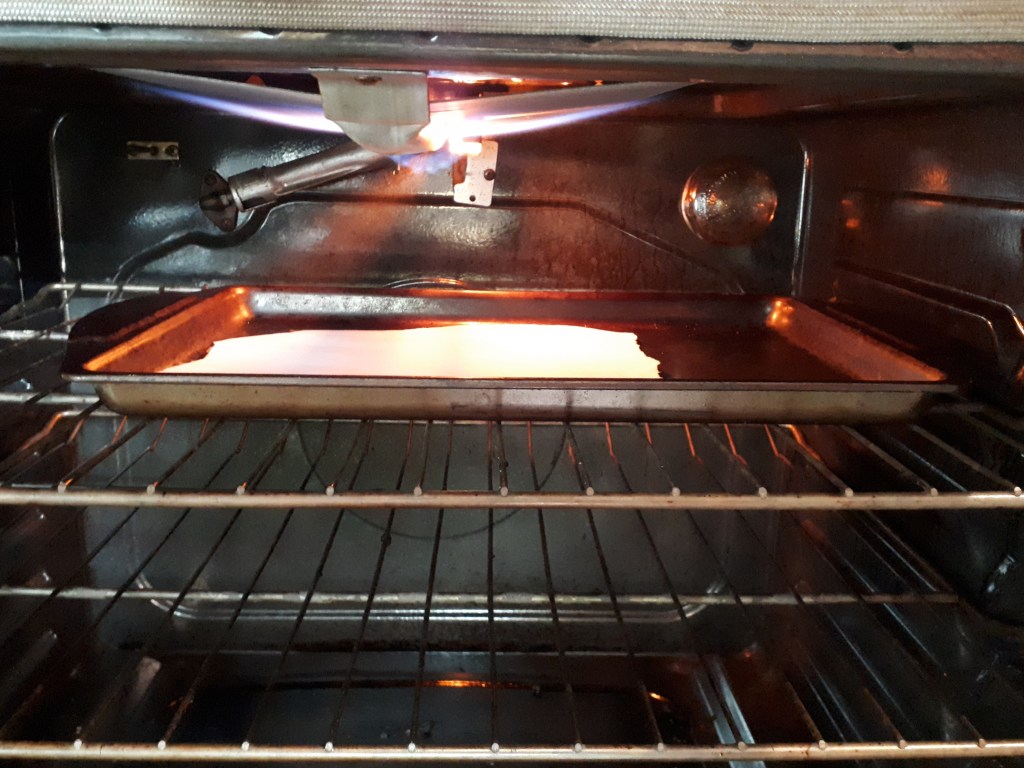
3. This method works the most quickly if the oven door is closed, but it’s harder to keep an eye on, so you’ll have to gauge how frequently it should be checked.
Pros and Cons of Aging Paper in the Oven
The main pro of this method of aging paper is that it is very quick. Now that the paper is aged you can write on it right away. The con of this method is that the paper is much more brittle after broiling. I’ve made things this way and had them disintegrate while writing on them, though not frequently.
Aging Paper Method 2: Coffee
Additional Supplies for the next 2 methods:
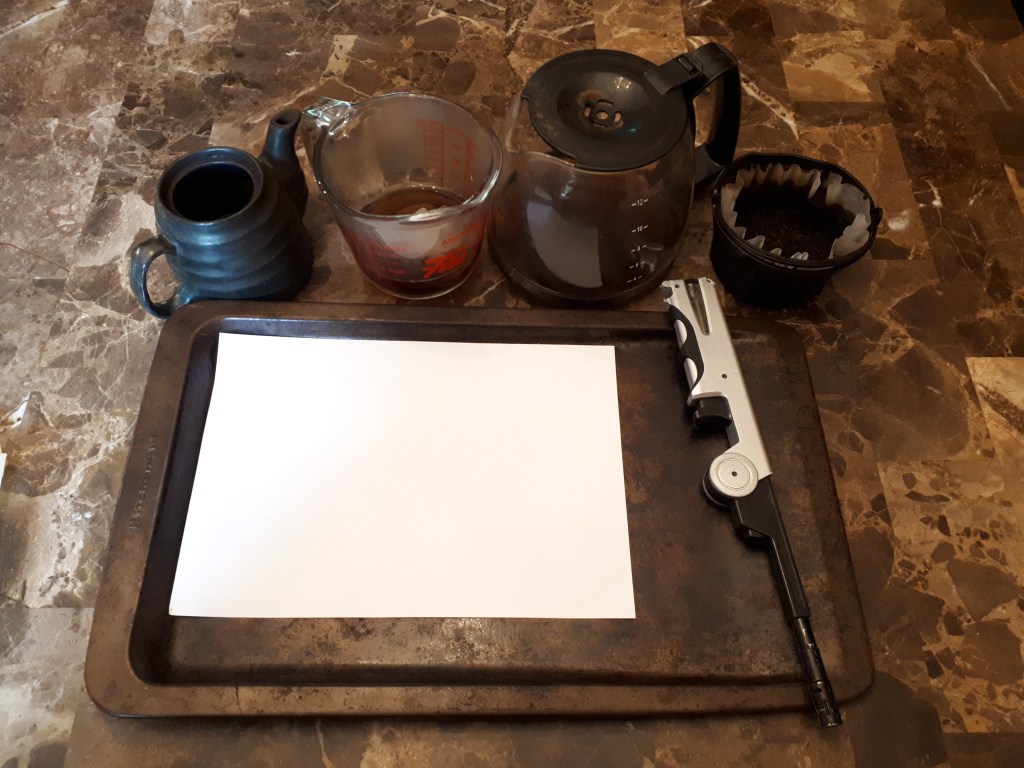
- Coffee/Tea
- Coffee Grounds/Tea Bags or Leaves (optional)
- Somewhere for the paper to dry. I usually use a wire rack (more on this later)
Instructions:
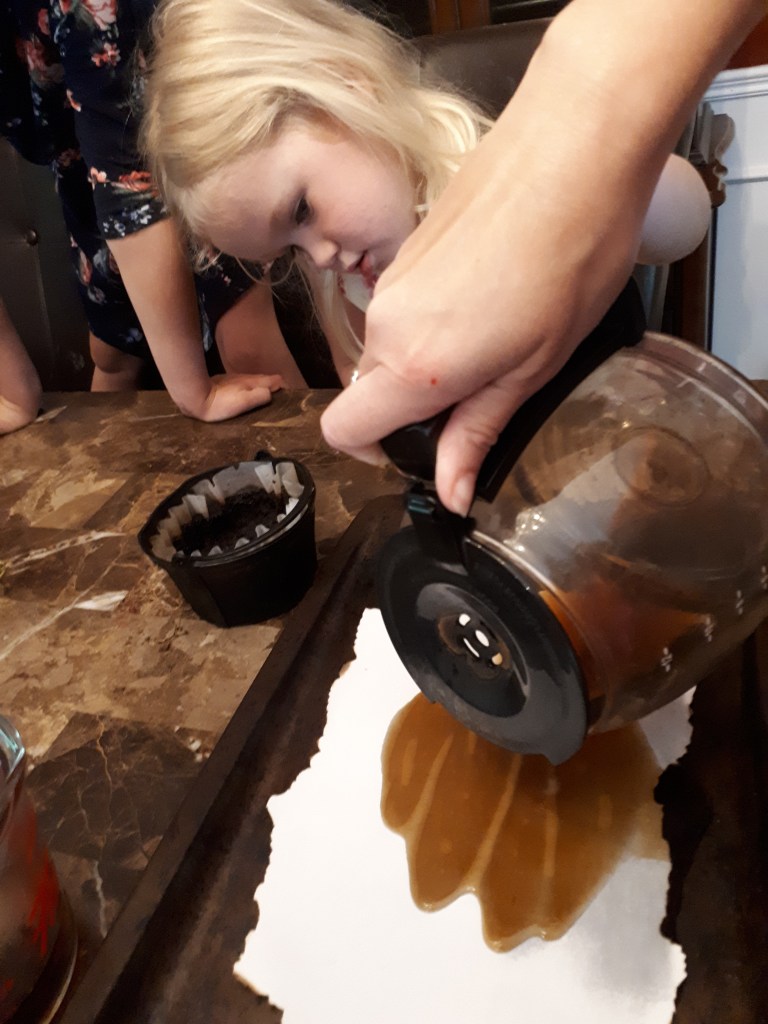
- Place your paper with the burnt edges on a cookie sheet.
- Pour coffee over the page, shuffling it gently to get the coffee underneath and on top.
3. Sprinkle coffee grounds onto the paper (optional).
4. Leave it to soak for several hours. For this tutorial I let it sit for 2 hours.
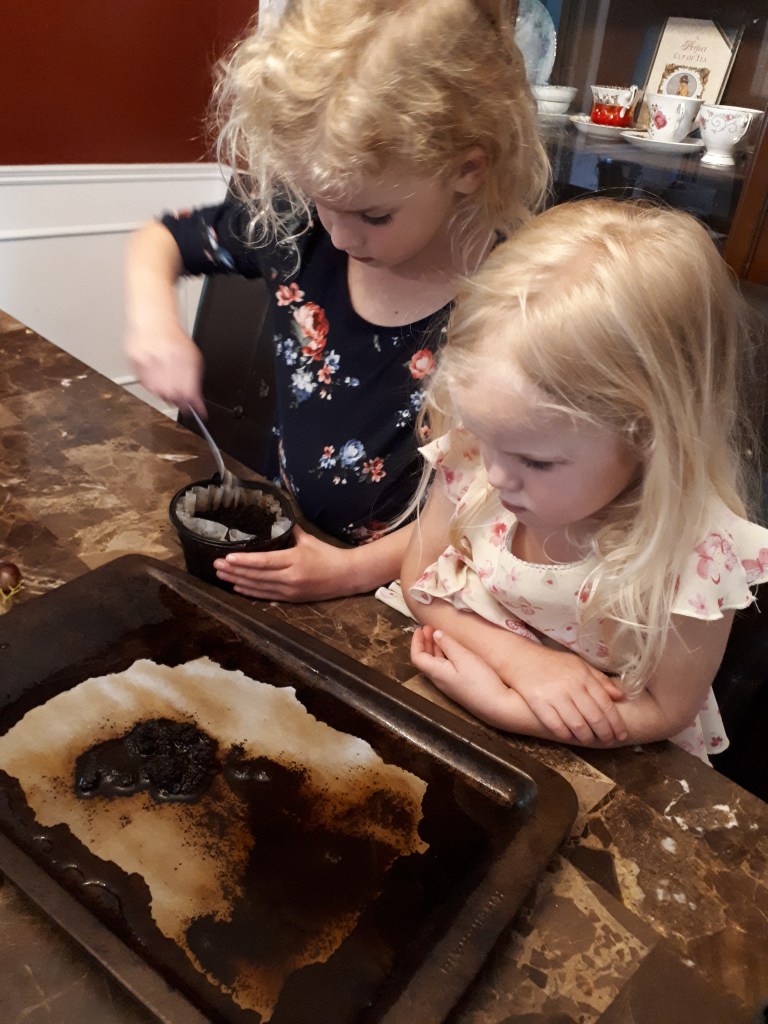
5. Remove from coffee and lay flat to dry on:
- a) a wire rack. This increases air flow, but may result in little lines where the wire hits the paper. To reduce lines, periodically move the paper on the rack.
- b) a floor register. The forced air will help it to dry more quickly. It’s really hot here right now, though, so we don’t have any heat on.
- c) a cutting board.
You can also use a hair dryer to gently dry the paper. You shouldn’t leave it flat on a surface because the coffee residue could stain the surface.
Pros and Cons of Aging Paper with Coffee
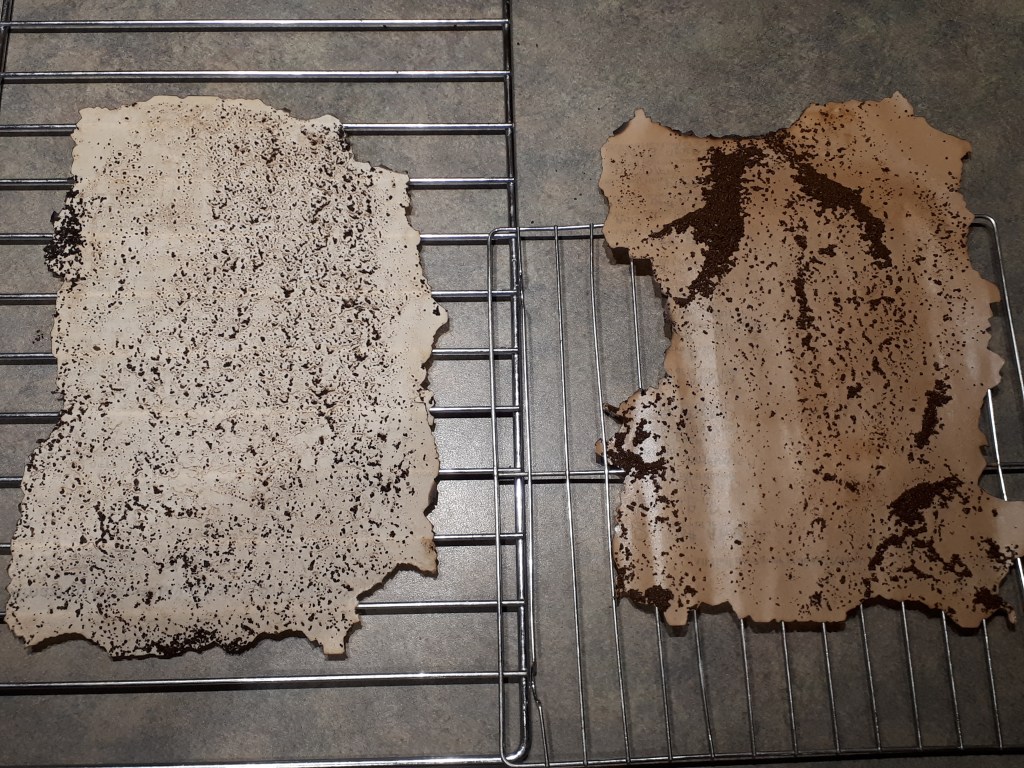
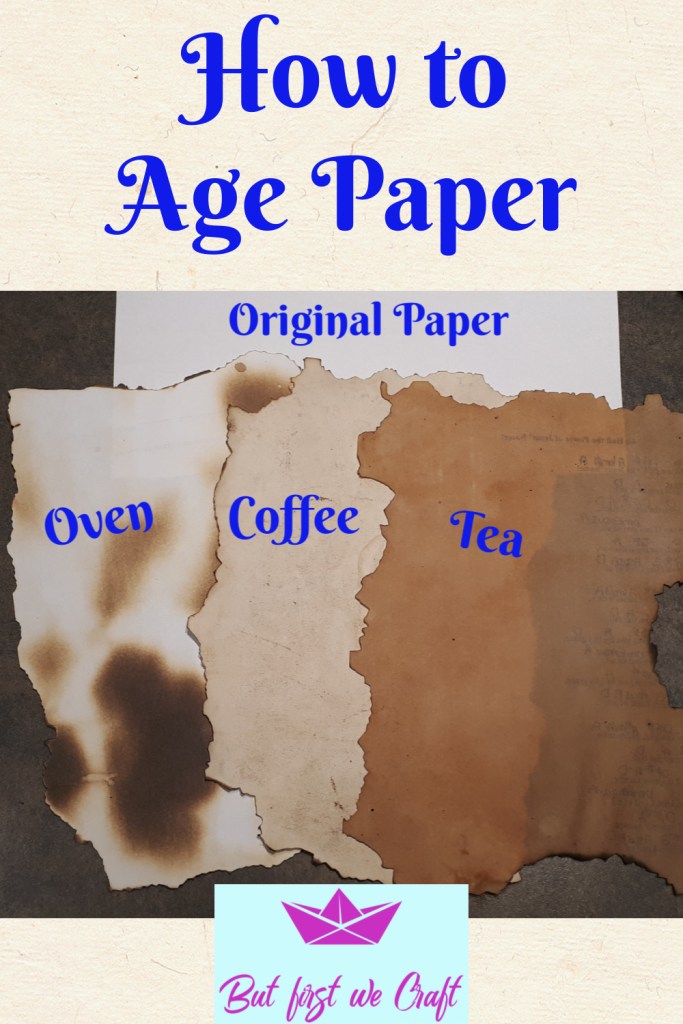
The main pro is that this method of aging paper doesn’t leave the paper weak after it’s dry. You can write on it, fold it, whatever you would do with normal paper. The main con is that it takes much more time, though it isn’t any more labour intensive. Another thing to consider is that it doesn’t make the paper as dark as the next method: Aging Paper with Tea. This may be fine with you, depending on what you’re making. You can see the difference in the picture below. On the left is paper drying after being soaked in coffee and coffee grounds. On the right is paper drying after being soaked in tea, and tea leaves.
Aging Paper Method 3: Tea
Additional Supplies:
- Tea
- Tea Bag, used is fine (optional)
- Somewhere for the paper to dry. I usually use a wire rack (see Instructions in Aging Paper with Coffee for details)
Instructions:
- Place your paper with the burned edges on a cookie sheet. Pour the tea over the paper, shuffling it a bit to make sure there’s tea above and below the paper.
- Open the tea bags and sprinkle the tea leaves over the page (optional). Or you can place several tea bags around the paper to make some places darker than others. I always use tea bags that have already been used. It would probably make it darker if you used fresh tea bags.
- Leave paper to soak for several hours.
- Remove paper from tea and allow to dry.
Pros and Cons of Aging Paper with Tea
These pros and cons are very similar to the coffee method. The paper isn’t brittle once it’s dry, it takes more time, but the same amount of effort to make as the oven and it’s darker than coffee. Usually I am able to plan ahead with aged paper, like for my Harry Potter Birthday Party: A Day at Hogwarts, so I don’t need to use the oven. But there are times, like when I made a treasure map of our basement for my kids, that we wanted to get it done right away. That’s when the oven method of aging paper comes in really handy.
Dried Paper:
This is what the three pieces of paper looked like after they were dried and brushed free of their grounds and leaves.
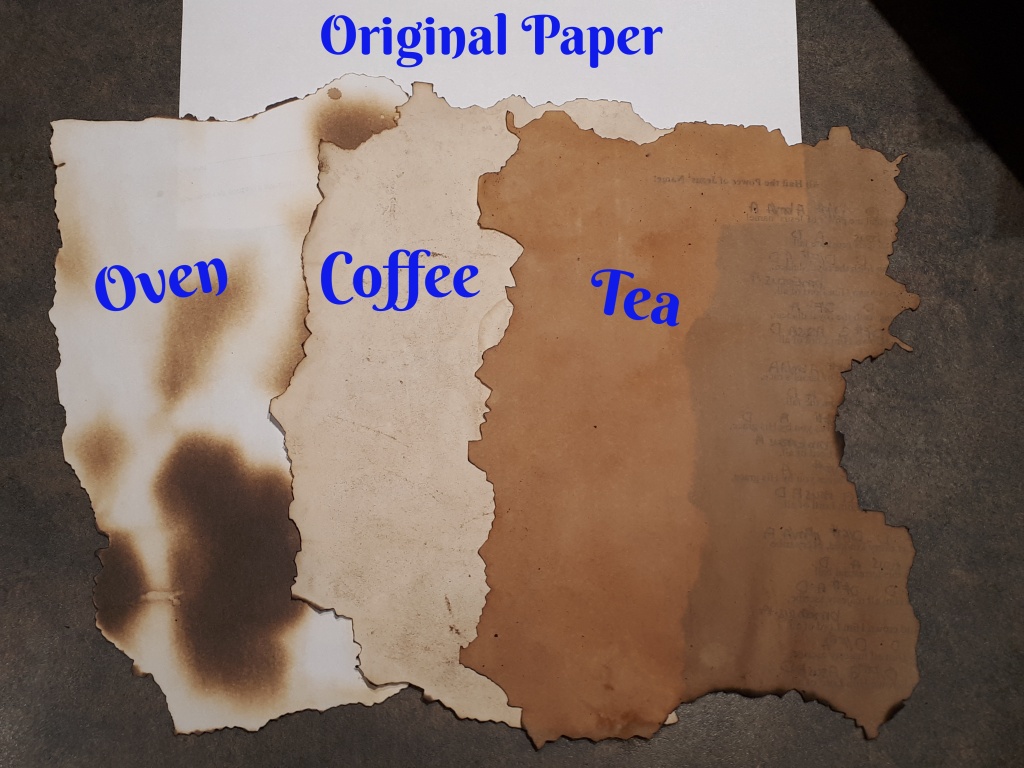
As I mentioned before, we used scrap paper for this tutorial. Here is what the writing (from the printer) looked like after we aged our paper:
It looks to me like the tea darkened the text, the coffee lightened the text and the oven kept it the same. That may be something to consider, too, when aging your paper.
Which method will you try? Do you like the tea or coffee method better? Let me know in the comments why you need to age paper!

thats awesomr
LikeLike
Thank you! I’m so glad you like it!
LikeLike
I’ve aged paper a few times because treasure maps are just better that way. Once I think I tried to age paper so I could make it look like an old scroll, then I used as a book to write things in. It’s fun to do but sadly I don’t have a reason to need to! Perhaps if I were to make a piece of wall art with a favorite poem…?
LikeLike