

This spring we put gardens into our backyard. We had a garden several years ago, but when my daughters were born 19 months apart I found I could barely take of my family, let alone a garden. So when we expanded our fence we took out the garden and put in grass. Since then the little children have grown up a bit and we started homeschooling. I feel the need for a garden again. I enjoyed it when we had it, but it was a lot of work. It was always nice having the fresh veggies, and getting to see everything grow. And of course the kids like to harvest as much as I do. And now there’s the added bonus of the homeschooling part: think of all they can learn through having a garden! The Better Health Channel in Australia lists, among others, these benefits: responsibility, cause and effect and learning about science (plant parts, environment, weather, animals…). I also love that they can see that their hard work can amount to something so amazing. They’re helping to put food on our table! That’s not usually a kid thing to do.
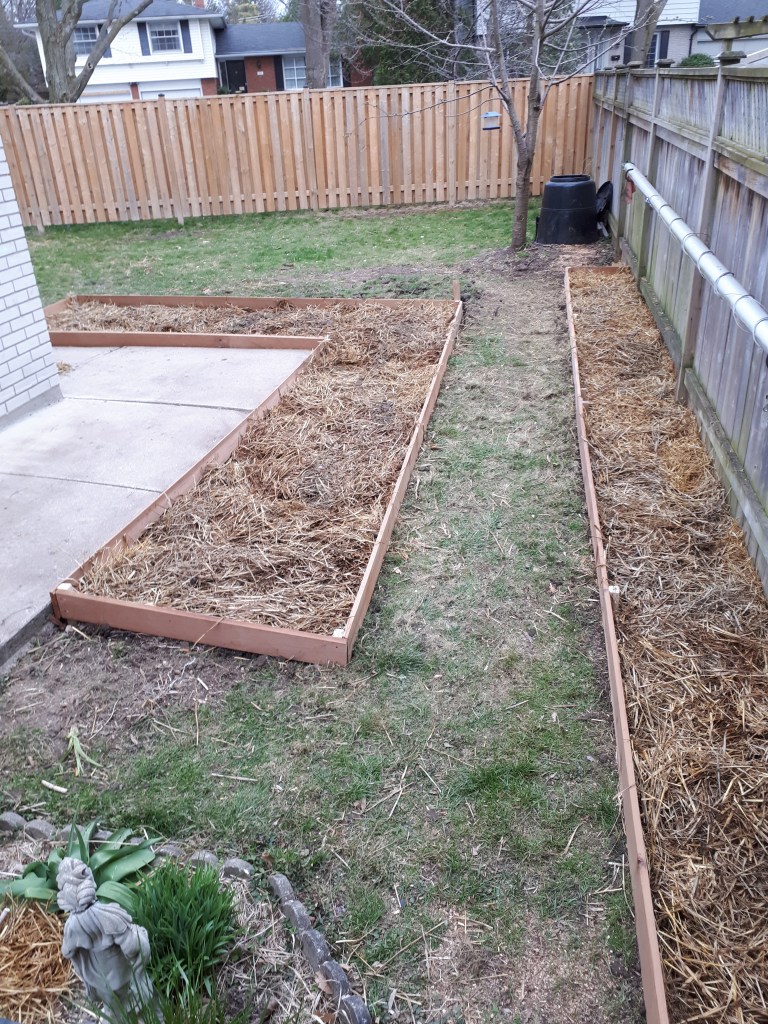
We started seedlings at the beginning of March, and we spent the last couple of weekends building bordered beds and planting all our seedlings and seeds. I am so excited about this! One total oversight was that we didn’t have garden markers. Last year I designed some DIY Wooden Garden Markers for my friend Kristen at Shifting Roots. I didn’t have enough of these supplies on hand, though, when we were planting on Saturday morning. So my son helped me design and make these!
Supplies:
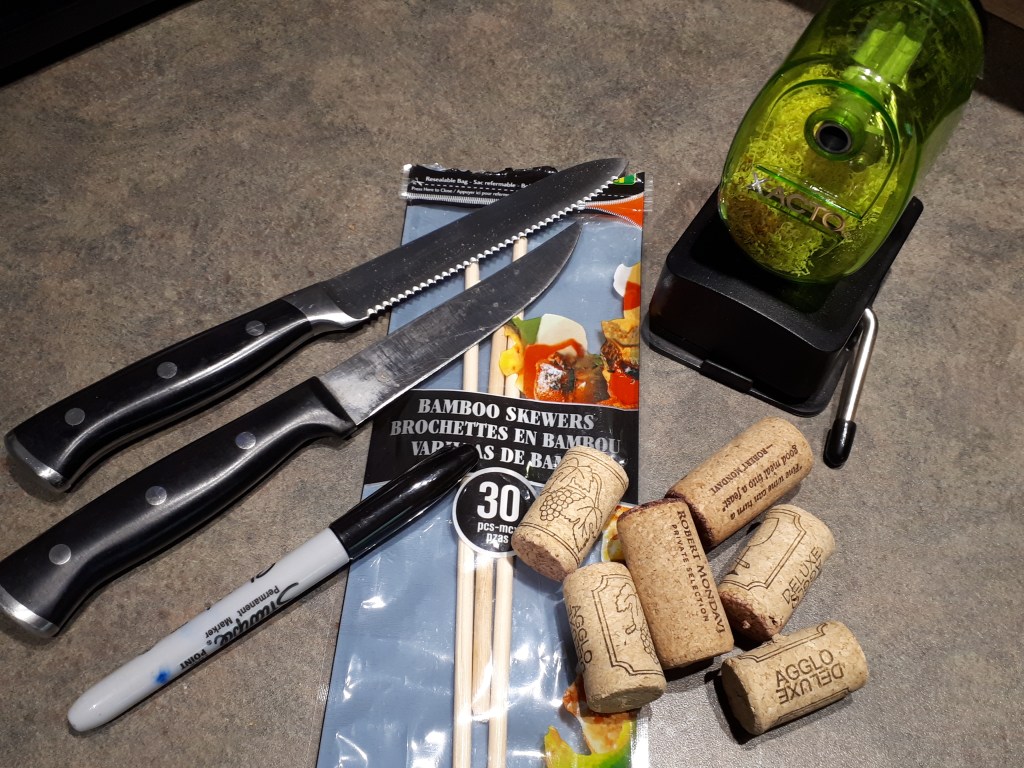
- Wine corks.
- Permanent marker
- Wooden skewers
- Knife to cut cork (I used a steak knife)
- Knife to cut skewers (I used a serrated knife. Like a mini bread knife.)
- Pencil sharpener
- Polyurethane
Instructions:
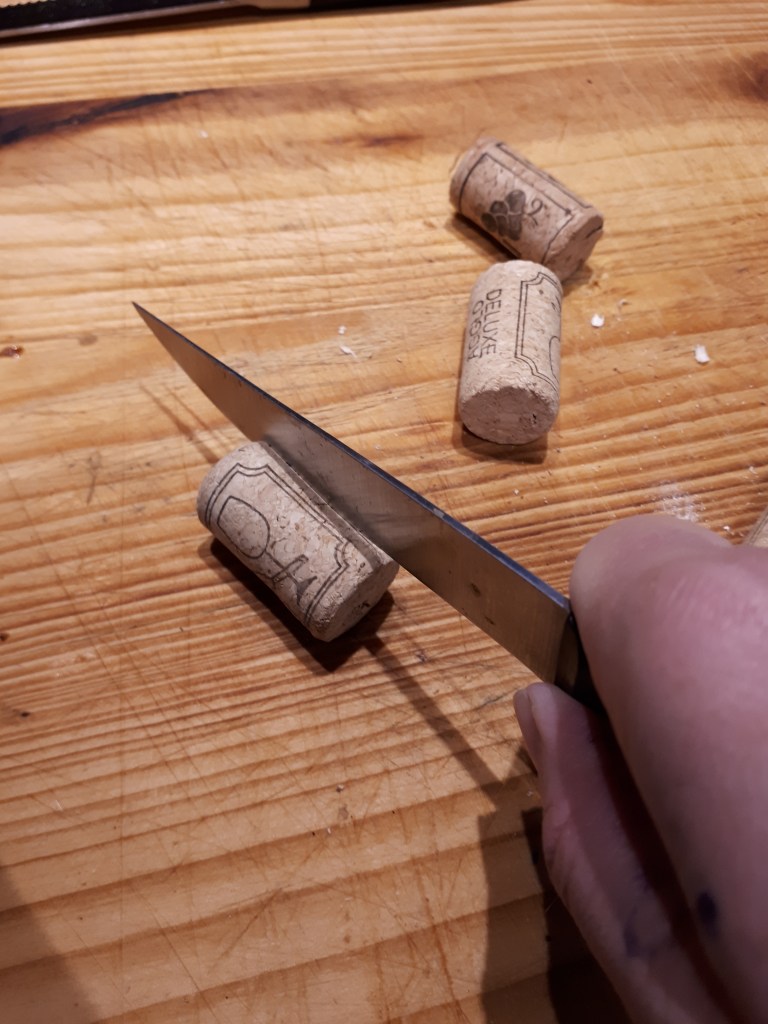
- Cut off the edge of each cork to create a surface on which to write the plant name.

2. Using your permanent marker write the plant name onto your cork. I tried to use a fancy font, but you can use block letters, or whatever you want. (My husband is reading this over my shoulder and just said, “You hand wrote those? I thought you made decals!” #winning 😊💖)

3. Using your serrated knife cut the skewers in half…unless you bought the right height skewers. Mine were huge, and I didn’t want them to be very tall, so I needed to cut mine. I needed help to hold the skewers still, so my son held them while I wielded the knife. We just scored them, then bent them to break them.

4. Sharpen both ends of the skewers. We started by trying to use a knife to whittle the ends down until I thought of this brilliant (if I do say so myself) idea. We used our pencil sharpener. This was so quick and perfect! You want both ends to be sharp because one end will go into the ground and one end will go into the cork.

5. Push the skewer into the bottom of the cork.

6. That’s when I put mine into my garden, thinking they were done. The squirrels had other ideas. My husband looked out the window to see a squirrel chewing on my DIY Wine Cork Garden Markers!! How dare it?! Didn’t it know how hard we worked on those?? Maybe it couldn’t resist the allure of the wine🤷♀️. The next day we found one DIY Wine Cork Garden Marker with a chunk bitten out of it. And the next day “Corn” was bitten clean in half. This would not do. It would not do at all. Polyurethane to the rescue! My littlest daughter helped me to dip each garden marker in polyurethane. We just did this step tonight, so I’ll have to let you know how it turns out! It makes them look all lovely and shiny, though!

And now our garden is all ready to go…grow. And these little outdoor garden markers are nice and subtle; they fit into the wooden look of our garden. Do It Yourself.com says that cork is water resistant. As we could have assumed because of their use in wine bottles. However, it says that cork is not water proof. The good news is that these corks will not sit in water, they’ll have the water drain off of them, so these should be weather resistant garden markers. For days following the installation of our garden markers we got a downpour, and the DIY Wine Cork Garden Markers look exactly as they did the day we made them, so things look very promising indeed.

