
This Secret Agent (Spy) Birthday Party is one of my all-time favourite parties. It was a couple years ago now, and just looking through the pictures gives me the feeling of excitement all over again. The intrigue. The mystery. The code-breaking. *shiver* This party is an adventurous kid’s dream come true. They’ll feel like they’re living the mystery and excitement of a real spy!
The Invitations:
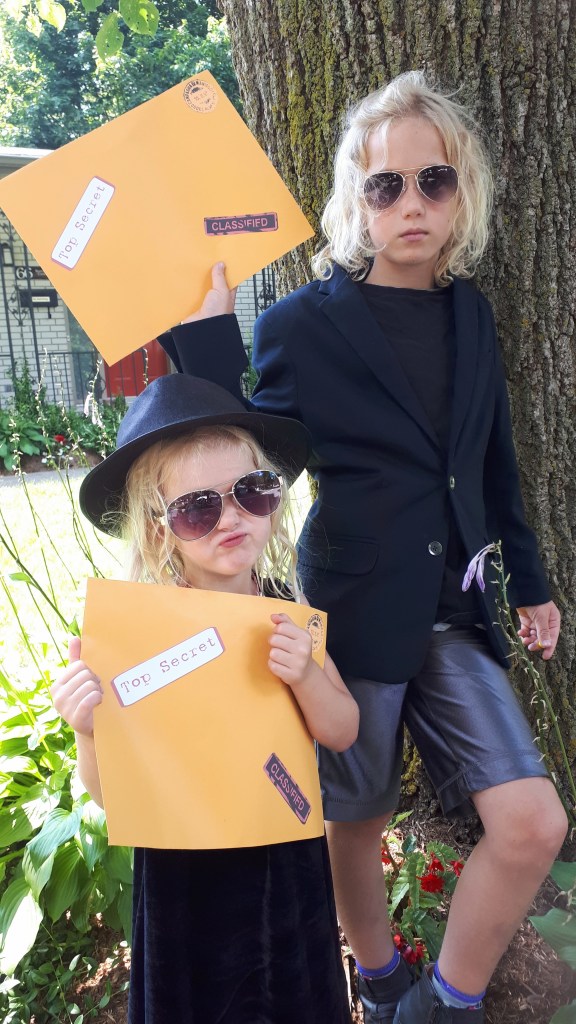
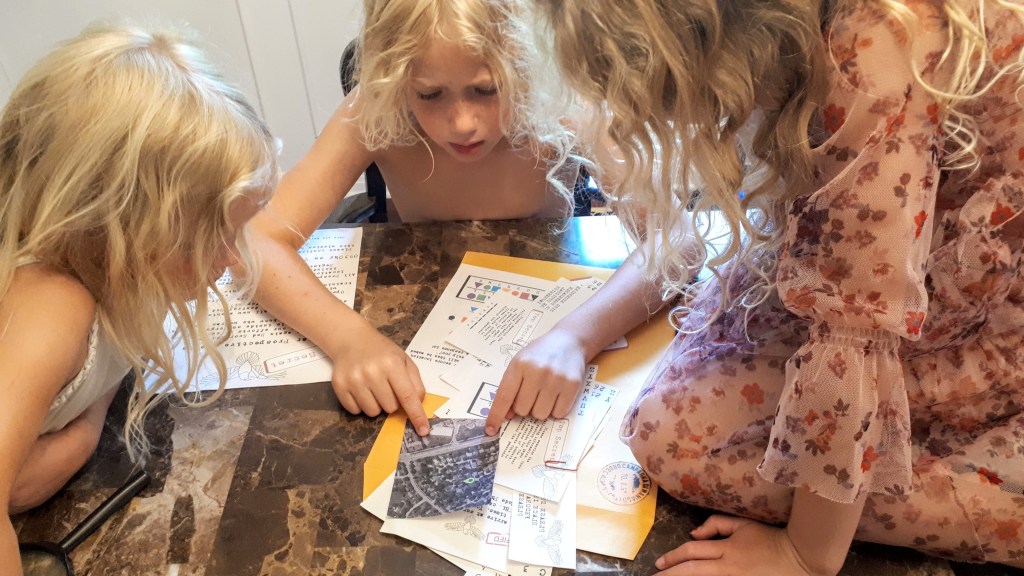
These two secret agents hand-delivered the invitation packages to the prospective agents. We gave one per family to make it easier. It’s important to hand these out well in advance to give the kids time to solve all the codes therein, and then get together their costume.
Each envelope contained:
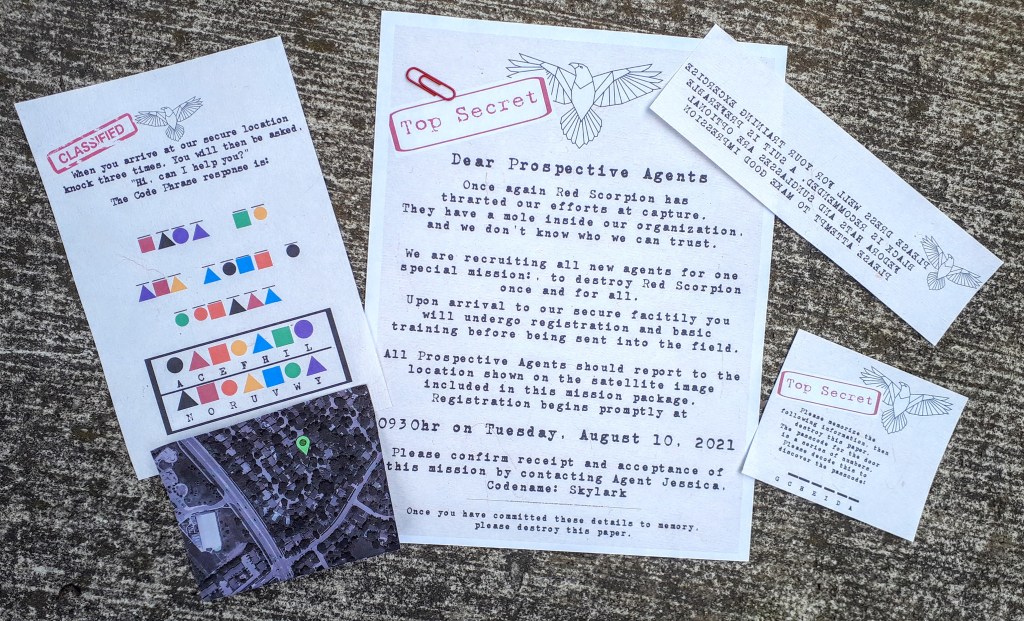
- Letter of invitation to the prospective agent(s)
- Aerial photo of our house (created from Google Maps)
- List of required attire (printed mirror image so they’d have to figure out how to read it)
- Mystery door code and decryption key
- Coded entry phrase
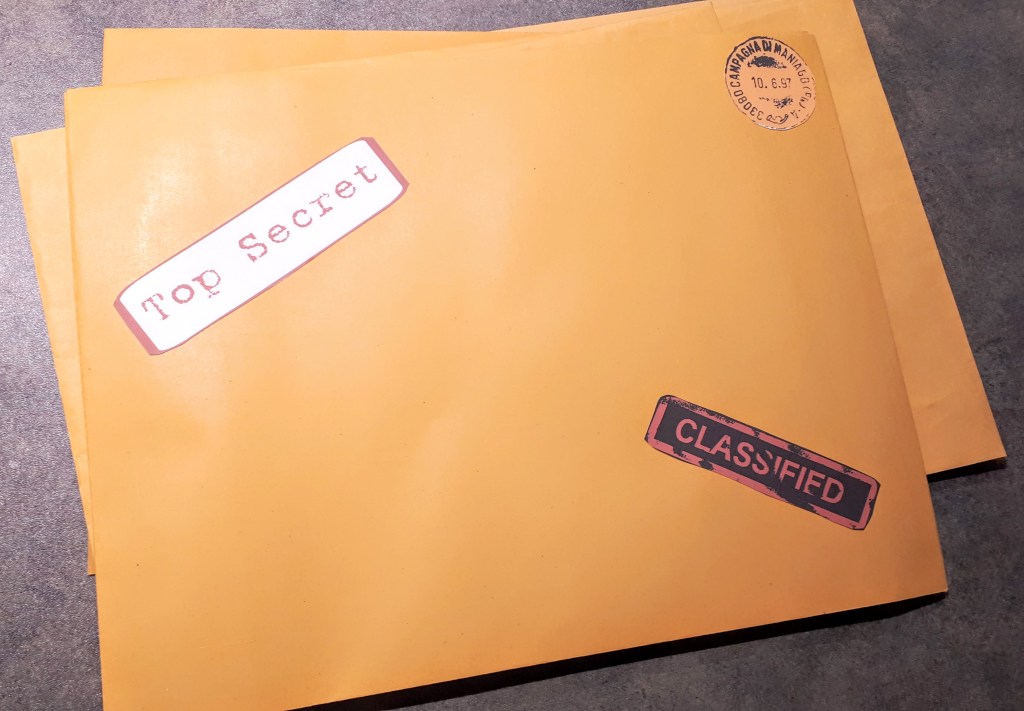
I made these stickers and printed them to go on the envelopes. The envelope idea is from Kristin at Exploring Domesticity.
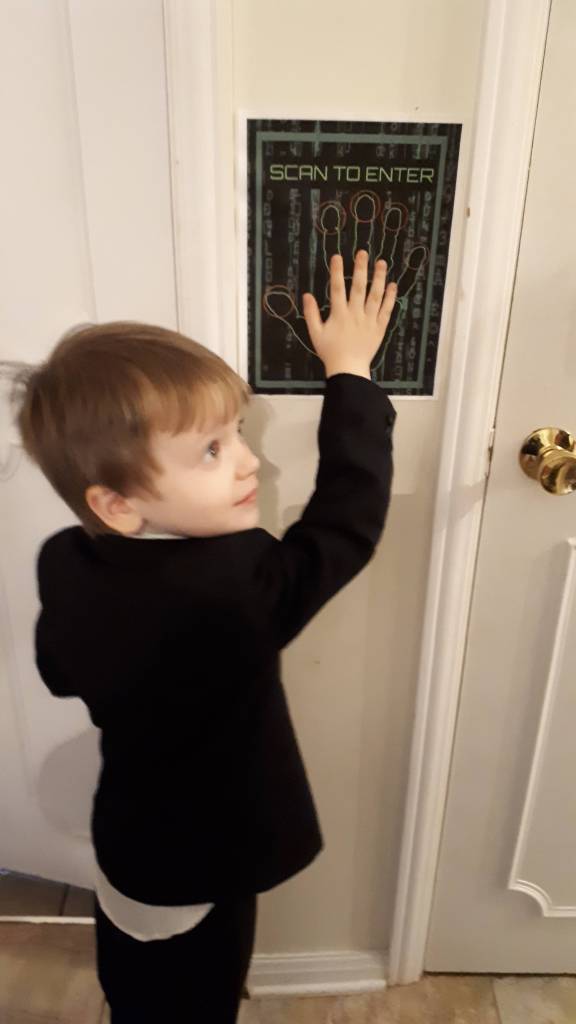
Here’s my sweet niece cracking the door code. I don’t think she shared with her siblings 🤭
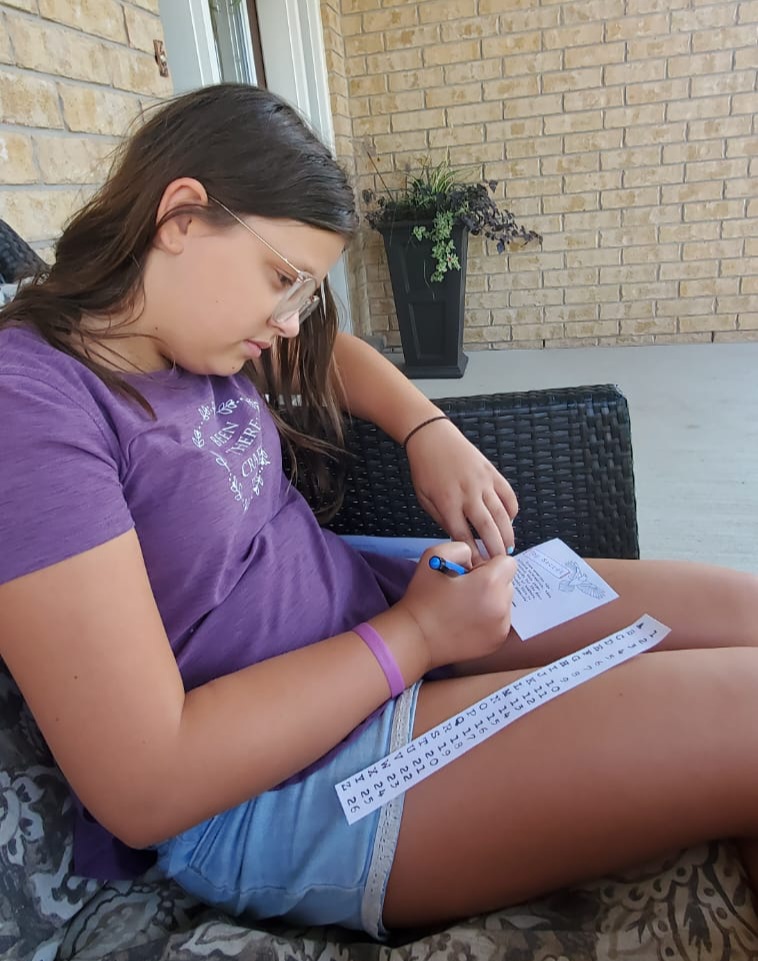
Here are my little cuties trying to solve it. They’re so little!
The Day of the Party:
I didn’t do much in the way of decorations. There is one corner that is supposed to be a secret agent’s office, but other than that it was little things that had a function. You’ll be able to see in the upcoming pictures.
Everyone was encouraged (in the invitation) to wear their most spy-ish outfits, such as black suits, sunglasses and fedoras.

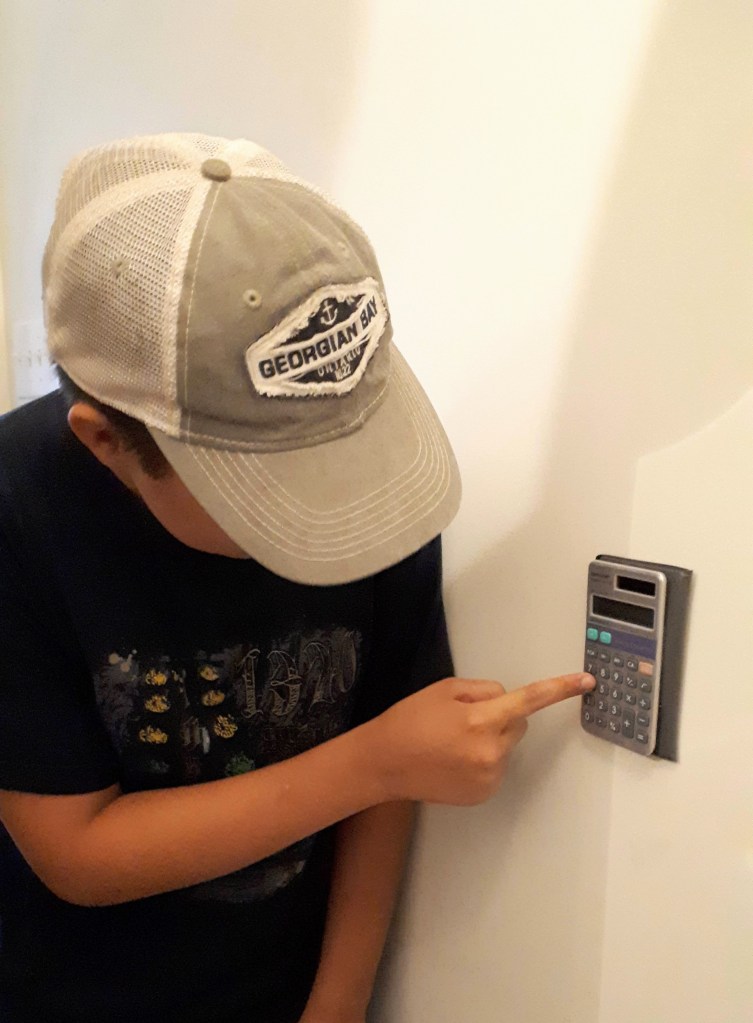
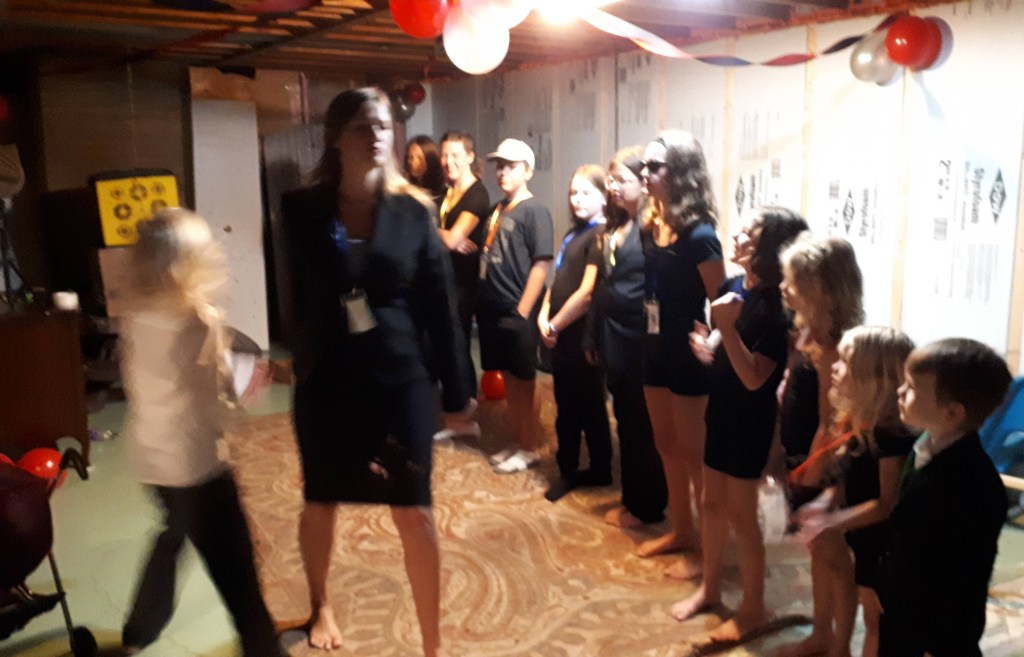
The kids all had to line up on the front porch and come in one by one. The first step was to meet an agent supervisor (a Mum friend) who watched them input the door code they had memorize into the keypad (a calculator taped on the wall).
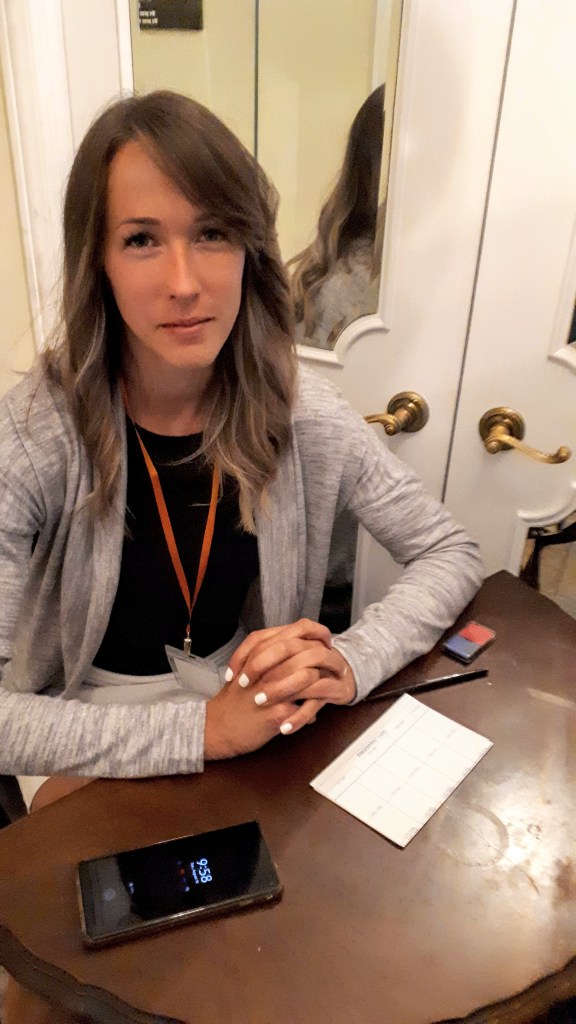
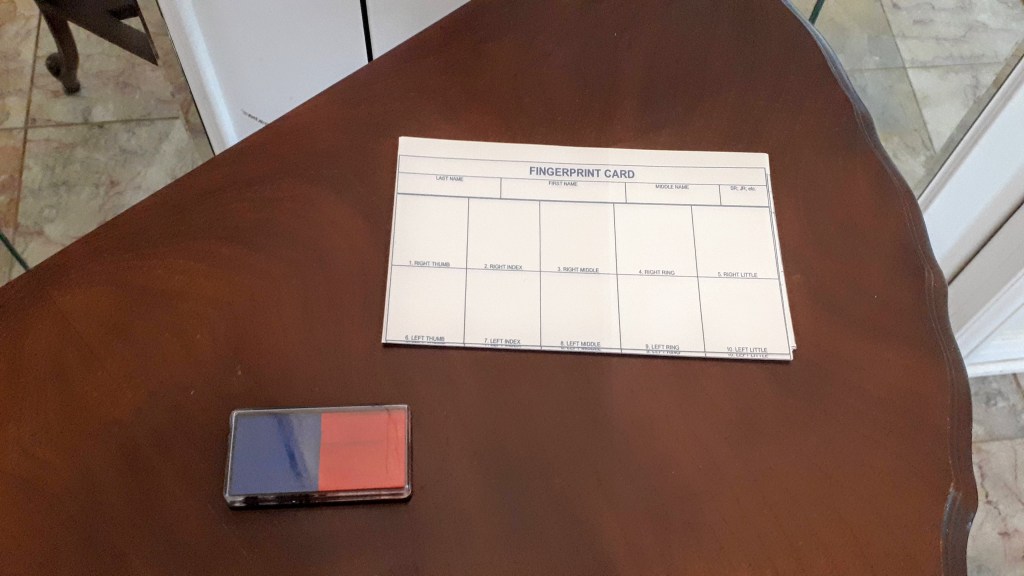
They were then fingerprinted by another agent (my sister).
(The fingerprint cards are from AllBusiness Templates.com)
Next they were given their badges, which had their codename and barcode. After this they were only to refer to each other by their codename. All these codenames are real historical ones. I looked up codenames on Wikipedia and chose my favourites. I got a pack of lanyards from Amazon to make them look better. The lanyards I bought are out of stock, but these are similar: Amazon Lanyards. These took forever to make, but I really loved them. (See the cute little bomb in the top left corner? I got that idea from Catch My Party.)
To enter the next phase of their vetting, they had to scan their barcode outside the door to their interview. I cut a hole in this box, put in a red light headlamp flashlight and taped it to the wall. (Even though I didn’t accomplish it the same way, this idea is from Amy Robison.)
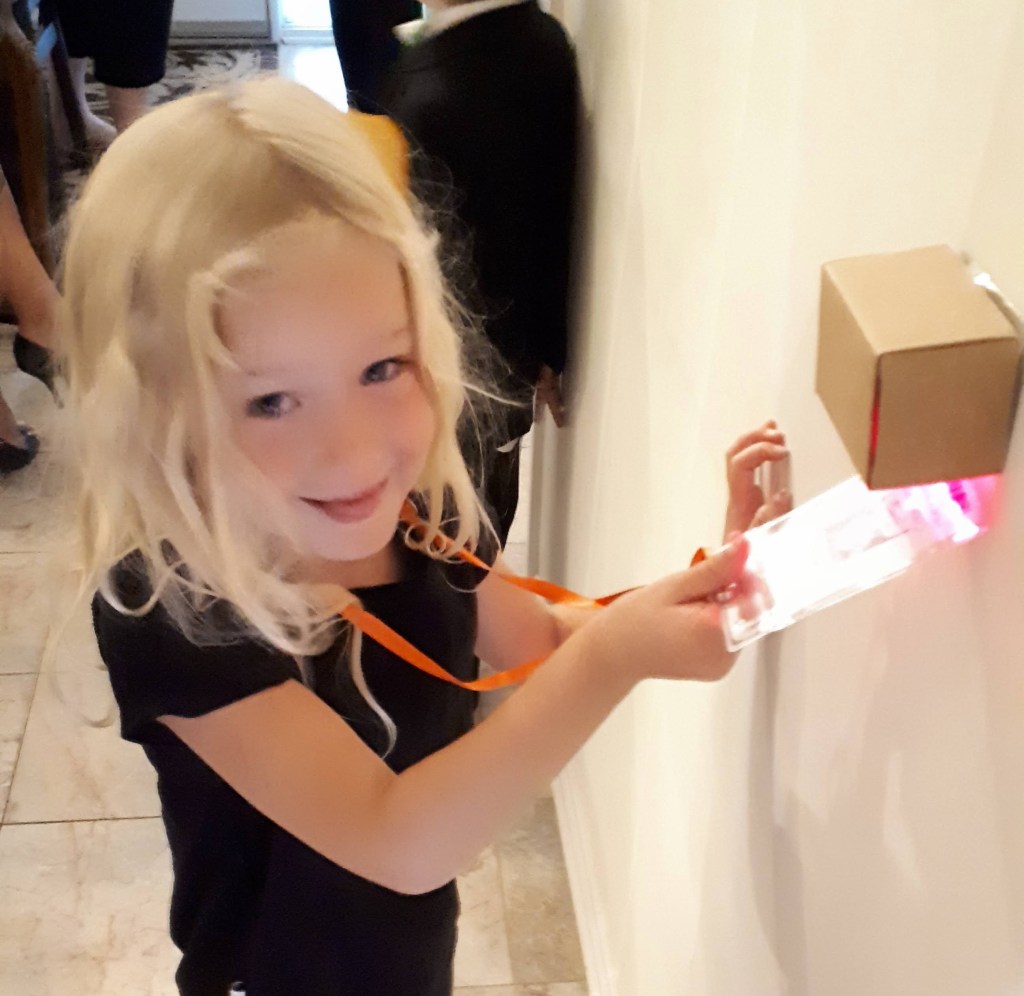
I made this scanner on PicMonkey. I also used PicMonkey for the badges, most of the clues and paperwork. They have a lot of great fonts and images for spies.
Here’s the tough, scary interviewer (my mum):
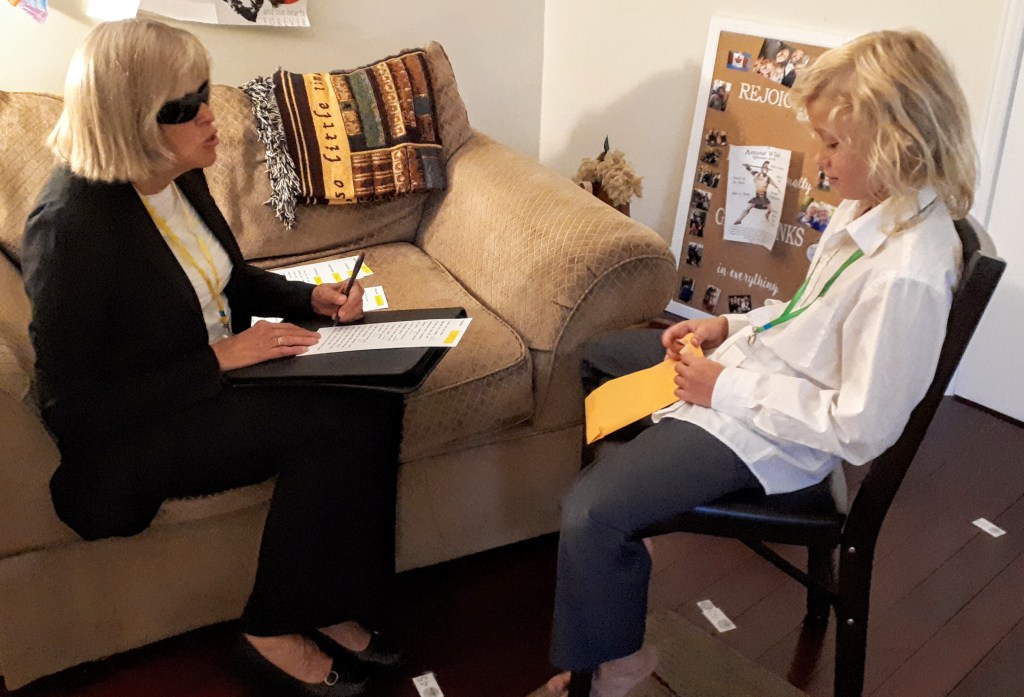
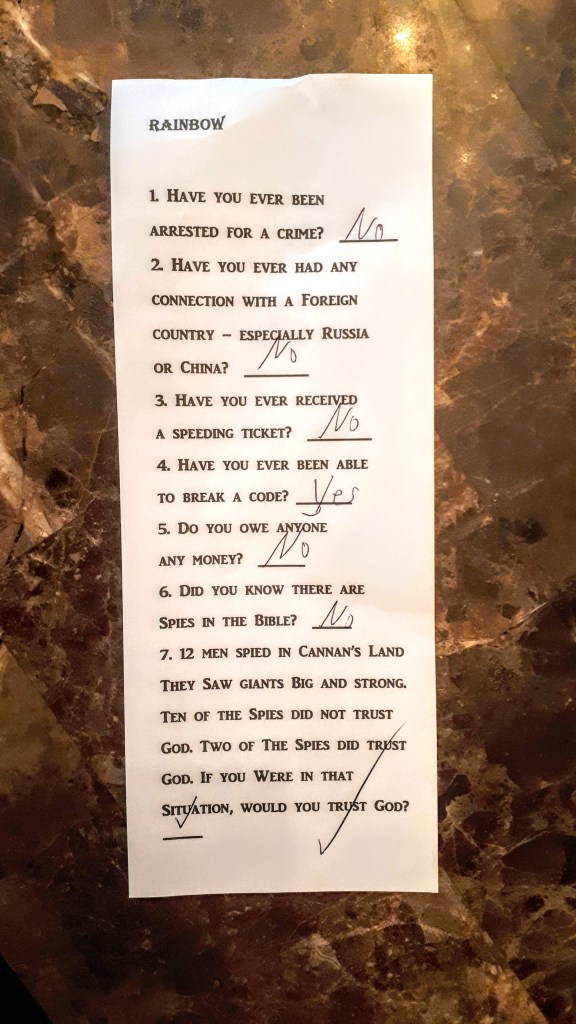
Here are her questions: (Don’t you love the last one?😊)
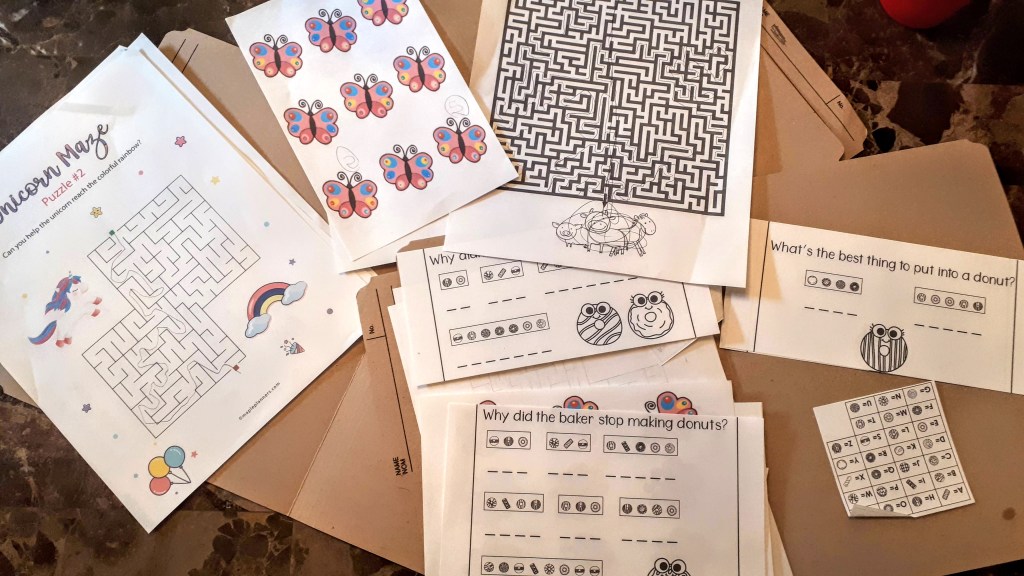
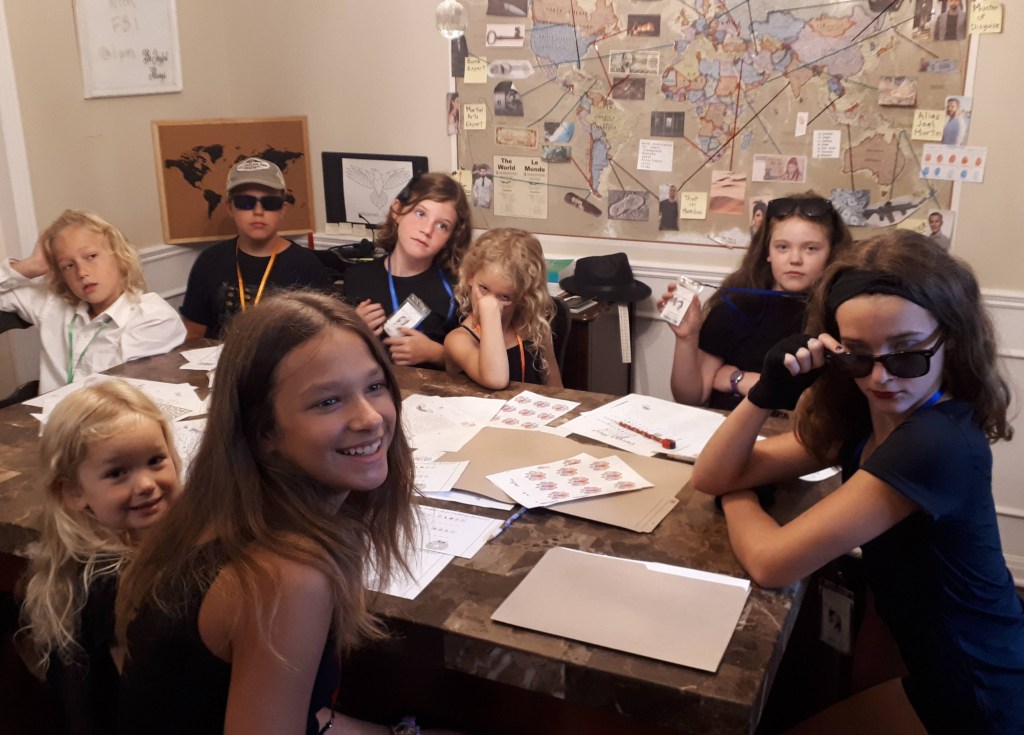
Once they passed the vetting process they gathered in the conference room to chat and work on cracking codes and doing mazes. I got the puzzles from Maple Planners, My Homeschool Math, Marjan at My Homeschool Math and Kristi and I Should be Mopping the Floor.
Okay, guys. Are you ready??? This is one of my favourite parts!! I spent H O U R S on it, and had so. much. fun. My evidence board:
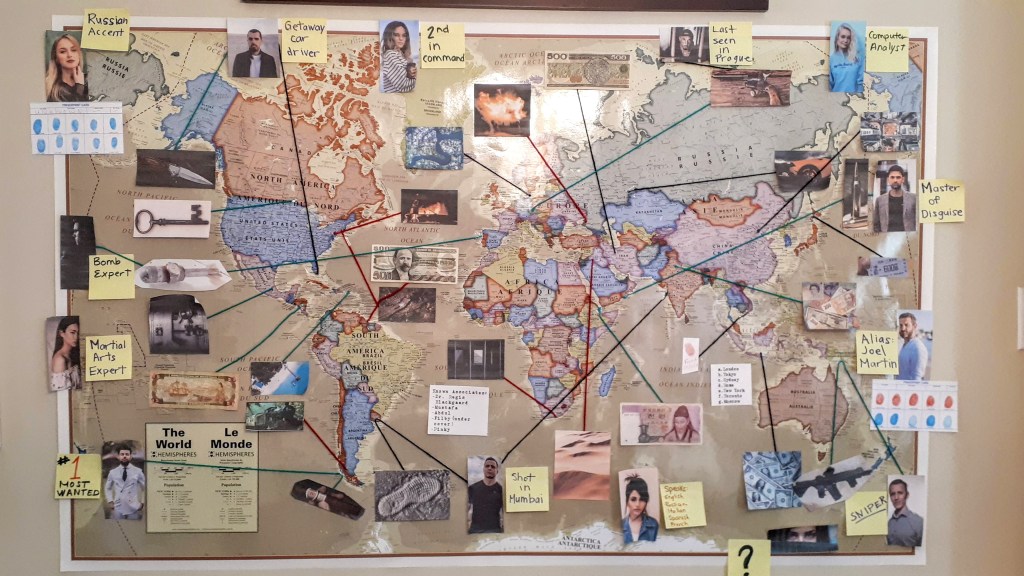
Ooo! Isn’t it awesome??? String connections, pieces of evidence like fingerprints, money, shoe tread print, weapons, locations, suspects, keys, lists of aliases (later I added shotgun shells, spent bullets, and a fake cigarette). Please zoom in on it and appreciate my hard work, haha. I left it up for a L O N G time because I was so proud of it!
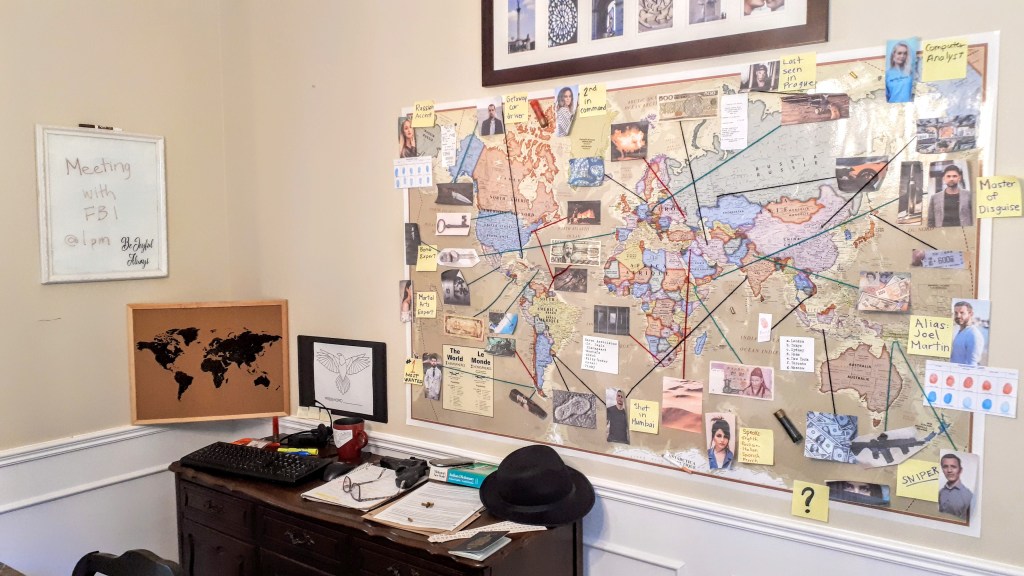
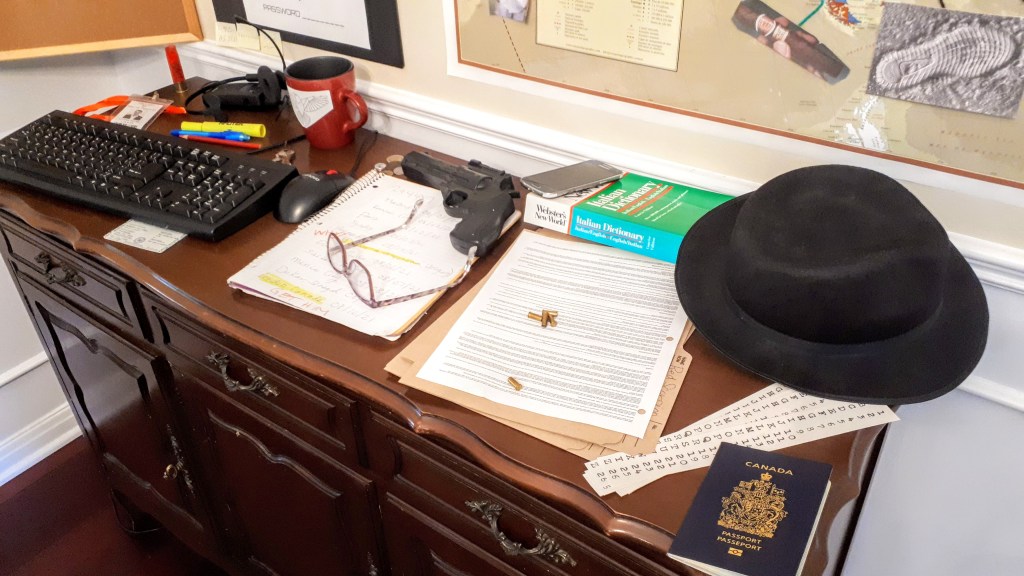
So this is supposed to be the main agent’s office. I decided on a logo for the operation (the geometric falcon picture) and I put it on the computer screen (which is just black cardboard taped to the wall) and the mug. The next couple pictures give you close up details.
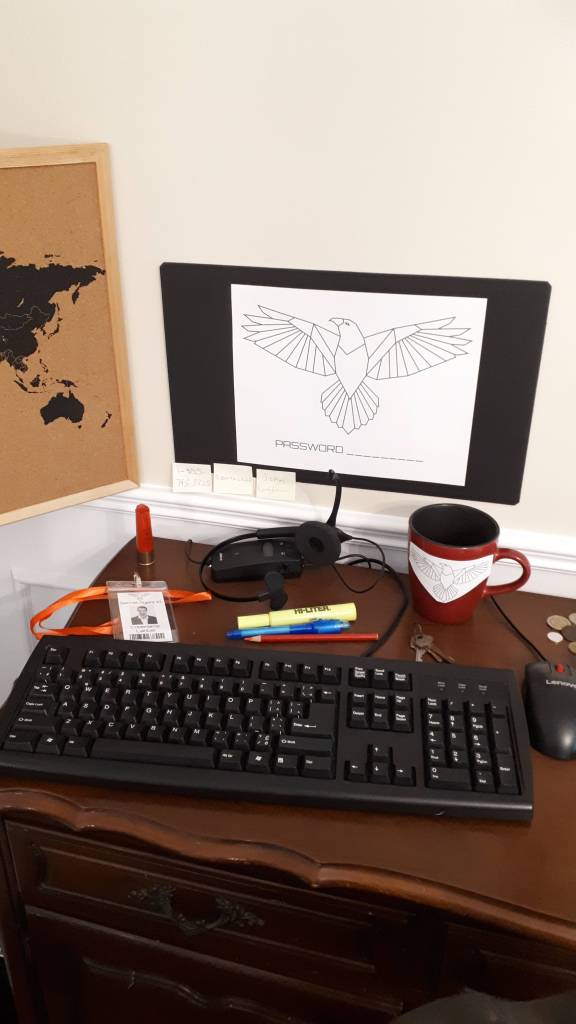
Adorning the desk is foreign money, passport, fake gun, badge, birth certificate, fedora, glasses, notebook, keys, cell phone, shell casings, fedora, headset, keyboard, shotgun shell, cipher.
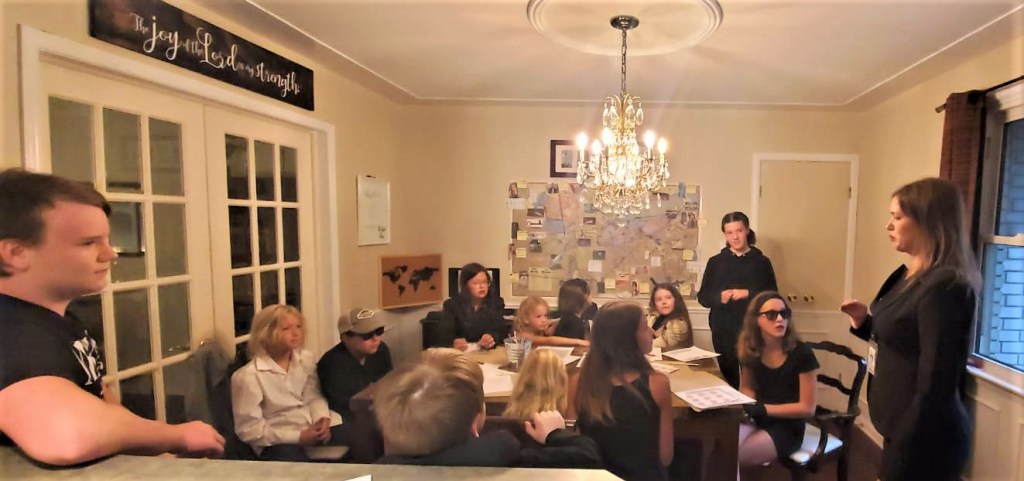
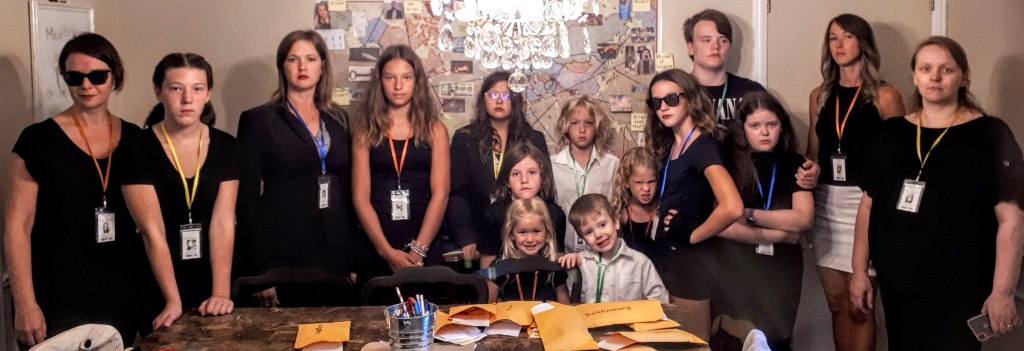
Here’s the group! All such precious children! This is a picture of me explaining the first game training exercise.
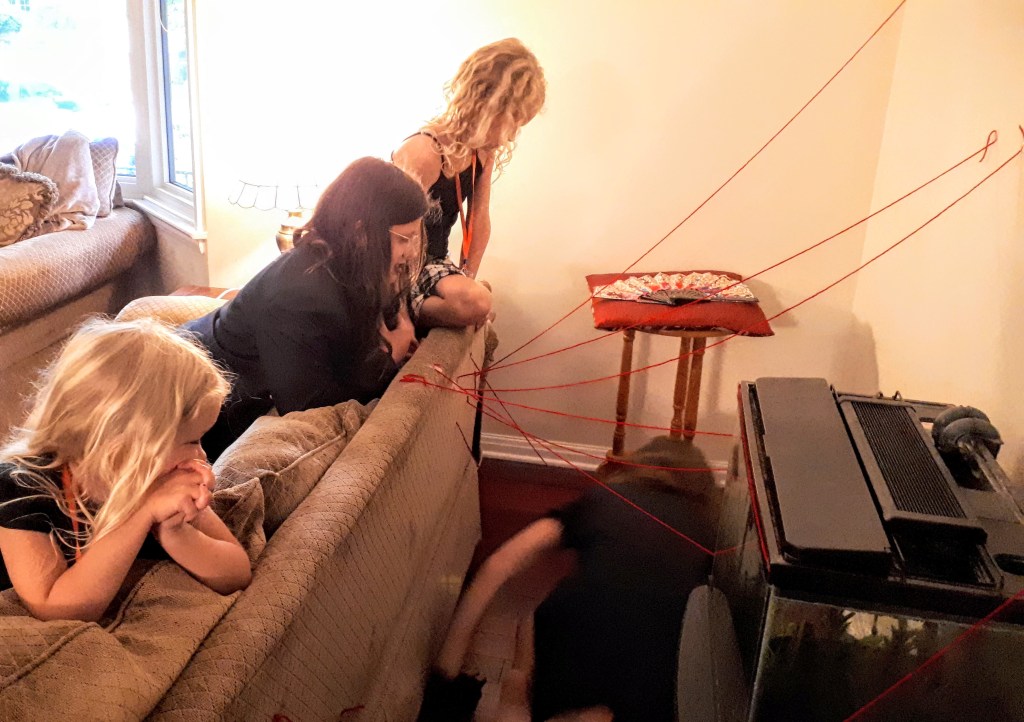
Training Exercise 1:
We used this game in our superhero party, too. The yarn is laser beams (obviously). The spy has to go through the yarn to get the fan without hitting the lasers.
Training Exercise 2:
The Brush Pass. We had a secret item (a card, like a library card) that had to be passed. Two children were secretly chosen(they knew who each other was), one to pass, one to accept the pass. All the other children had to try to figure out who the two kids were. Play many rounds so everyone has a turn to be one or the other, or both.
Training Exercise 3:
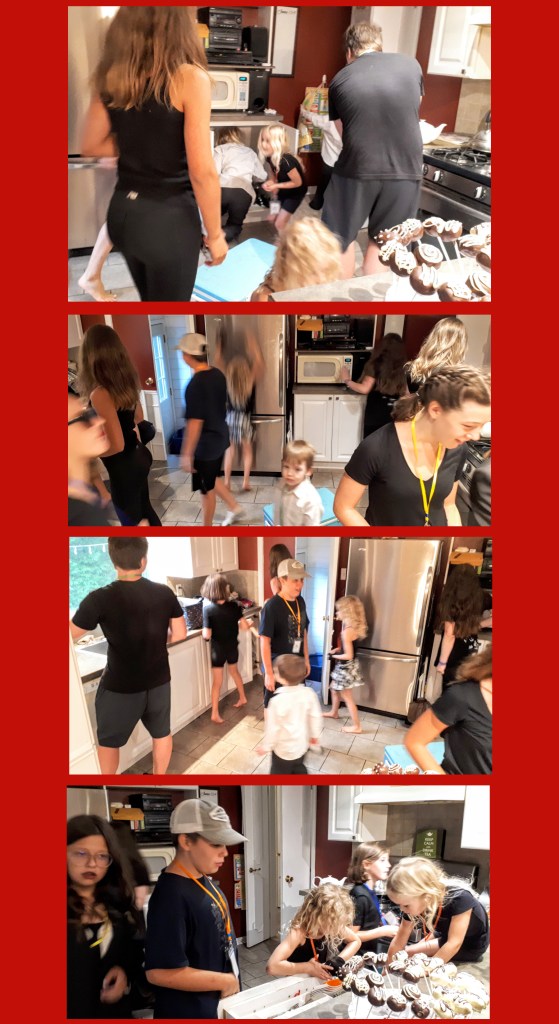
Sweeping for bugs. I hid mints listening devices all over the kitchen; whoever found the most won. I hid about 100 mints, so everyone went home happy.
The successful trainees:
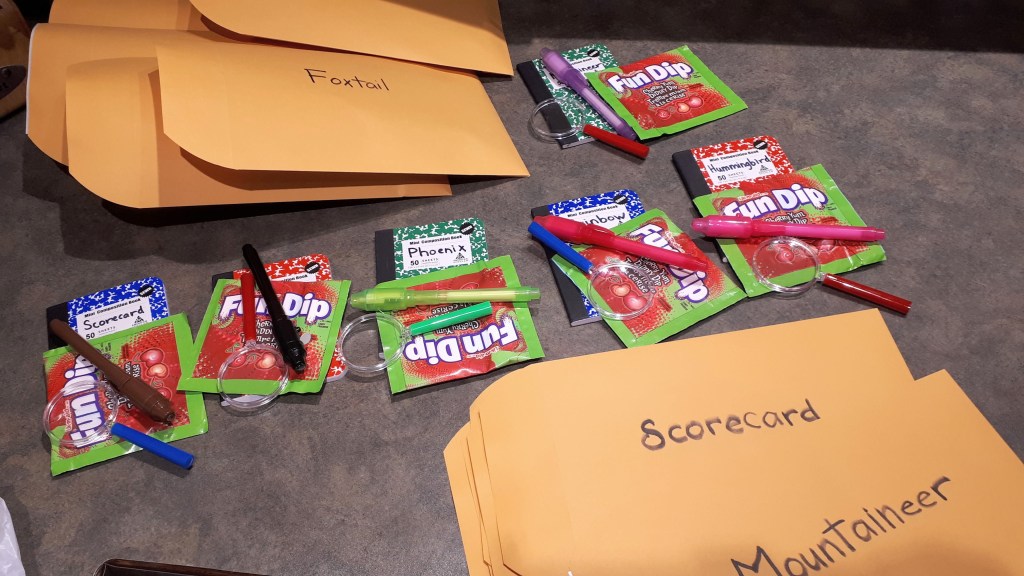
After successfully passing the training course, every child got an envelope as their loot bag and graduation package. I don’t usually do loot bags, but I kind of went over the top on this party. Each envelope was labelled with the child’s codename, and contained Fun Dip, a magnifying glass, notebook and invisible ink pen.
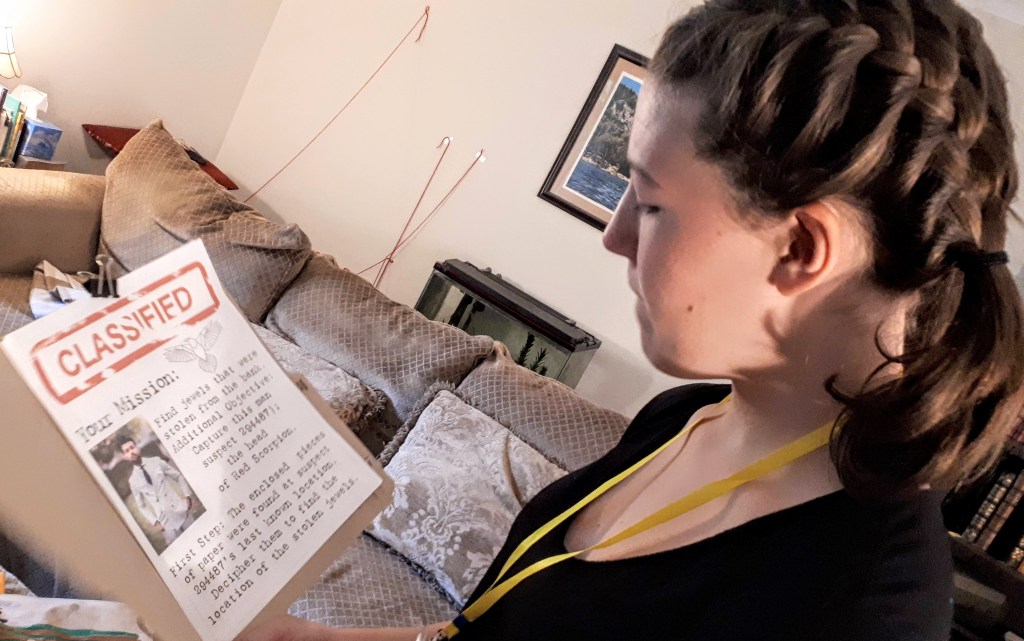
The Final Task:
After the training, we had cupcakes and I acted as if the party was over. But not so. The night before, my husband and I spent AGES recording (in between raucous laughter) a video with him as the director of our spy organization. He wore a three-piece suit and tie while sitting in front of our fanciest bookshelf. He very seriously gave details on Red Scorpion’s most recent activity and urged the new recruits to do their duty and catch Red Scorpion.
So, just after cupcakes and tea, when my cell phone “rang,” I shushed the kids (they all actually looked worried and thought it was a serious phone call – oops). The agent on the other end told me to show the recruits the video of the director himself. After we watched the video I gave the new recruits a file folder containing the super-duper secret print out of classified information pertaining to a known member of Red Scorpion (a terrorist group made up by Adventures in Odyssey).
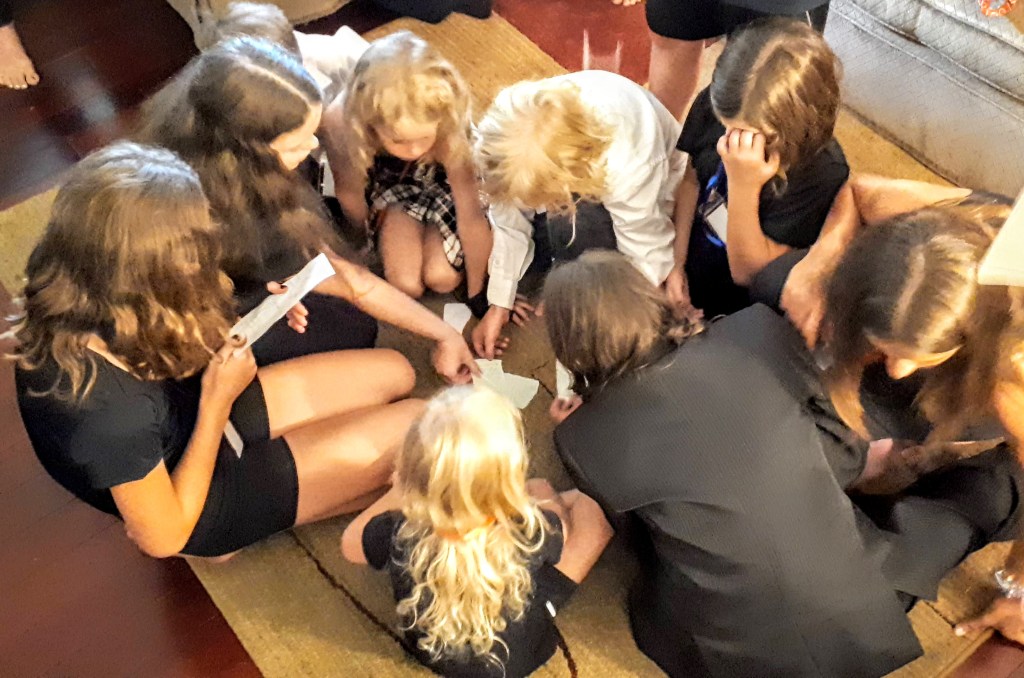
Also in the file was the first clue. It was a ripped up piece of paper that they had to reassemble and figure out the clue. Here are the kids reassembling the paper:
That led them to the following notes:
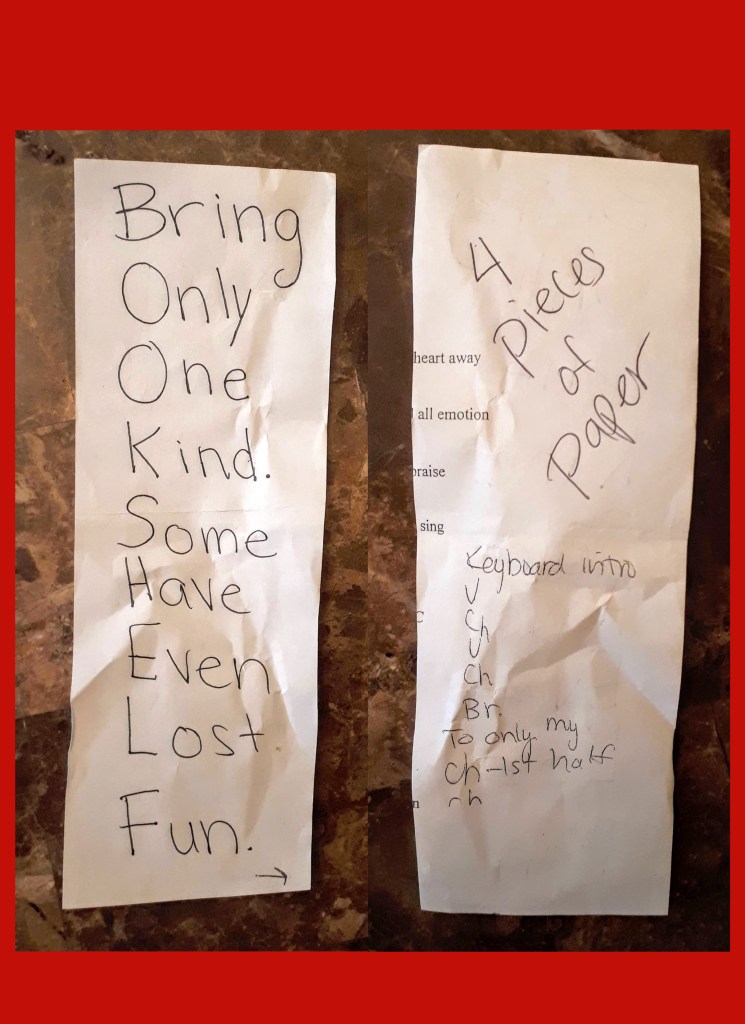
Did you figure it out? The first letter of every line spells “BOOKSHELF.” They had to find four pieces of paper on the bookshelf, which led them to another clue:
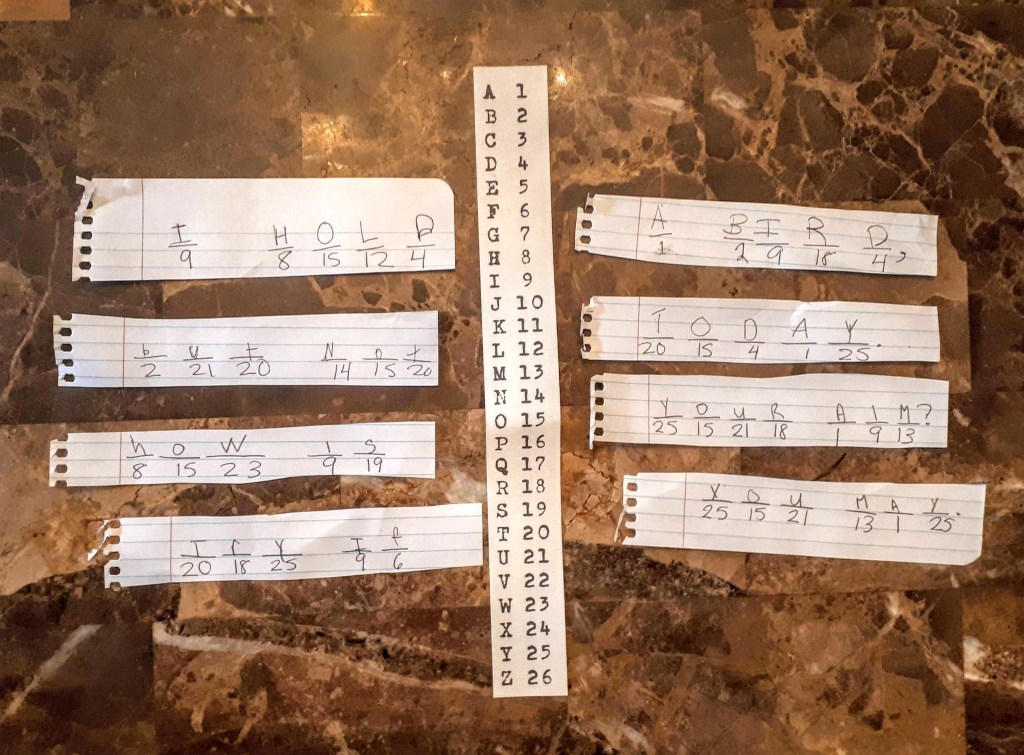
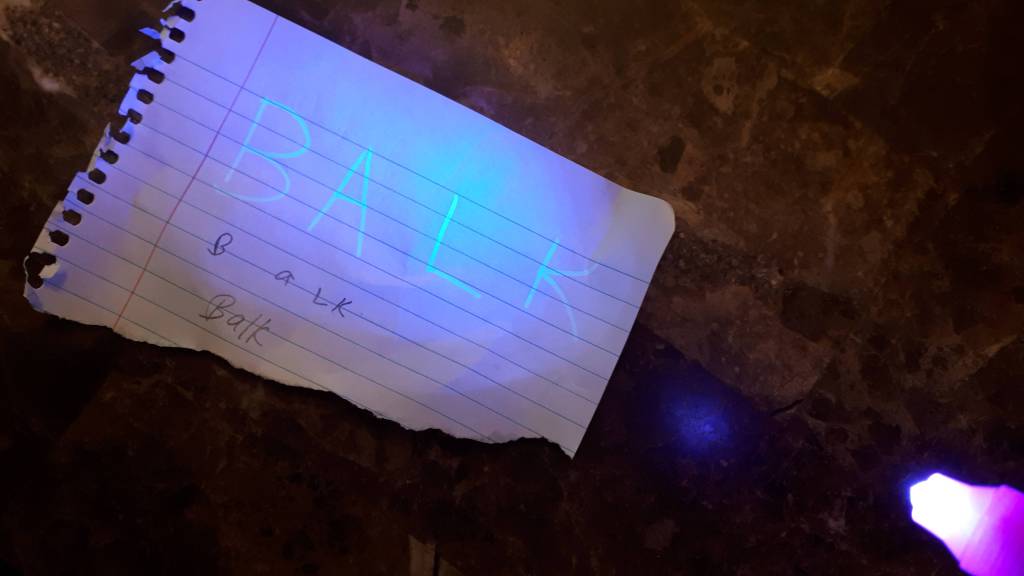
The big kids deciphered this one, and found the next clue in a birdcage. The birdcage led them to a treasure chest that was locked with a combination lock. The lock combination is a word. They had to use invisible ink to find the codeword:
We had kids ranging in age from about 4 -15, so the little kids got left out of this activity because the big kids were so much faster at it, so there was some frustration. So, I think it may work better to either assign a person to each clue, or have a smaller group.
This party was so much fun. One of my favourites ever. You certainly don’t have to do this much prep to make it fun, but I really enjoyed finding all the spy-ish things in our house and putting it all together!
