
Do you know what I love about having a Cricut? I can make gorgeous personalized gifts. I can MAKE gifts that other people pay full price for. I love using my Cricut to make gifts, and I love when people look at me, shocked that I’m able to create that by myself…okay, with my Cricut’s help😏! I wanted to take some time to inspire you (hopefully!) to make some Cricut gifts of your own. It’s not too late!
If you have any questions on how to use your Cricut, please ask me! I am so happy to help! I know how it feels to take your Cricut out of the box and be totally flummoxed by how to make it do what it’s supposed to do. I’ve been there, and now I can help. Please ask me any questions in the comments, or click on the Contact Me section of my blog. I would love to help you learn how to use your Cricut!
Now take a look at my Christmas Cricut DIY! And let me know in the comments which ones you like, or you’d like to try 😊.
Camper’s Gift Bundle

Don and Karen (and their dog, Sam🐶) are avid camper van campers so I wanted to make this DIY Cricut Campers’ Gift Bundle for them for Christmas. I got the plastic tumblers in bulk at Costco and used adhesive vinyl to make them personalized wine tumblers (hand wash only). My husband made the wine, and I painted the bottle with glass paint. Finally, I bought the sign board 50% off at Michael’s, and used permanent outdoor adhesive vinyl to make the sign. I intended this sign to hang on the permit post at Provincial Parks and National Parks. So cute, ya?
Stuffed Personalized Christmas Tree Ornaments
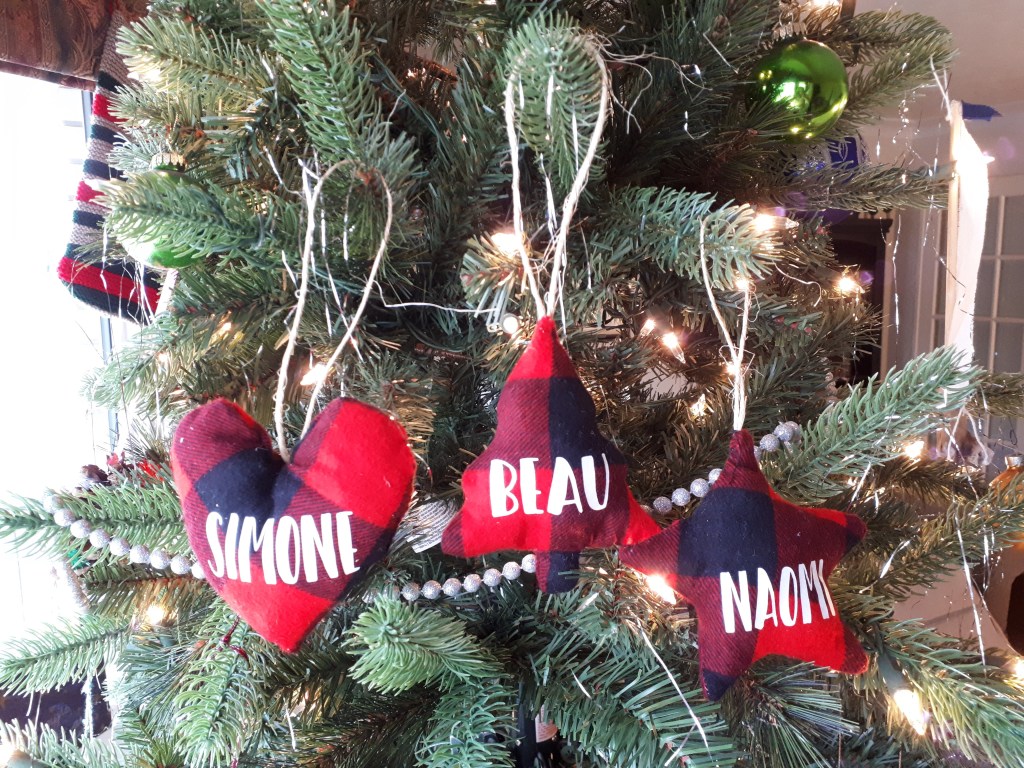
These ornaments have a little story behind them. I saw my neighbour outside, and she was looking a little sad. She told me that she had just bought her children Christmas tree ornaments, and all three smashed shortly after they got home. I had already wanted to try out making soft ornaments, so I decided to make these for my neighbours. All I did was cut out fabric shapes, sew them right sides together, with the string already in place (yes, I did forget to sew the string in the first time🤦♀️). Next you turn it right side out, stuff it and finally iron-on the decal.
As long as the name fits in the centre of the ornament, with the ornament squishing quite flat, you should be able to iron it on without difficulty. If your sewing is better than your ironing-on you may choose to iron on the decal and then sew it.
“Snuggle This Muggle” Shirt

I just love this shirt! This “Snuggle this Muggle” decal is one of the first designs I made when got my Cricut – and it’s the gift that keeps on giving. If you’re a regular reader of this blog you likely know of my die-hard love of Harry Potter. I have since made a “Snuggle this Muggle” shirt for myself, my friend’s daughter, and a onesie for my nephew. And everyone loves it! All it is is different layers of Heat Transfer Vinyl (including gold glitter vinyl for the stars!). I love the different colours incorporated into this shirt.
Personalized Wooden Ornaments

One of my favourite websites that I use in conjunction with my Cricut is openclipart.org. It allows you to use tons of images for personal use or to sell. Many of the images above were from Open Clip Art, as were some from the Campers Gift Bundle. For these wooden cookie ornaments use your Cricut to cut out a decal in black adhesive vinyl and stick them to the ornaments using transfer tape. On the reverse side I cut out “Merry Christmas” in red and green adhesive vinyl.
Then I used a drill to put holes in the top for the twine. They look super cute on the tree. Kind of “Rustic Christmas!”
Iron-on Bear Family

And it wouldn’t be Christmas if I didn’t have a bunch of bears to make and send out through my Etsy site! I love these little guys 🐻. They’re so cute, and super easy to use. They also make for adorable family Christmas picture😏.
Andy’s Drink (Don’t Even Think About It)
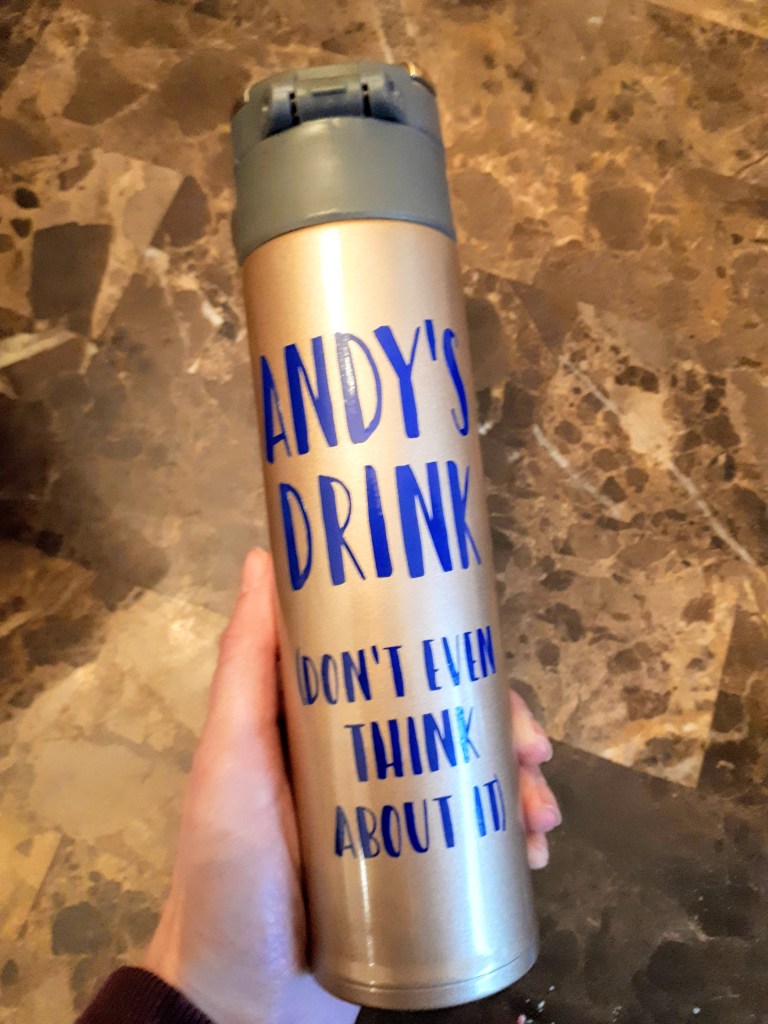
(*Classic Jessica: taking one picture and having it be blurry. Give me strength.*)
Anyway, I made this for my Uncle❤. He’s quite the character, so I thought he would enjoy this. It’s regular adhesive vinyl on an insulated mug. “Andy’s Drink (Don’t Even Think About It).” I use this adhesive vinyl for my everyday vinyl needs. For example, if I’m making a stencil for a sign, or a decal for a mug. It has always done the trick, except on my Yeti, probably because the surface is so rough on my Yeti (I have this one). I put it on my husband’s silver Yeti two years ago (he has this one), and we wash it in the dishwasher, and it still looks amazing.
Cat Lover’s Gift Bundle

Bonus! DIY Christmas Wrapping Paper
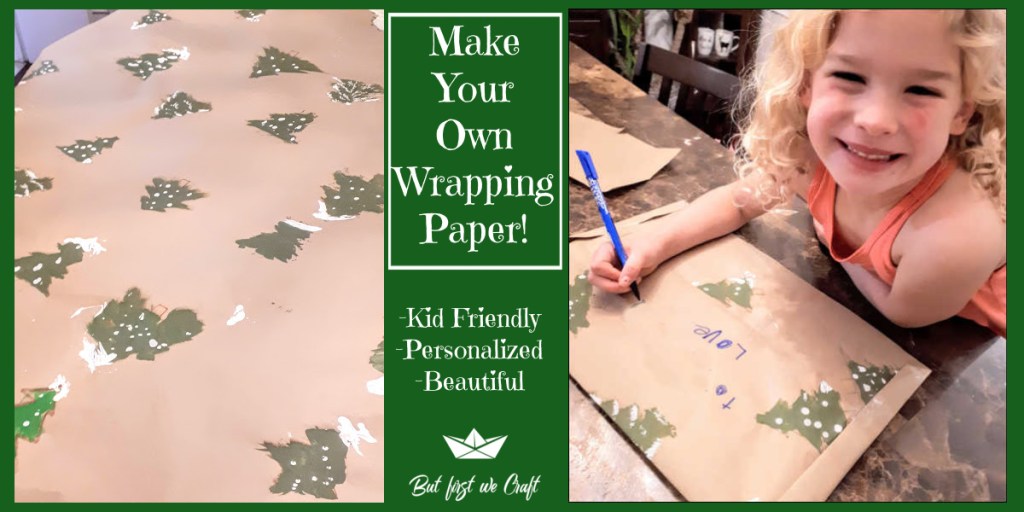
This one is a bonus because it’s not a Cricut item, and it’s not my idea. Remember my friend Janet? The artist who provided us with Easter Colouring Pages and Free Printable Valentine’s Day Cards? Well, she sent me a picture of her children making their own wrapping paper out of dollar store brown wrapping paper. It looked so beautiful, so we had to try it too!
All we did was spread the paper out across the table (we could fit two sheets side by side) then went crazy painting Christmas trees all over it (yes, some look more like Christmas trees than others 😂). Once it dried we added the snow. It’s really adorable to wrap the grandparents’ gifts in this paper!
Do you make your own Christmas gifts? What are your favourites Christmas presents that you’ve EVER made? Even if you don’t use a Cricut I’d love to hear your ideas!
And if you DO have a Cricut, but don’t get how to use it – please ask me your questions! I’d love to help you get started.
Merry Christmas!

Well done!! Love K&D’s sign and so thrilled to be included. 🥰. Xoxo
Sent from Padjay’s iPhone =^..^= =^..^= 🐼🐼
>
LikeLike
Thanks, GAP!💕
LikeLike