
This weekend my husband was sick. It was a weird kind of sick where he felt good, then bad, then good, then bad all weekend. It was totally unpredictable and seemed to hold the rest of us a bit hostage because we’d never know if we should be including him in our activities, or if he’d be sleeping.
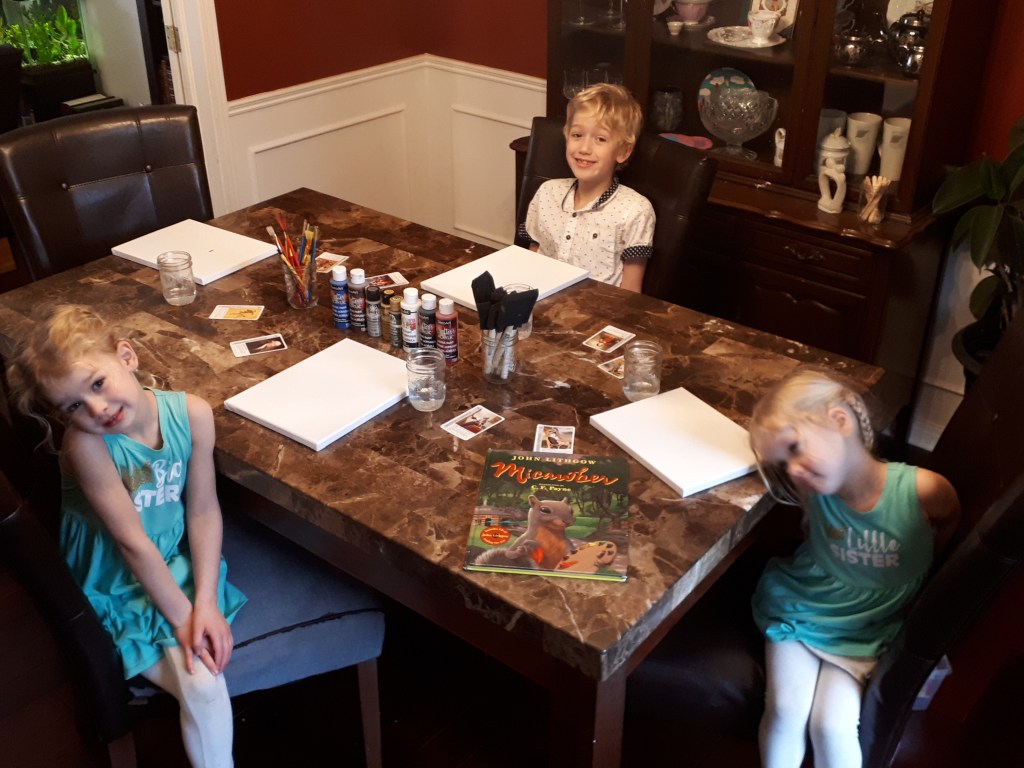
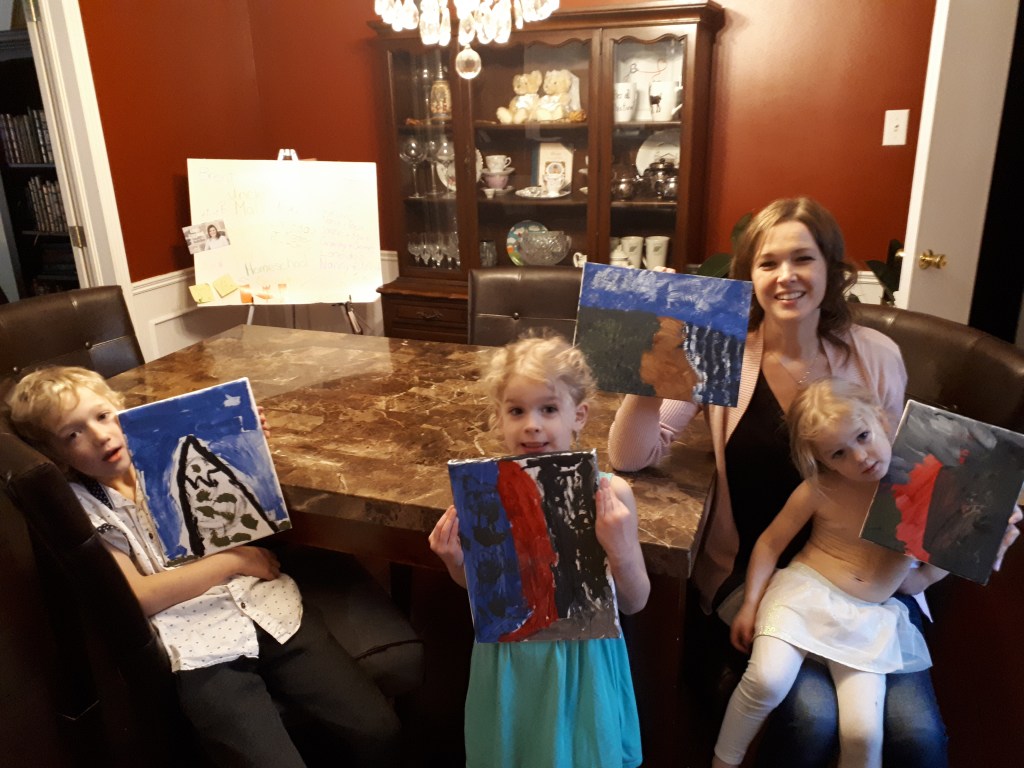
On Sunday afternoon we knew he was planning on napping after lunch, so we planned to paint together. The kids went downstairs to play for bit while I got things together. They didn’t stay downstairs for long, though. They came back up, eager to help me set up. It was a lovely way to spend part of an afternoon. Complete with a story, learning and painting, we had such a nice time together.
If you are thinking of having a paint party, too, here are some ideas, and things we did for ours!

Invite Your Guests:
I always, always, always use Punchbowl.com for my parties. It has so many options (including lots of free ones!). If you sign-in, it keeps your email addresses so you don’t have to input them every time. It also has features like R.S.V.P. and potluck sign up list.
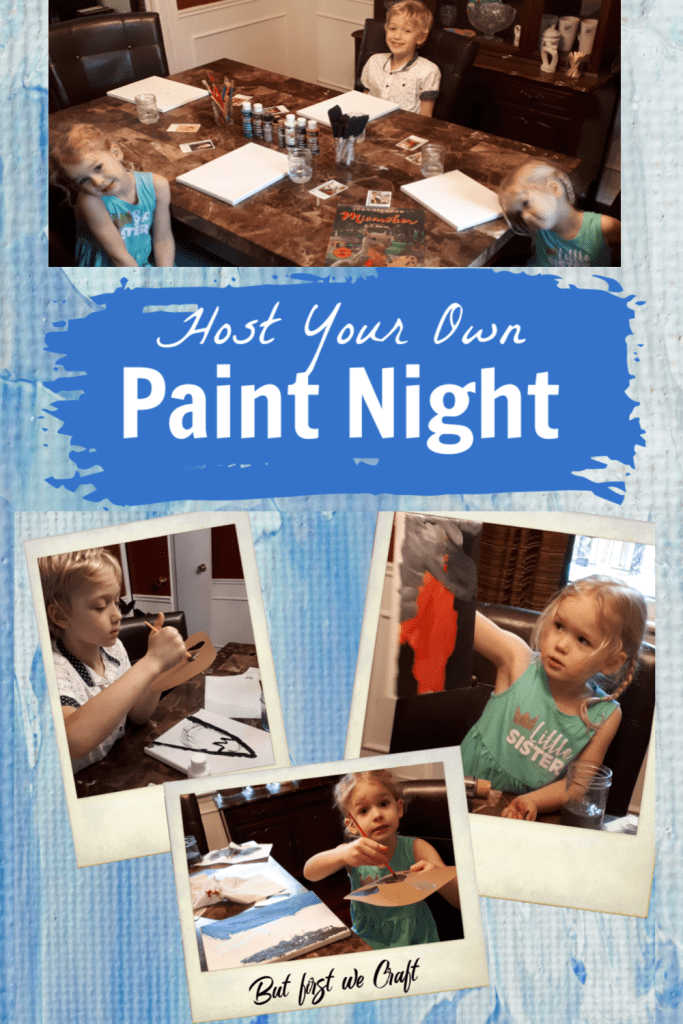
Set Up for Your Party:
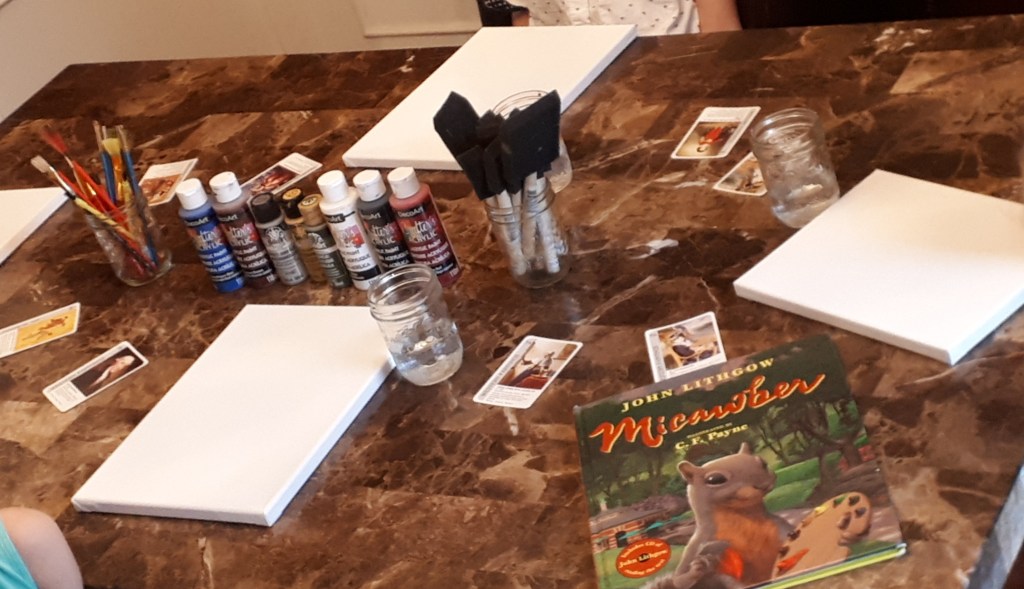
You can make it elaborate with flowers, and works of art hanging here and there, or it can be very low-key with just the essentials. Here is how we set up for our Paint Party:
- Canvas for each person at their chair.
- Paint. I mostly use paint from Dollarama. It’s always worked perfectly, except for the gold (I assume silver will have the same problem). However, I bought FolkArt brand gold at Michaels and the same thing happened: once it’s dry and you try to peel off a stencil (which you don’t need to do here) the gold comes with it. A friend of mine told me that it’s because the gold paint needs to be more “plasticky” to make it shiny. If you’re using it purely to paint, I have no doubt it will work perfectly.
- Paint brushes
- Water cups to rinse brushes (optional)
- A damp cloth to wipe down the canvas
- Paper towel or rags to dry the brushes and wipe up spills
- In hindsight I should have used a tablecloth…not sure what I was thinking. But the paint came off the table just fine, it just would have been a lot easier and less stressful to throw on a table cloth.
- Something (maybe decorative) to hold your supplies. I used mason jars to hold my paint brushes and I gave one, half-filled with water, to each person in which to wash their brushes. My motto is: don’t buy anything if you have something that would do the job. So if you have little terracotta pots use those. Maybe you have metal pails, tea cups, mugs or juice glasses. Try to think of a way to incorporate what you’ve already got.
- I have playing cards that have works of art on them, like oil paintings, armour, sculptures, etc., so I chose all the cards with paintings and laid them around the table for inspiration. Below, I have a fine arts printable you could use!
- Cardboard palette for each person. I cut cereal boxes into the shape of palettes. If you read a bit farther you will find a palette printable that I made. I didn’t set these out on the table because I wanted them to be a surprise. More on that later.
- Micawber by John Lithgow (This is totally optional.) At the end of the post I’ll tell you all about how I incorporated Macawber into our Paint Night). In the book Micawber (a squirrel in New York) uses a palette while painting. I thought my kids would be more excited about the palette after having been reminded about it through the book. You can buy a copy of the book from Amazon by clicking here. (I don’t get any benefit from anything you buy from links on my blog because I don’t have enough traffic yet. So, if you love But First We Craft, please help me spread the word so that can change!😁)
How to Paint a Canvas:
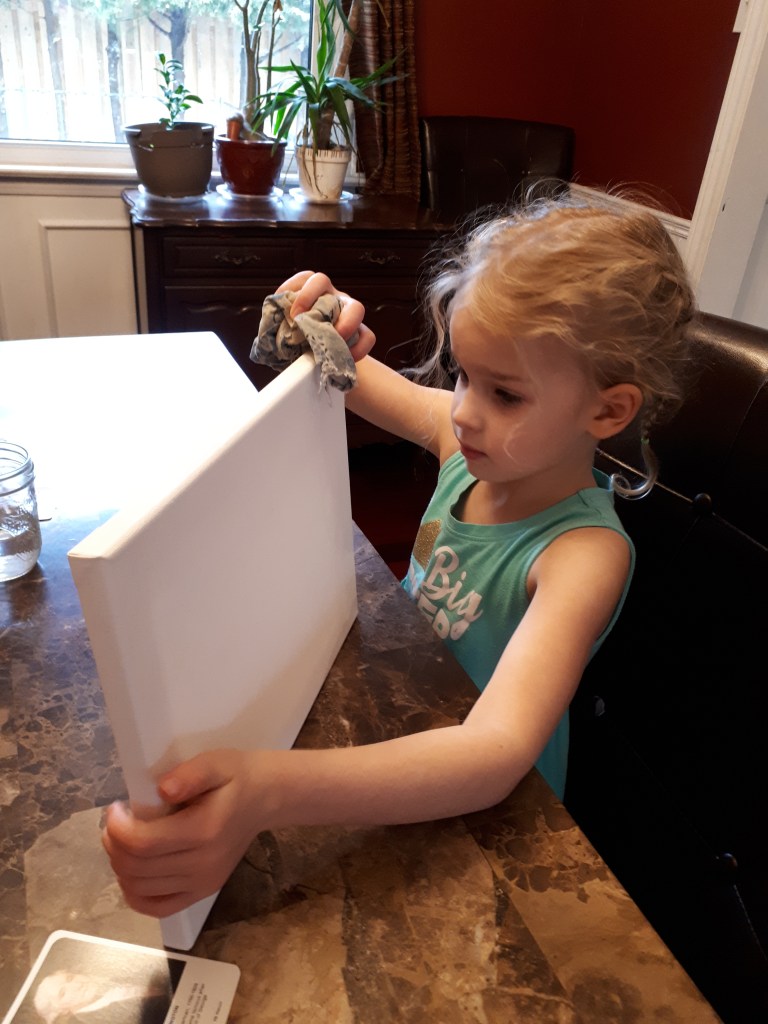
- Wipe down the canvas with a damp rag. Allow to dry.
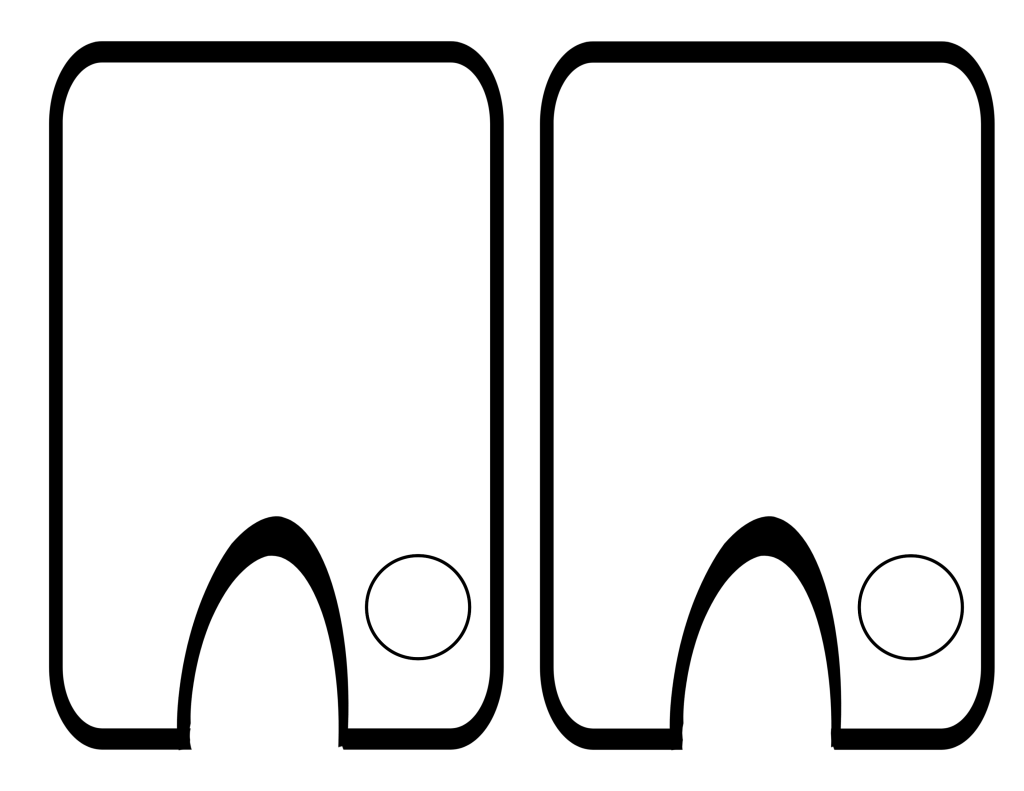
2. Let each child have some paint on their palette. Don’t give too much or it will just run off. You also don’t want to put so much that it gets wasted. I let each of my children choose several colours to start. To make cardboard palettes for your guests just download and print this Printable Palette Template, cut it out and trace it onto thin cardboard (like a cereal box) and cut it out.
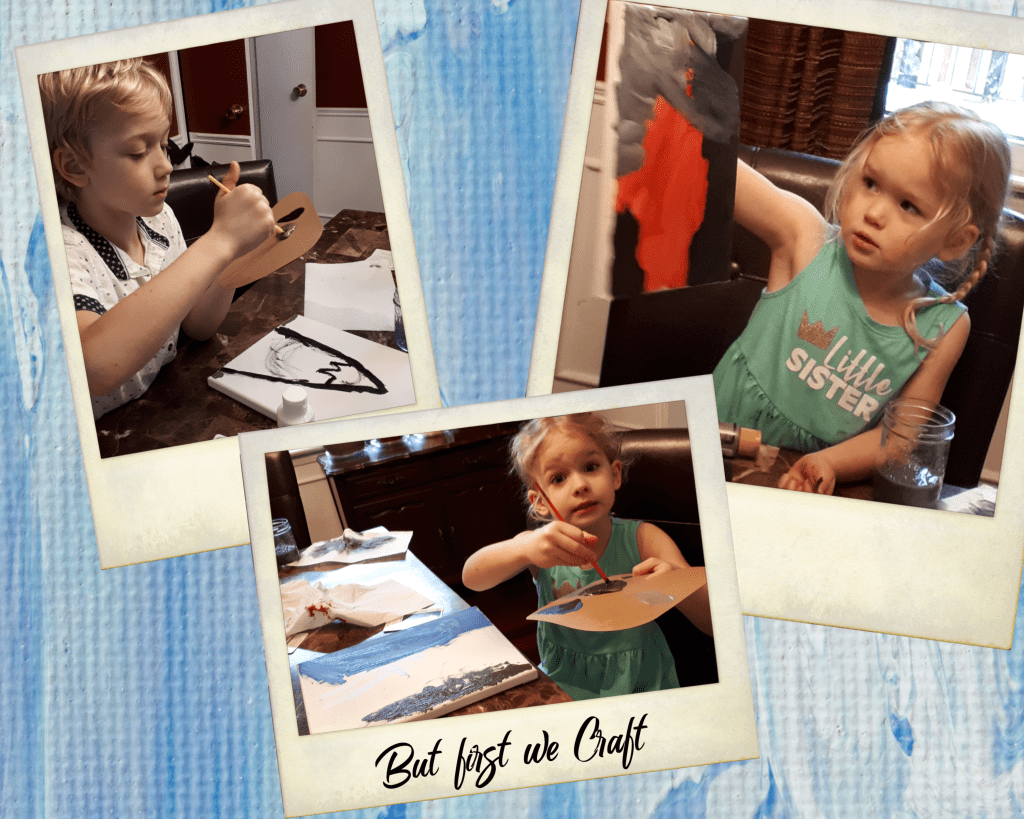
3. Paint! We discussed a few things before painting:
- I explained the difference between portrait and landscape and we each chose which we wanted to do
- I told the children to do thin layers of paint and let them dry in between, or the canvas will ripple when it dries.
- We should keep brushes for the same colour, without rinsing them, so that the paint doesn’t get watery.
4. Tidy up while your paintings dry! (What?! My house is clean??? Ya, it is 😏)
Learning About Fine Arts with Micawber by John Lithgow
Discuss the Colours in Micawber:
We were given this book (and the art playing cards I mentioned earlier) by my husband’s aunt. She’s a retired kindergarten teacher and she’s amazing! She sends us all kinds of awesome things to help us in our homeschool.
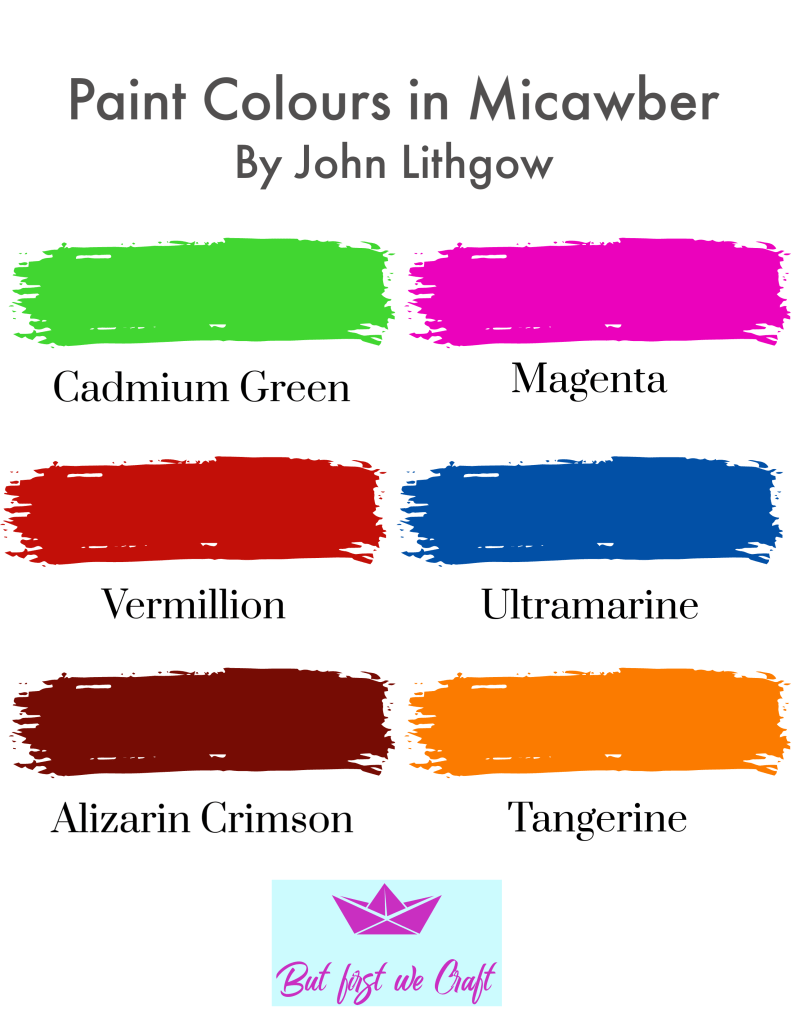
I just love Micawber! It’s such a great story, with beautiful language. It has very difficult words in it (some I had to look up!) but they’re used in such a way that it leaves no doubt of the meaning, and expands the child’s (and adult’s, apparently!) vocabulary. It was valuable in this context because it describes various colours and artists.
We read this story at the beginning of our party and, for the first time (and we’ve read it many, many times) we talked about the colours listed. To make it easier for you, I have created a printable with the various colours. Just print it off (you can cut it up if you want so you can show each colour on its own), name one of the colours and ask your children what they think it means. For example I said, “What do you think Cadmium Green is? Do you think it’s the colour of grass? Or maybe the colour of a pine tree?” They repeat my answers, “I think it’s the colour of grass!” Then I say something like, “What else is green? What other colour could cadmium be?” Then they start suggesting other colours like “broccoli, a lime, or a grape.” Once they have all guessed what shade of green it is I revealed the true colour.
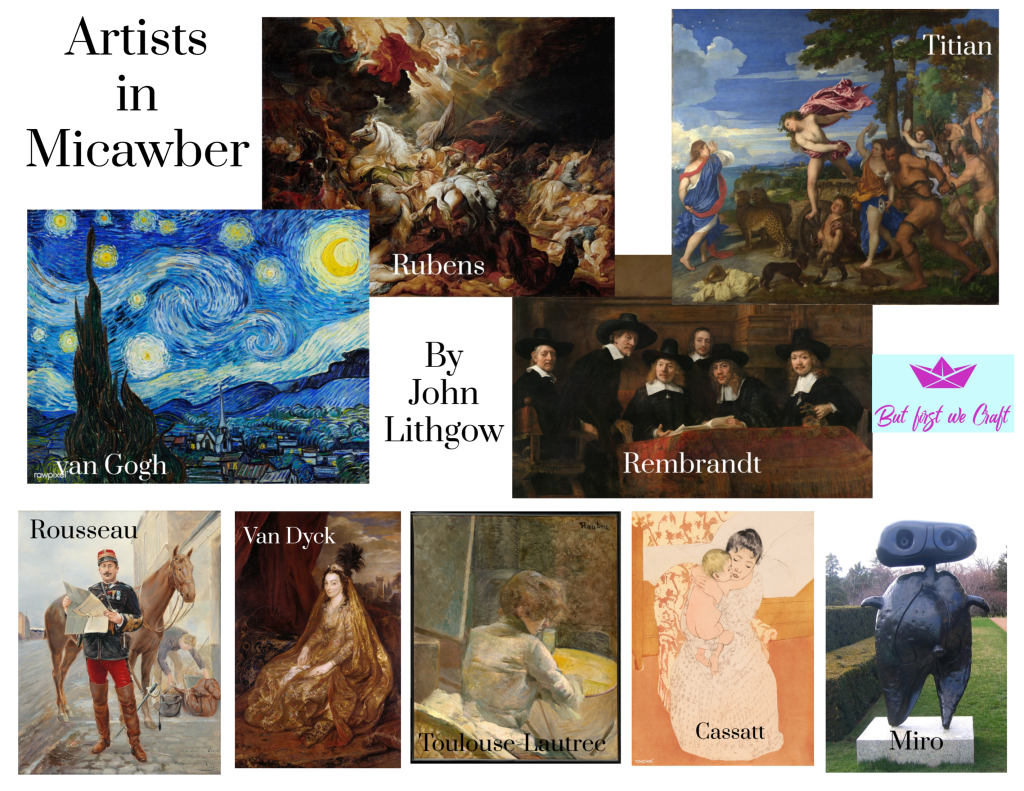
Discuss the Artists in Micawber:
On another page Micawber names nine artists; some I’d heard of and some I hadn’t. I perused Wikimedia Commons and found these paintings and one sculpture by the artists listed in Micawber (these works of art are all in the public domain). As you read each name in the book, take a moment to look at the artwork by that artist on this free printable (or discuss after reading the book). Talk about the colours the artists use, whether or not your guests like it (and why or why not), and anything that strikes you or your guests about each work.
Discuss Micawber’s Art:
When you get to the end of the book you’ll see that Micawber opens his own museum. You can discuss his paintings in the same way you discussed the artwork on the free printable above.
And that’s how we held our paint night! The kids liked it so much that we’re planning a Paint Party with friends! It’s a fairly inexpensive party (you can get 8 – 9″ x 12″ canvases at Michaels for $16, and you don’t need a world of colour for this; if you only get the primary colours you can teach them about mixing!). I really hope you try it out and, as always, let me know in the comments how it goes! If you’d like another craft that uses paint please try out our How to Make a Shield craft!

That looks like so much fun!
LikeLike
It really was! I think I had as much fun as the kids!
LikeLiked by 1 person