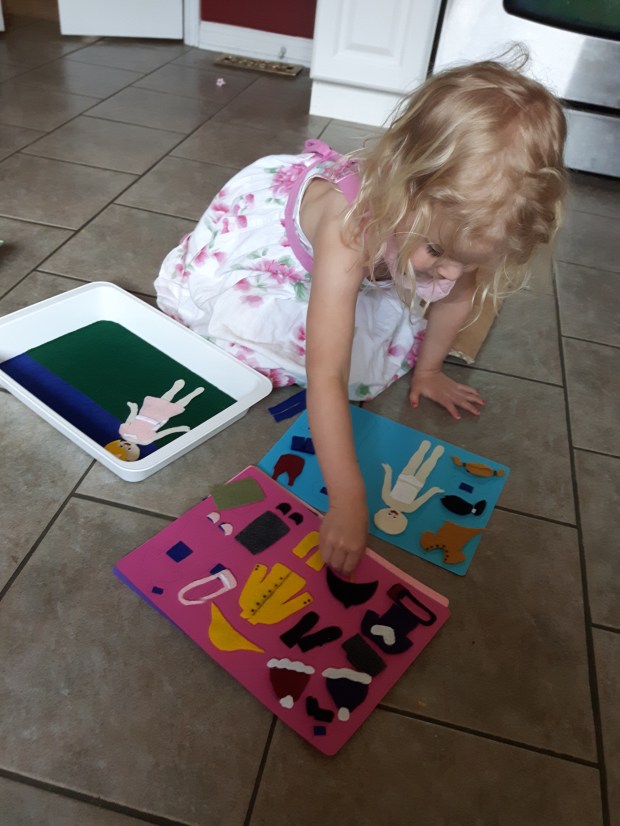
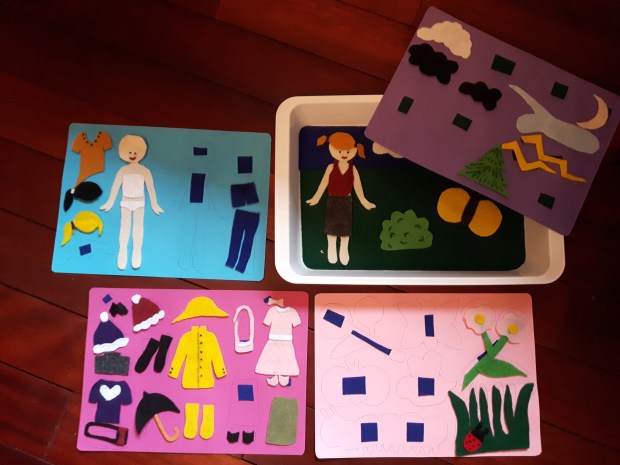
For Christmas one year I decided to make my niece a travel felt board. My original idea was to make a background (sky and grass) and then make some pieces, like large pretty butterflies, ladybugs, flowers and clouds for her to arrange on them. Well, once I started creating I could. not. stop. I worked on it for more that 14 hours (not in a row!) making the scenery, and I also made two girls with various outfits. I was THRILLED with the results and had such a blast doing it!
SUPPLIES
- felt in various colours (I got mine from Walmart and Fabricland)
- glue gun and glue
- a computer and printer (optional)
- markers and a pencil
- scissors
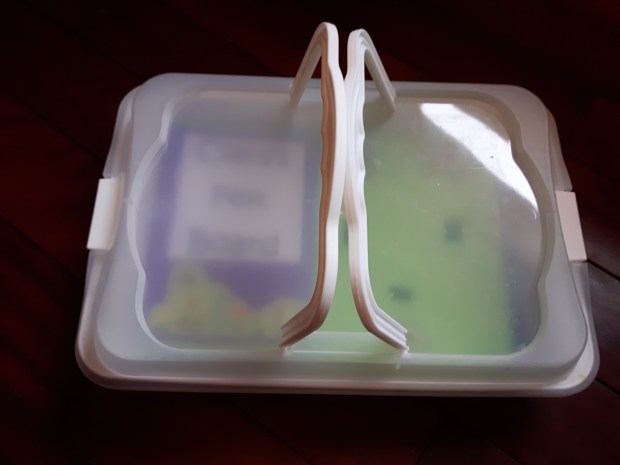
- container with lid (I got this at dollarama too). Thick cardboard would work if you don’t need it to be transportable

INSTRUCTIONS
- On the inside of your lid or the bottom of your container make a background. I simply put grass at the bottom and blue for sky at the top. The grass needs to be the larger portion so you have more room to put things that stay on the ground. You could get more sophisticated and make water and sand, or a desert, or mountains, or a city – whatever your little one is into. Some of the felt I purchased at Walmart has a sticky back. This worked really well for the background. If your felt is not sticky I would recommend sticking it to the container with a glue gun.
- Now it’s time to get creative with all the little pieces! For many of my pieces I just drew them onto a piece of paper (and I’m a terrible drawer, so this isn’t as hard as it might sound!) and kept fixing little details until it looked the way I wanted it to. (One detail that might seem obvious is that the pieces need to fit on the board! So, don’t make your trees too tall!). I then cut them out and traced them with a marker onto felt and cut them out. When you cut them out you need to make sure that you cut on the inside of the line or you’ll be able to see the marker. Alternately you can look up on Google Images different pictures then print them and cut them out to use as templates.
- Once you have the outline you can add little details by tracing and cutting out more felt, or drawing it on with marker. I did the faces using markers, but things like the heart on the shirt I cut out of felt and used the glue gun to stick it on.
- This last step is totally optional, but I thought it would be nice if all the items could be laid out. This is totally impractical when giving it to a little child, because likely they won’t be able to put them back properly, but it looks nicer and more professional when they first open it. It’s also a lot more work. So to do this I figured out how to fit the most pieces on one sheet of card stock (be sure to measure your paper against the container so it fits) and then traced all the pieces. It looks nice to keep the pieces together that are in the same category. For instance, I put all my clothes and girls together, all the scenery together, etc. Then I removed all the pieces and used the sticky felt to put one little piece on each of the traced items so they wouldn’t slide around in the container. I also made a “cover page” so when it was originally opened it was personalized and had a little scene.

Be warned: THIS IS TIME CONSUMING! But for me it was hours of pleasure!
If you tried this out let me know how it went! What other scenes or pieces did you make? Let me know in the comments!