
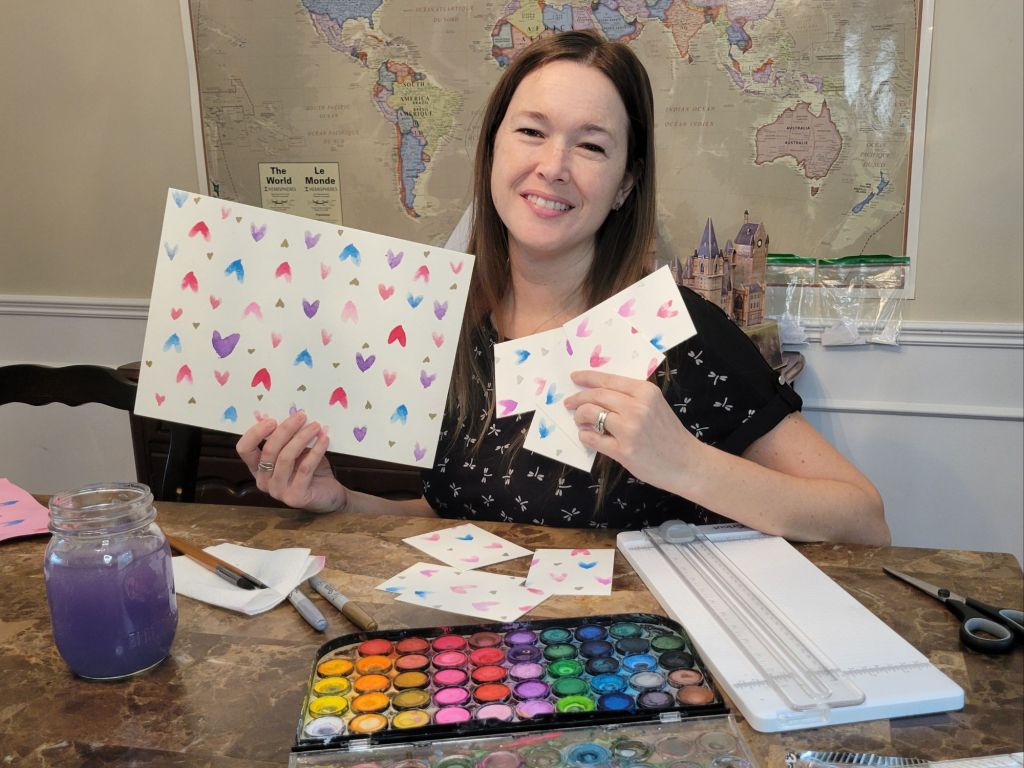
Happy Valentine’s Day! For those of you who have been around here for a while, you’ll know that I’m totally into celebrating Valentine’s Day. (See this post to read a bit about my V-Day journey) I love to make my own Valentine’s Day cards with my kids, and since I started watercolour painting just over a year ago (we gave our daughter watercolor supplies for Christmas last year. I use them more than her 😬. She’s a very good sharer), I thought that this year I’d try to make my own watercolour cards. So here they are! I made these by myself, but they are a very kid-friendly Valentine’s Day card.
I also made a video of me making these cards. Click this link to watch it on YouTube.
Supplies:
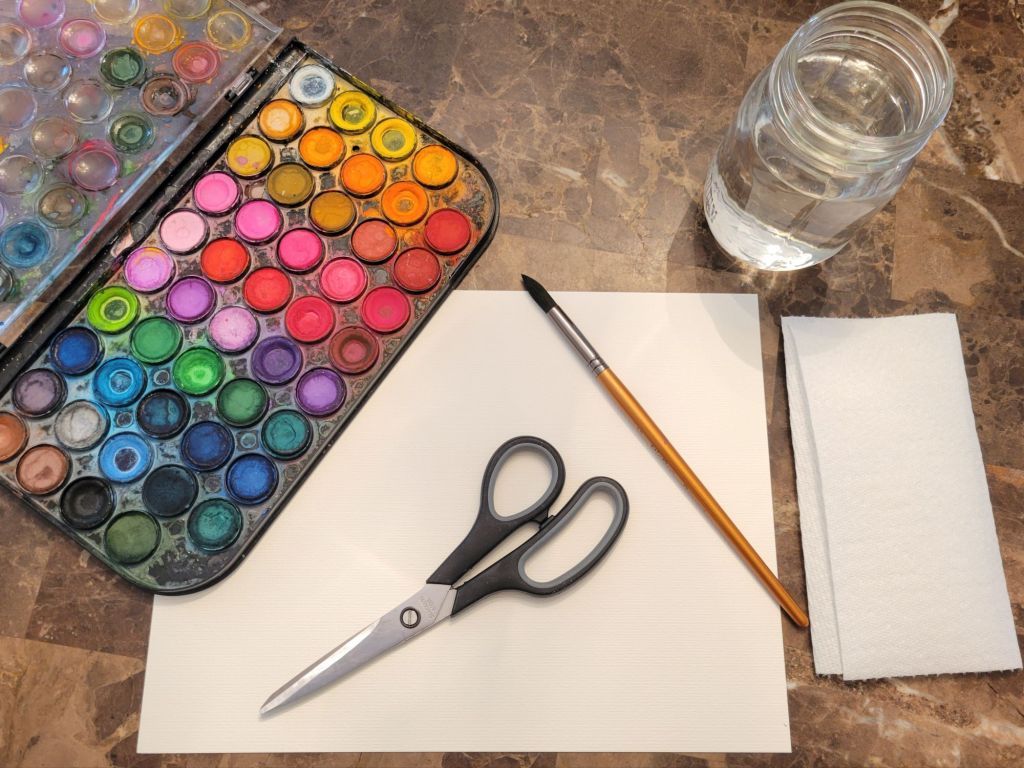
- Watercolour paints
- Round pointed tip paint brush
- Watercolour paper OR construction paper
- Scissors OR paper cutter
- Water
- Sharpies or markers (optional)
- I always get a paper towel. I use to dry my brushes and I dip a corner of it into the paint on my page if I put too much on
Instructions:
1 Wet your watercolour paints. I sometimes spritz water from my paintbrush on the colours I’m going to use, or I’ll drip water from the tap onto the whole palette. Since I’m only using a couple of colours for this project, I’m just going to use my brush. The pros (or the people I watch on YouTube, anyway) use a spray bottle of water.
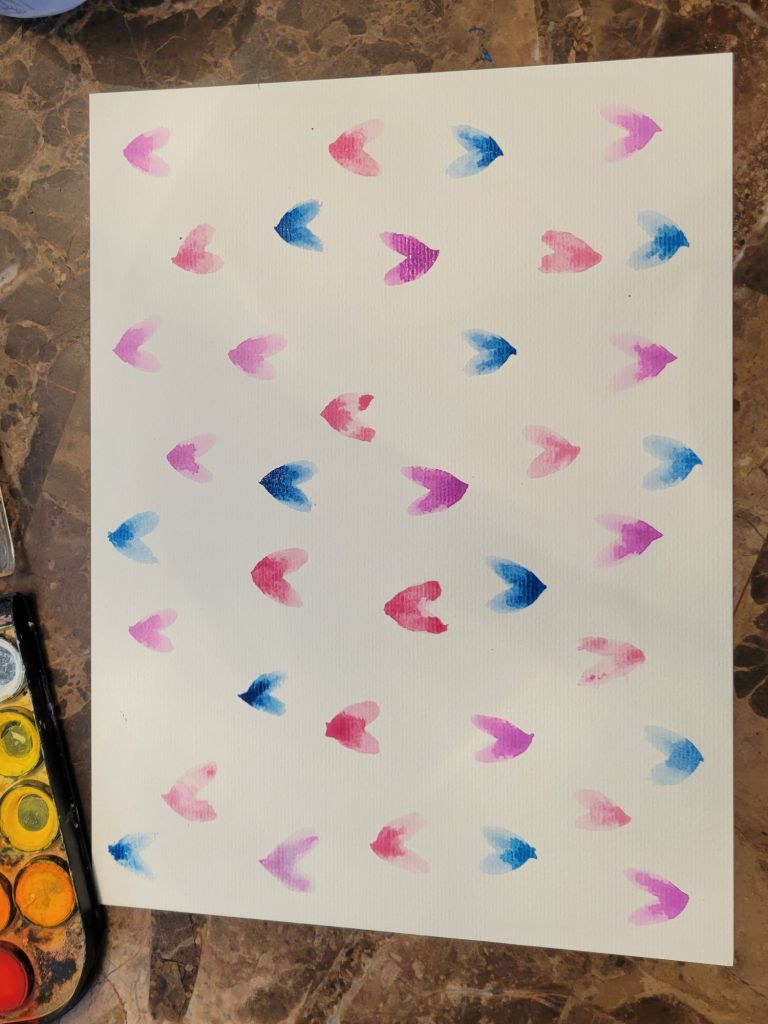
2. First, you need to know that you’re painting the hearts upside down. The point of the heart will be at the top, the humps are at the bottom. Using the tip of your brush, press down gently and raise your brush. This will give you one half of the heart. Do the other side the same way. Put the tip of your brush where the tip was last time, and go to the other side.
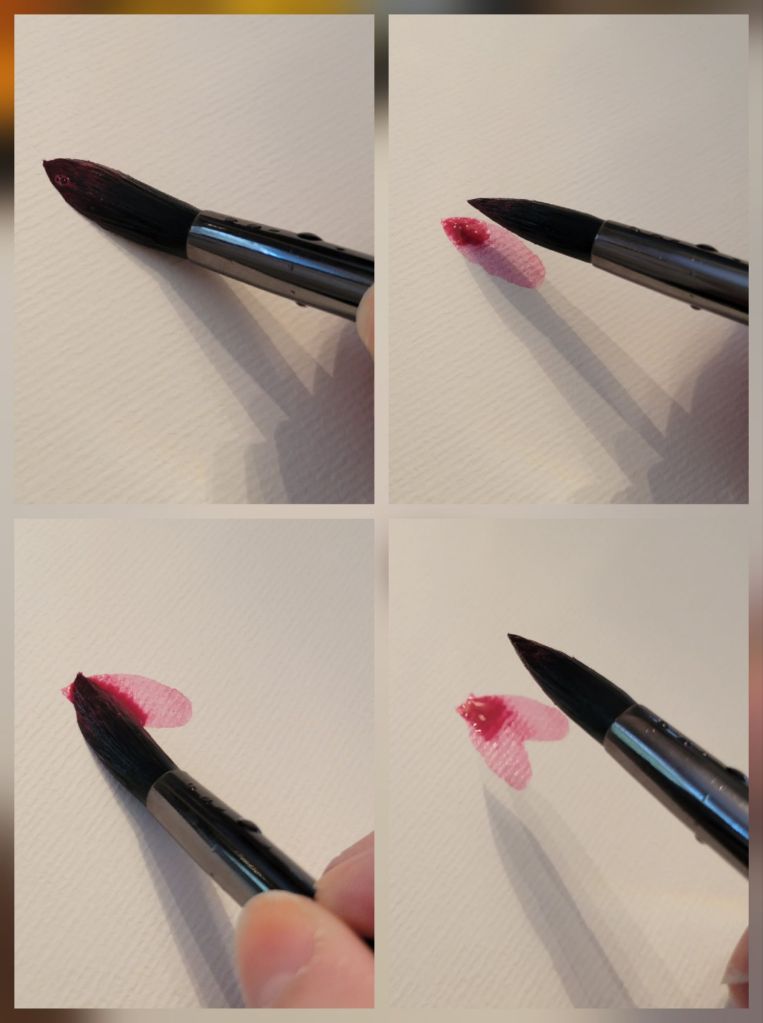
You can use your brush to pull some of the colour to other areas of your heart. Sometimes I’ll drop a little into the top humps.
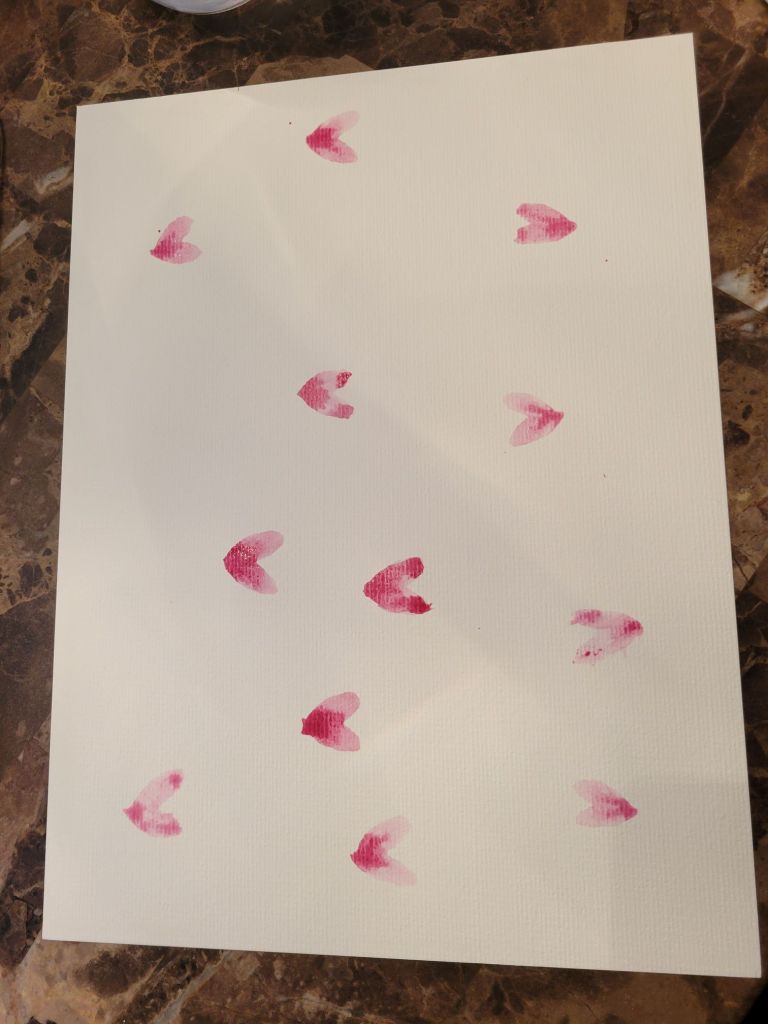
3. Do this over and over all around the page, choosing whatever colours you want. I did pink and blue so they wouldn’t look as girly for the boys in the class.
I like to put the hearts on sporadically (meaning jumping all around the page) because the paint will get lighter as you go. If you go straight across your page it will start dark and then get light. I like the variety of dark and light beside each other.
You need to choose if you want your hearts all facing the same direction, or if you want some upside down. I did some of each, but I think I like them all one direction better. To have them facing both ways you’ll have to turn your page upside down. Be very careful to keep your page flat or your paint may run.
4. LET IT DRY!!!! Please be patient here. I know it’s hard. I know it’s ALMOST dry. I know a hair dryer would speed it up nicely. RESIST THE URGE!!!! If you do it too soon you’ll smudge your work. If you use a hair dryer you could blow the paint across your page. I may not be too advanced in watercolour, but these things I’ve learned. So learn from my many, many mistakes. Go have a cup of tea and come back to it.
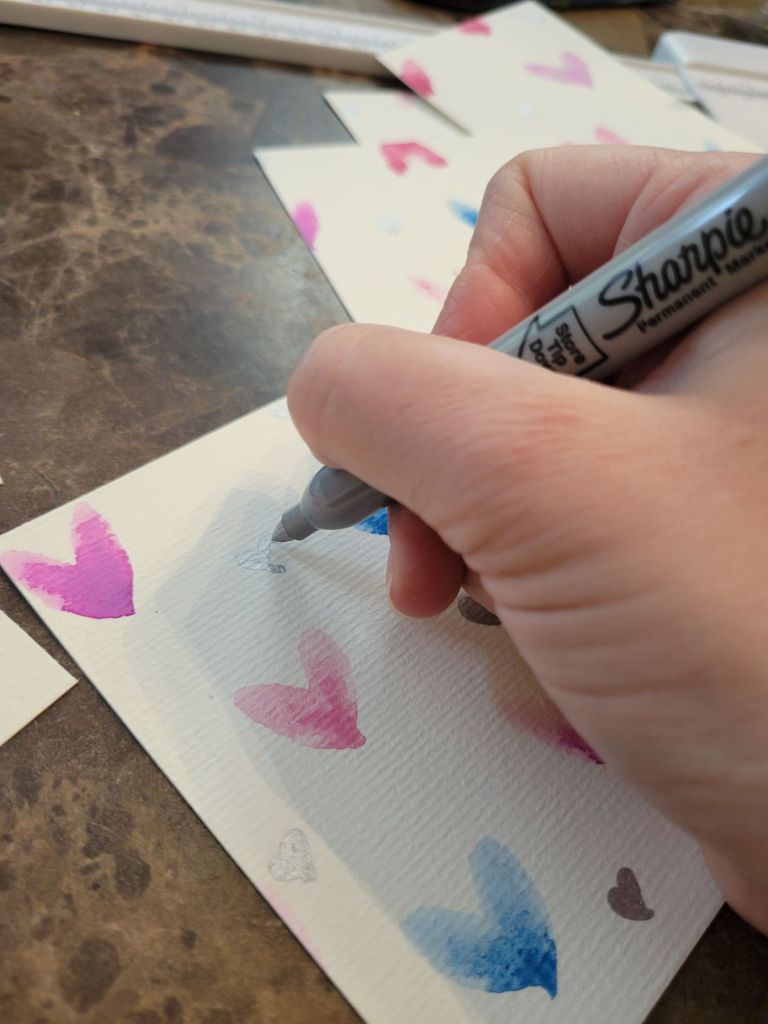
Optional: After it’s completely dry, if you want to draw hearts on in marker, now is the time. The metallic sharpies are really nice because they go right over the paint giving a nice layered effect. If you do it when it’s still wet you can damage your makers and wreck your paper.
A SIDE NOTE. I just thought of this: To my fellow procrastinators. If you need to get these done and signed because it’s Valentine’s Day tomorrow, mark out on the back where the cards are going to be cut, and get your child to sign them first. Then you can cut them (and paint them if needs must) while your little person is in bed.
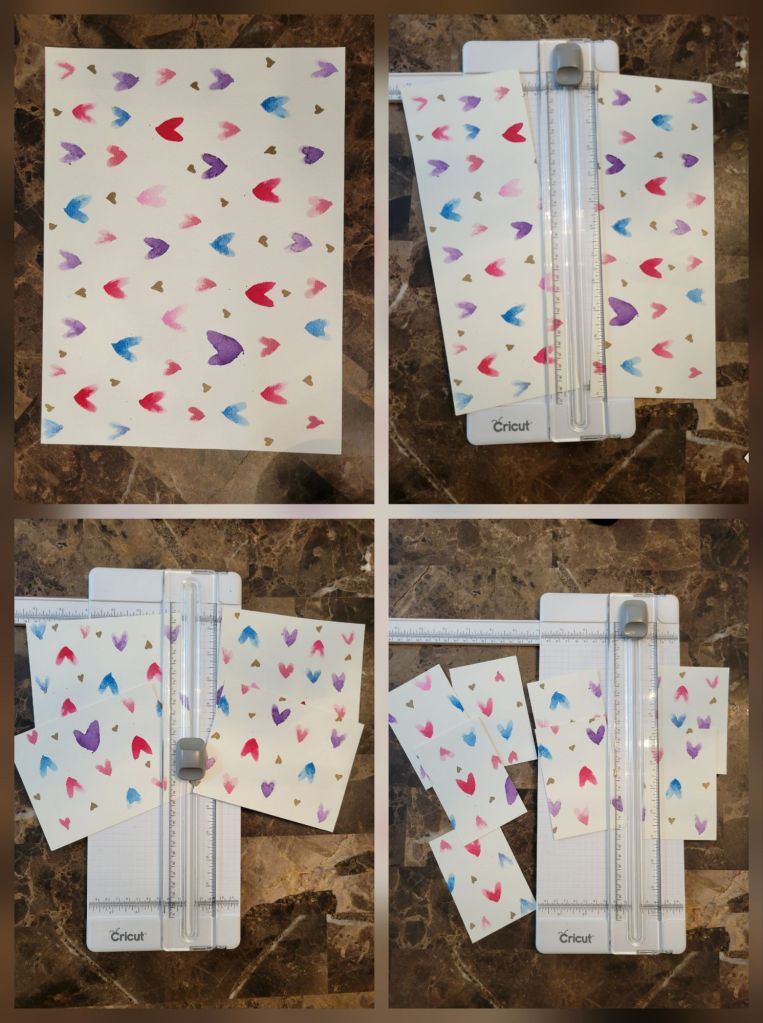
5. Cut the cards apart. If I’m using a full 8 by 12 inch piece of paper I usually cut it into 8 pieces. I wanted to write messages on the front of the second design, though, so those I cut those into 6 pieces.
6. And finally: write your Valentine’s Day message on the back. Aren’t they adorable? 🥰
Design Two:
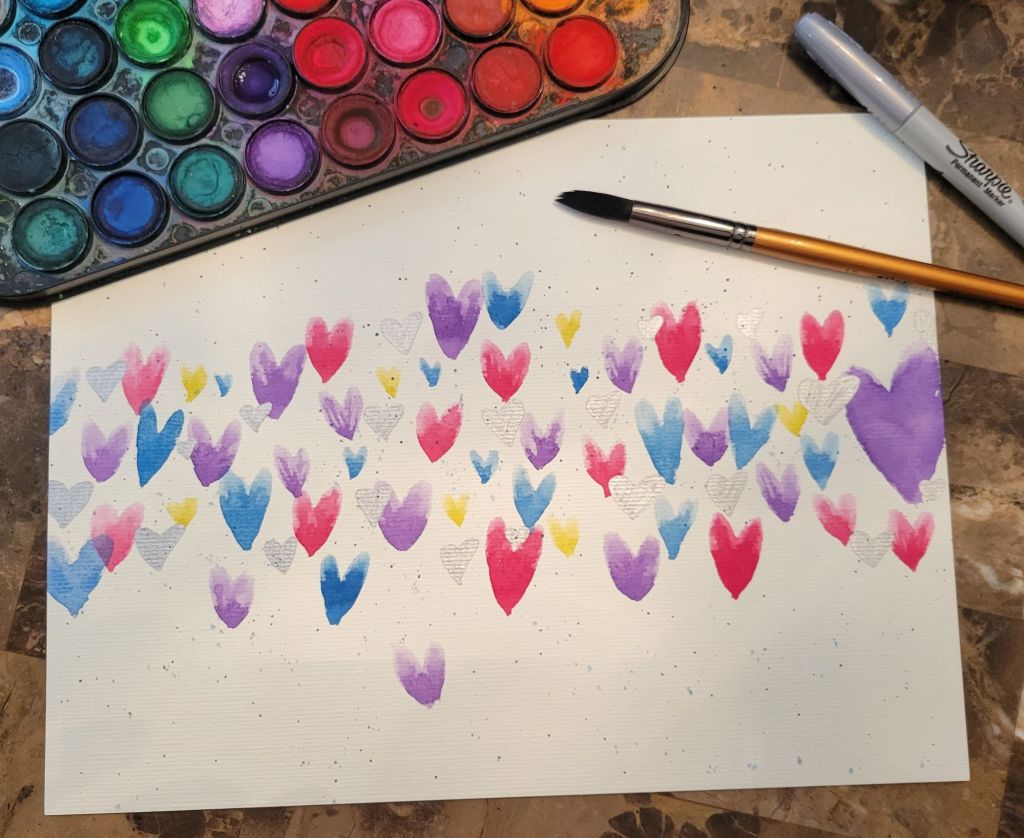
1 Make a banner of hearts across the middle of the page. Make your hearts in the same way we did above. Make some big and some small to give variety. I also added in overlapping metallic hearts. Do you see the paint splatter? To do this you just load up your brush with watery paint, then tap it against your finger, about four inches above your page. It usually goes everywhere – maybe your aim is better than mine- so move everything you don’t want painted, and wipe it up after.
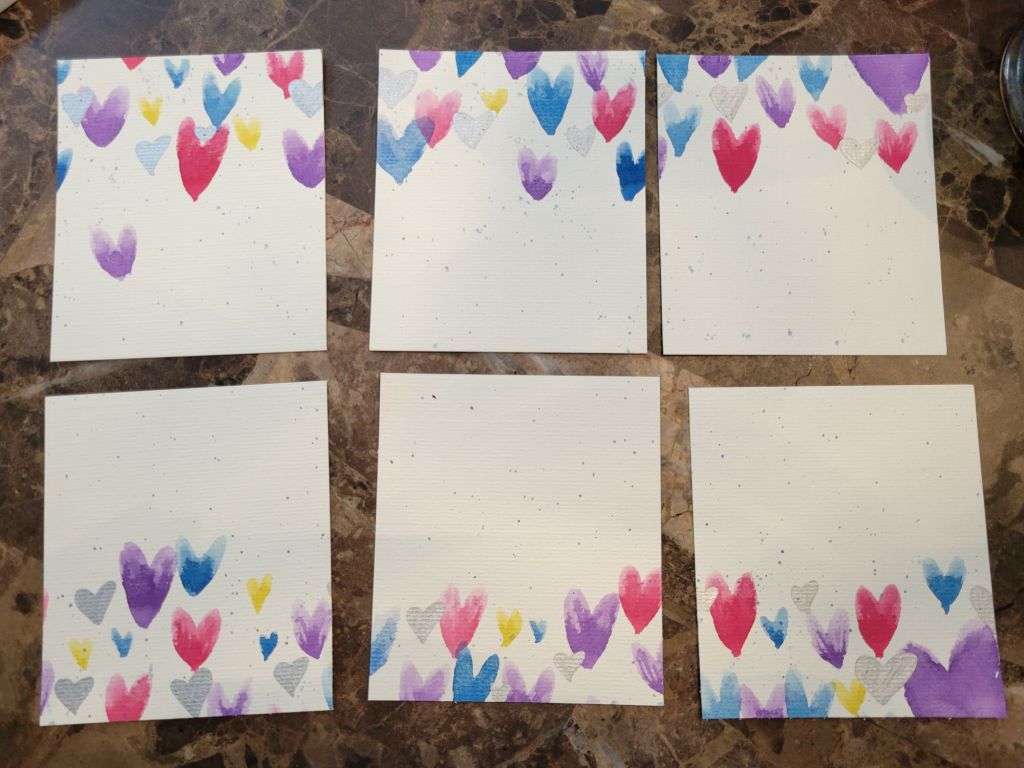
Cut them up. This will put a banner of hearts on each card. I wanted to write on these Valentines so cut them into six cards instead of 8.
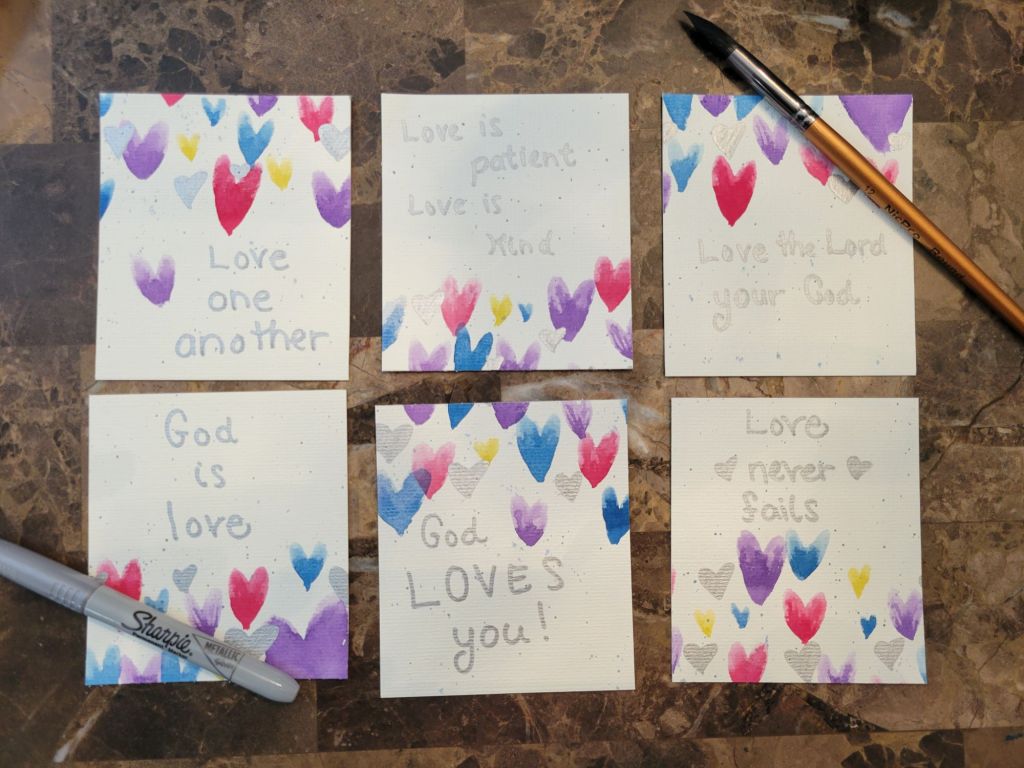
I wrote on mine with metallic sharpie, but you can also use normal markers.
These DIY Valentines Day cards don’t take very long. The video I made of me making one page is 14 minutes, but I was doing it very slowly and peacefully, stopping to talk, show you things and sip tea. It was lovely. If you want to check it out click here: Happy Valentine’s Day!
