
Just Bristol and Foam Board!
A year ago I planned and prepared an epic tea party for my daughter’s birthday party, then had to cancel it two days before because that’s when the Covid restrictions started. The bin of read-to-go party sat in my basement for the “postponed” party day. Who would have known at the time that it would be almost a year later? Finally, two weeks ago, we had the party, but had only 4 guests because we’re still under Covid restrictions😩!! I’ll post the whole party in the coming weeks (but with an added Beauty and the Beast theme mixed into it, because my daughter decided that this year she wanted Beauty and the Beast, and not a tea party🤦♀️🤷♀️).
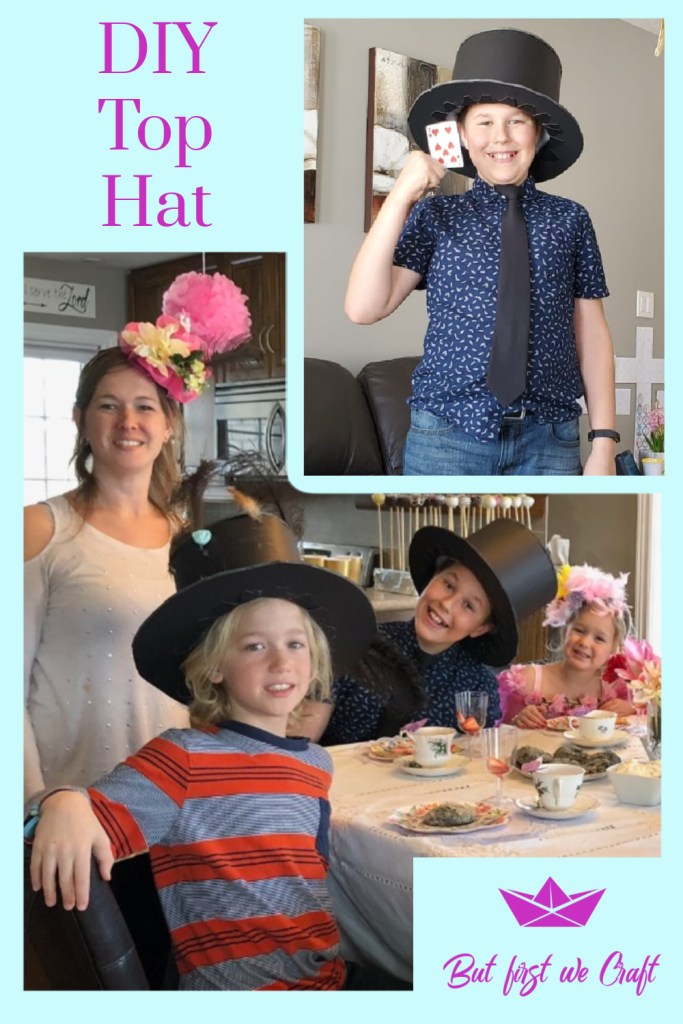
One very important part of this old fashioned tea party was making the upper class head coverings. The girls made fascinators (check out this delightful post by Bobbie at The Clumsy Crafter that we used) and the boys decorated top hats. I was shocked by how much the boys loved their top hats! I expected them to fight me on it, and take them off as soon as I wasn’t looking, but they wore them for most of the day, way longer than the girls wore their fascinators, and were constantly saying, “Look what I can do with my hat!” tossing them around and doing ENDLESS magic tricks. These top hats absolutely make great magician hats (is anybody else thinking, “Messy, messy, messy.”?) as well as gentlemen’s top hats or even a Leprechaun hat for St. Patrick’s Day!
By the way, you can watch me make this on YouTube! Just click here and we can make it together!
Supplies:

- Black bristol board
- Black foam board
- Pencil
- Scissors
- Ruler or straight edge
- Sharp knife
- Tape Measure
- Glue gun and glue
- Quilt batting (optional)
- Something circular and comparable in circumference to the head that’s supposed to fit into the hat. I used a plate for the head hole and a pot lid for the brim
Instructions:
A Note on Measuring:
Measure the head that the hat is to go on. The first hat I made was the right measurement (number of inches) for my son, but it didn’t fit because it was perfectly round, unlike his head. These hats are very stiff; there’s absolutely no give in them. Be sure that the circumference of the hat hole is the same as the circumference of the head, but that it’s NOT a circle. Of you can err on the side of too big by making it a perfect circle, and then adding a bit all around the edge. It’s far easier to put in stuffing or a strap to fit a smaller head than to have to redo it to fit a bigger head.
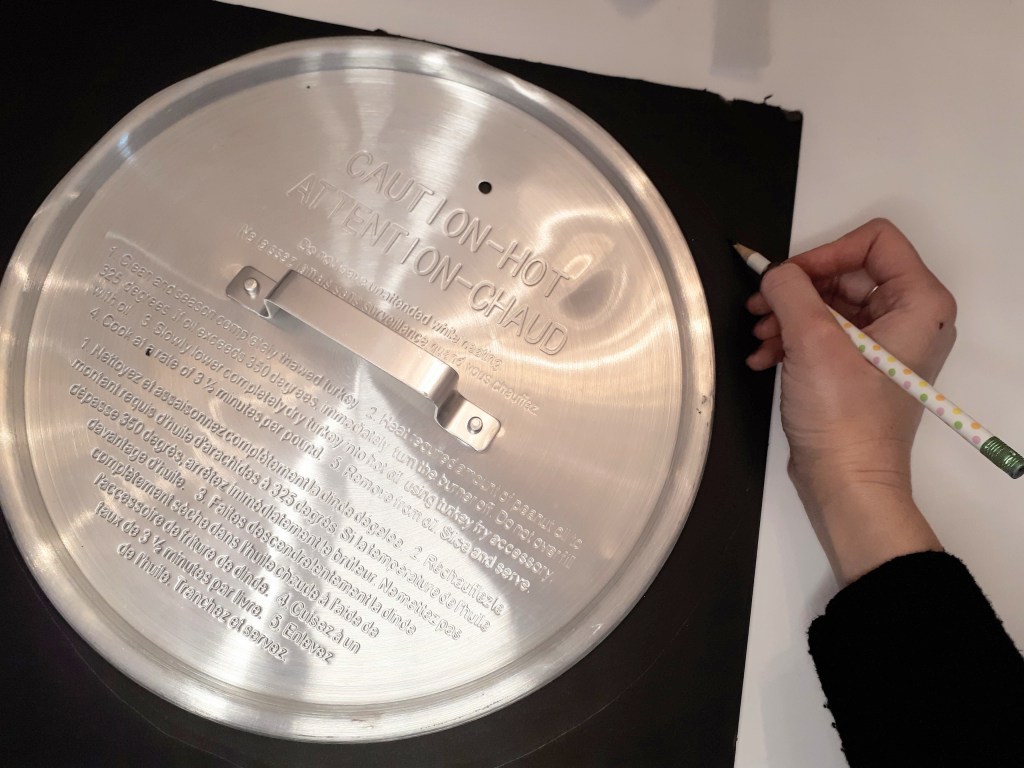
- Find something several inches larger than the size of your head. I used the pot lid from our turkey fryer. Trace it onto the foam board. This part will become the brim, so it should be about two inches on all sides larger than your head. Trace it with pencil. This can be a perfect circle.
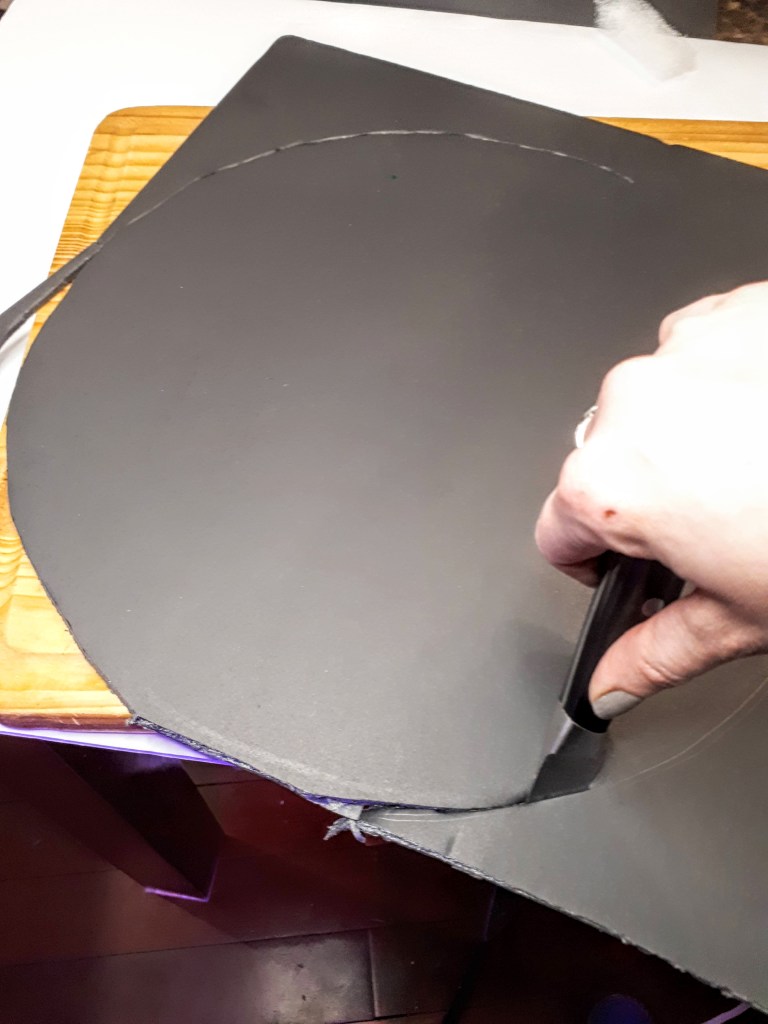
2. Cut out the circle. I used a sharp paring knife. I found that using scissors here crushes the edge before cutting it.
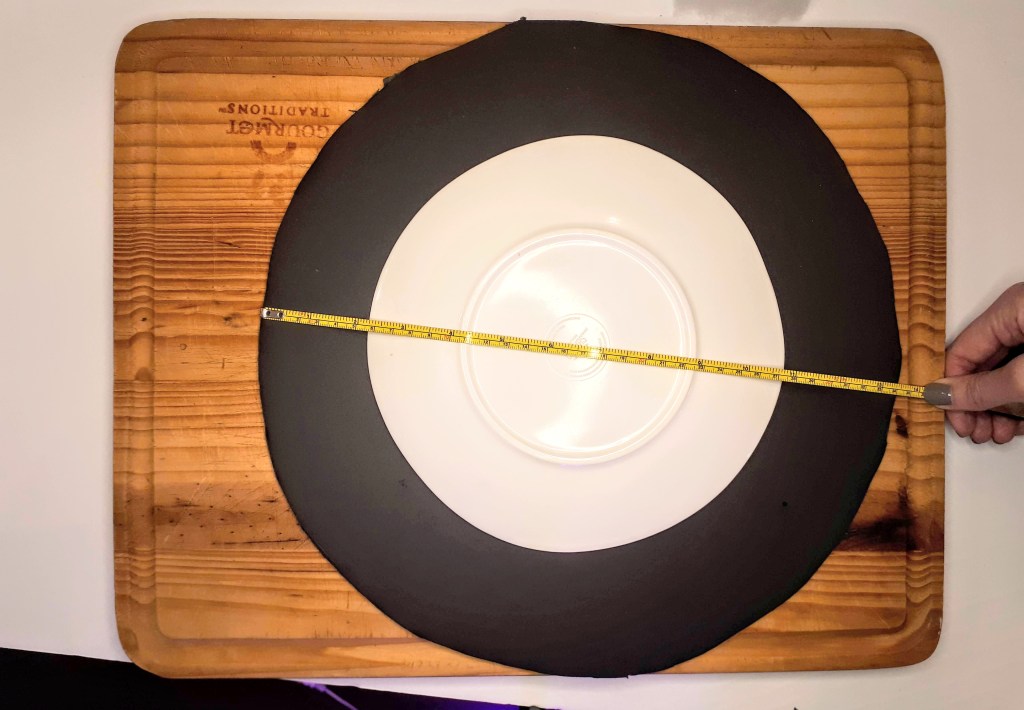
3. Find something kind of comparable to the size of your head, and then manipulate it to make more of an oval shape (again, see note on measuring above! If I’m confusing you take a look at the YouTube video. I talk about how to manipulate it and show you how I did it.). Cut it out. The large circle will become the brim of your hat, and the small circle will become the top of your top hat.
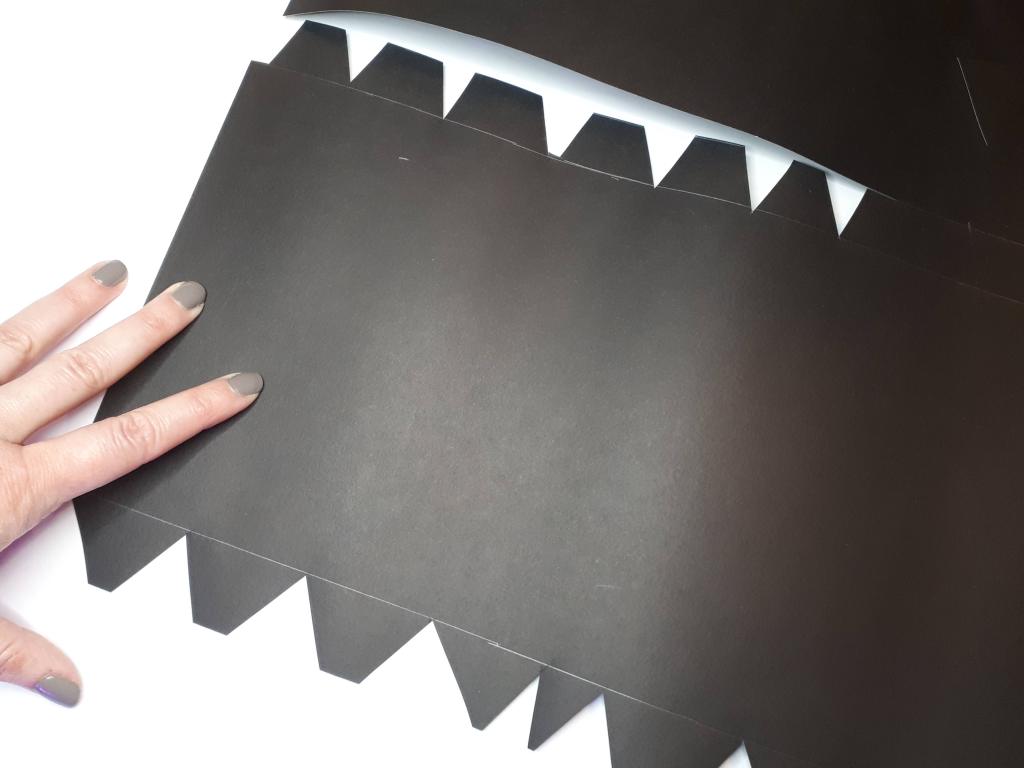
4. Make the long cylindrical section. Now you need your bristol board. The height of this part should be about 6.5 inches when complete, plus half an inch on either side to make the above shown tabs, so cut it 7.5 inches tall. The length will depend on how big your hat needs to be, so go ahead and roll up the bristol board and push it through your brim hole. The ends should overlap about an inch, two to be safe. Once that long strip is cut off use a ruler to draw a pencil line half an inch from each long side of the bristol board. Then cut the notches in as you see above. To make the next step simpler cut right to the line and no further.
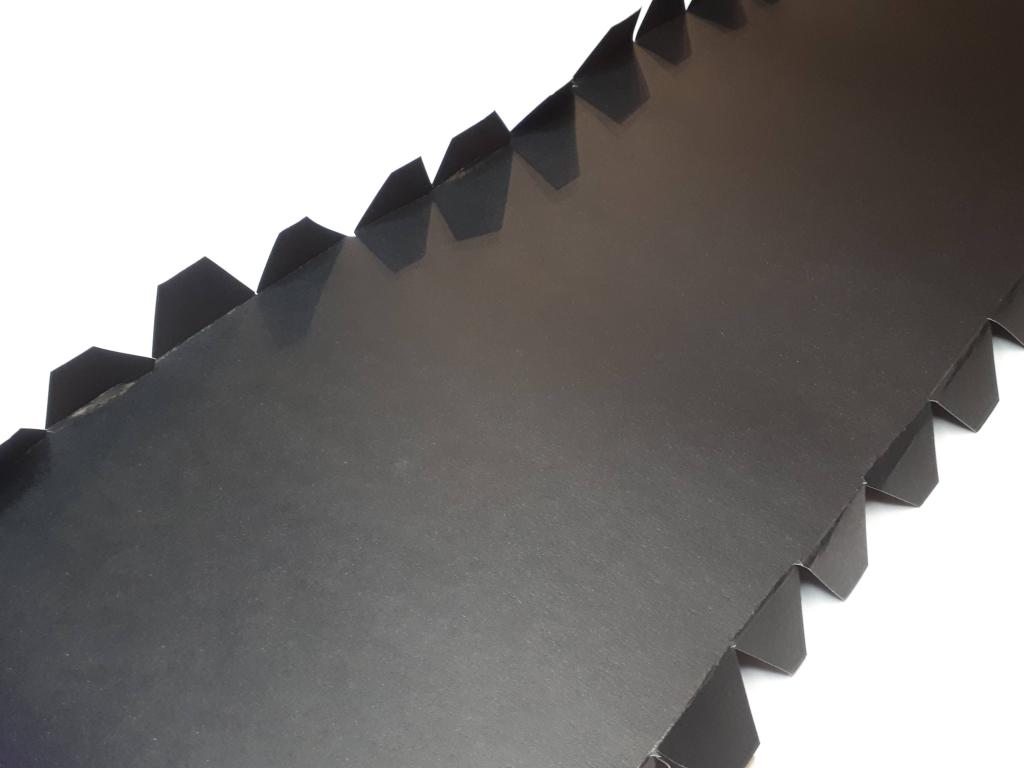
5. One side of notches will attach to the brim, and the other to the top. Fold one set of notches up, and the other down. This should be fairly simple to do if you were careful to cut your notches to the pencil line.
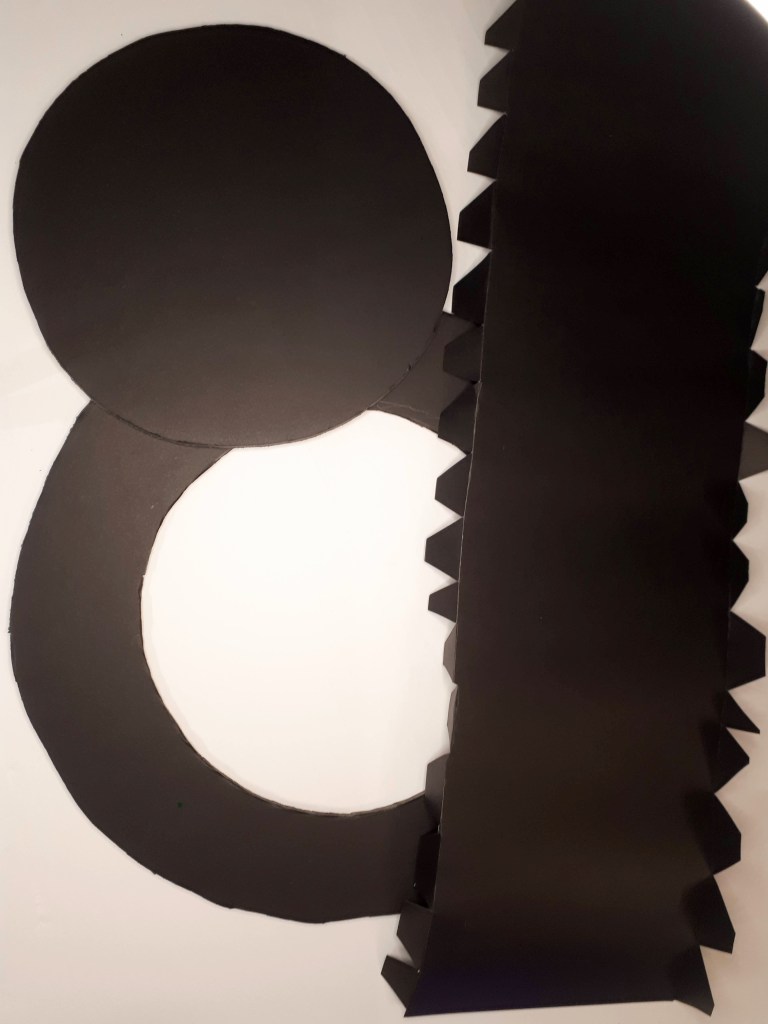
Here are the three sections that you will glue together. Brim on the bottom, Top on the top (naturally), and the cylinder on the right.
6. Take out your handy glue gun and heat her up. Start by attaching the cylinder to the top of the top hat. Lay your top on the table and glue several notches at a time, starting at the middle of the long bristol board. Work your way from the middle to one end, and then the middle to the other end. The part of the top of the top hat that you can see will be inside the hat, so it doesn’t matter much if you get glue everywhere (thankfully!).
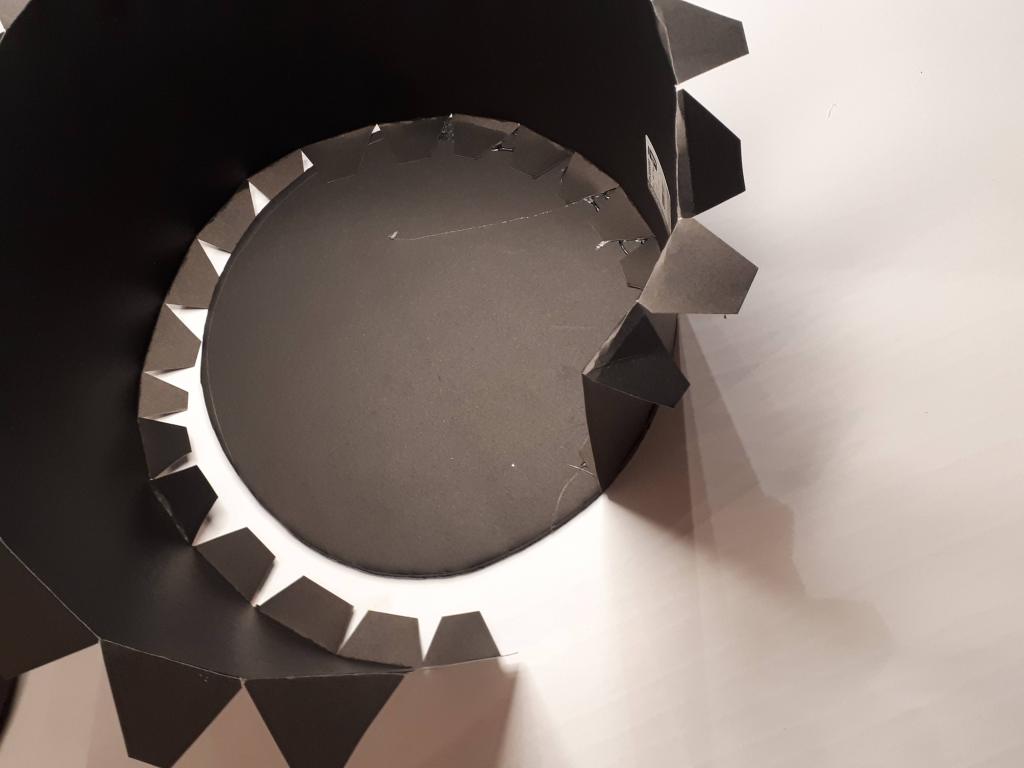
7. Slide the cylinder into the brim and glue the bottom notches to the underside of the brim (again middle to edge, then middle to other edge). If you get glue on the bristol board the colour may come off with it (see my picture below), so be extra cautious here. Once the bottom is attached, glue the slit of the cylinder closed.

You can see near my brim here there is an extra cut. When I attached my brim the cylinder was gaping. This only happened with one hat (out of three) and I’m not sure how it happened, but it was easy enough to fix. Just use your scissors to slit the bristol board slightly and glue it again.
8. If the hat is too big (which is completely okay!) glue strips of quilt batting along the inside rim. This will hold it tight and comfortably to the gentleman’s head. And you’re done!
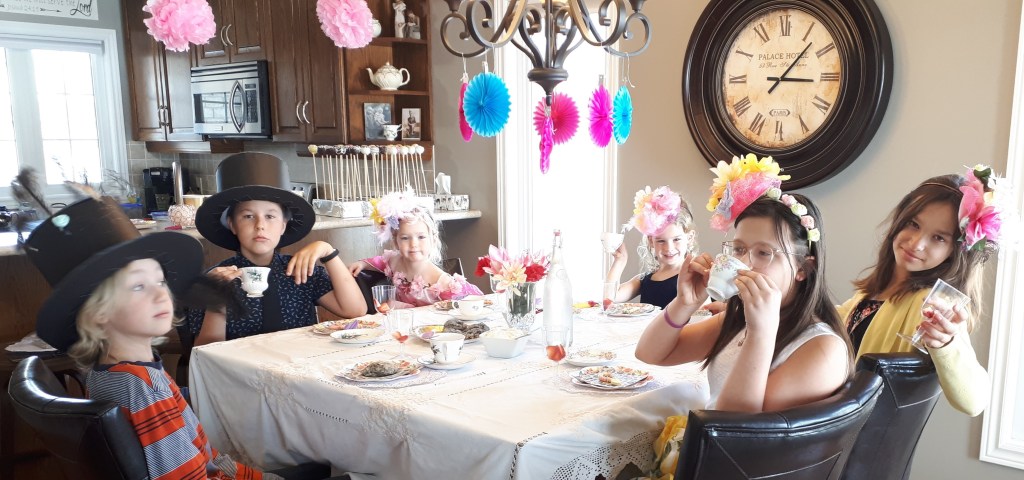
Here are the handsome boys in their homemade top hats, and a teaser for the Tea Party Birthday Party post!
Remember that you can watch me make one of the top hats if you’re confused about any of the steps. It’s 25 minutes long, so feel free to skip around! Also I love to get comments and questions, so feel free to reach out, especially if you have questions!

2 thoughts on “DIY Top Hat”