
Well, I have had a lovely summer off! I didn’t mean to take the summer off, and I could hardly believe my eyes when I looked at my last post and saw it was on July 24th. Where does the time go? Anyway, my family is back to our fall schedule! We started homeschool this morning (I’m typing this on Tuesday, Sept. 8), with one child in grade 4, one in SK and the last little one in JK. We also started swimming lessons today, so it seems almost normal to start blogging again. Plus, this week I made something that I’m super-duper proud of, and you should make it too, particularly if you have little girls.
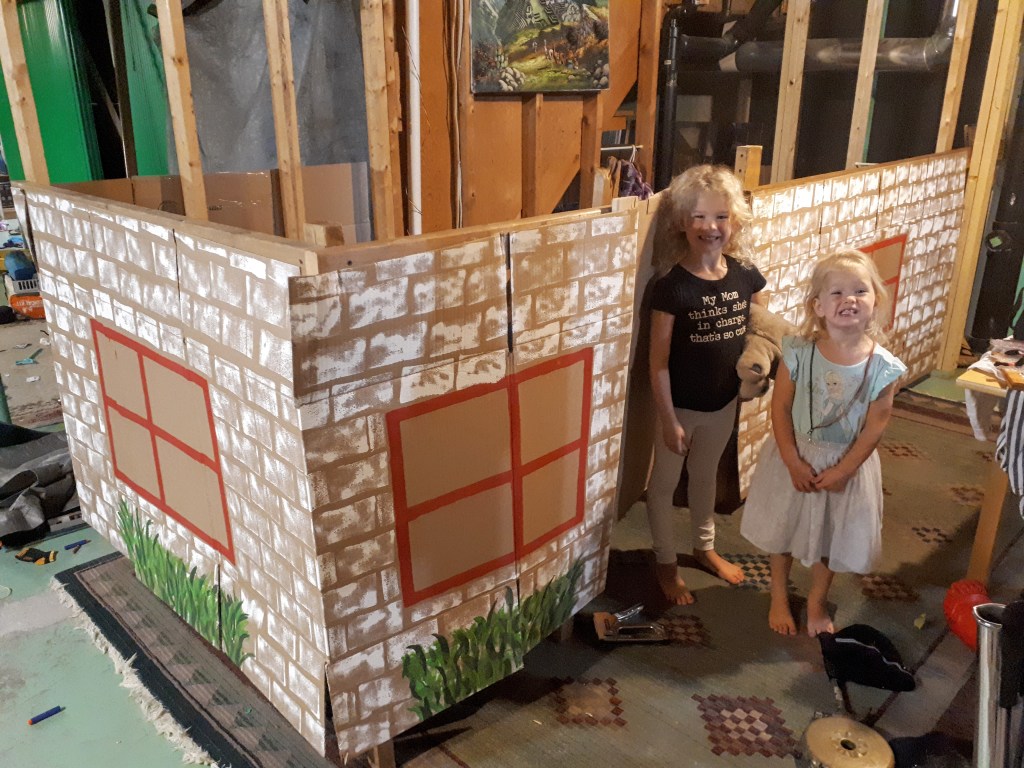
I made this on a total whim. My husband took the oldest two children fishing, and the little one wanted to play house with me. I was feeling rather tired, and not at all in the mood for imaginative play, so while playing I decided to try to convince my daughter that we ought to make a play house. She jumped right on board and helped me move a huge pile of wood in order to make the house in a corner with ample open framing. Our basement is an unfinished, wide-open monstrosity, which allows a lot of space for playing, but it’s also chaos. There are toy kitchen dishes and costumes all over the place all.of.the.time. So I thought that if I made a little house where they can keep it all, it may not continue it’s reign of terror on the rest of the basement (don’t ruin my dream…let me live in this little fantasy land for a spell!). So, after moving said wood, we got to building! Just the two of us💕. This house ended up fitting a kitchen, living room, and two very minuscule bedrooms!
Supplies:
- Cardboard boxes; mine are 4-cube
- 2x4s
- Staple gun and staples
- Hammer and Nails
- Paint and brushes
- Sponge for painting bricks
Instructions:
To start, take a look at this blueprint. I hope it’s adequate to show you what I’m talking about!

- Decide on the location of your house. In order for this to work you will need to build into a corner, where there is framing. All horizontal 2x4s we put up were about 4.5 feet from the ground.
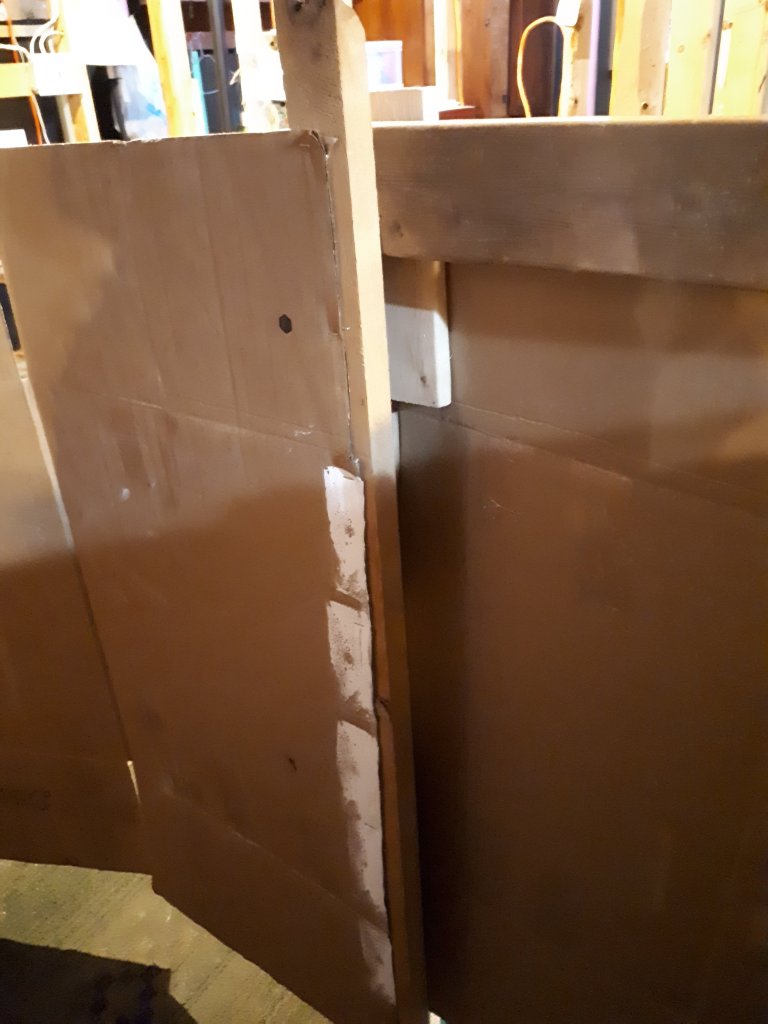
2. We started building by making Wall A. We nailed a very long (8- or 10-feet) 2×4 into the framing of the wall, making sure it wouldn’t fall or shift by putting two nails in the one end. At the other end of the long 2×4 we supported it by nailing it to a shorter 2×4, about 4.5 feet tall. We didn’t concern ourselves at all about making it level.

2. Repeat step one at the other end of the “house.” This will make Wall C.
3. To make Wall B we nailed a 2×4 from the vertical 2×4 of wall A towards Wall C, using another 4.5 foot 2×4 to support it. We left about a 3 foot gap to be the door.

4. We then took 4-cube boxes, cut one side they wouldn’t be double thick, and stapled them with a staple gun all along all the exposed walls. At the ends of the walls we stapled all the way down. We put the clean empty side of the boxes facing out so we could paint later.
5. To make the door, just cut a 4-cube box to size and staple one side onto the 2×4. Ours overlaps one side to keep it closed.
Decorating:
I gave the house windows by using a level to make squares on the outside of the house. The kids wanted me to cut out the windows so they could see through them, but I was concerned about the structural integrity of the house, so I decided not to. They weren’t very disappointed because they want it to last, too. I just made lines with a sharpie, and painted it with a foam brush and acrylic paint from the dollar store.
To do the brick work I just dipped a rectangular sponge in white paint and put it in rows on the house, being sure to offset each row.
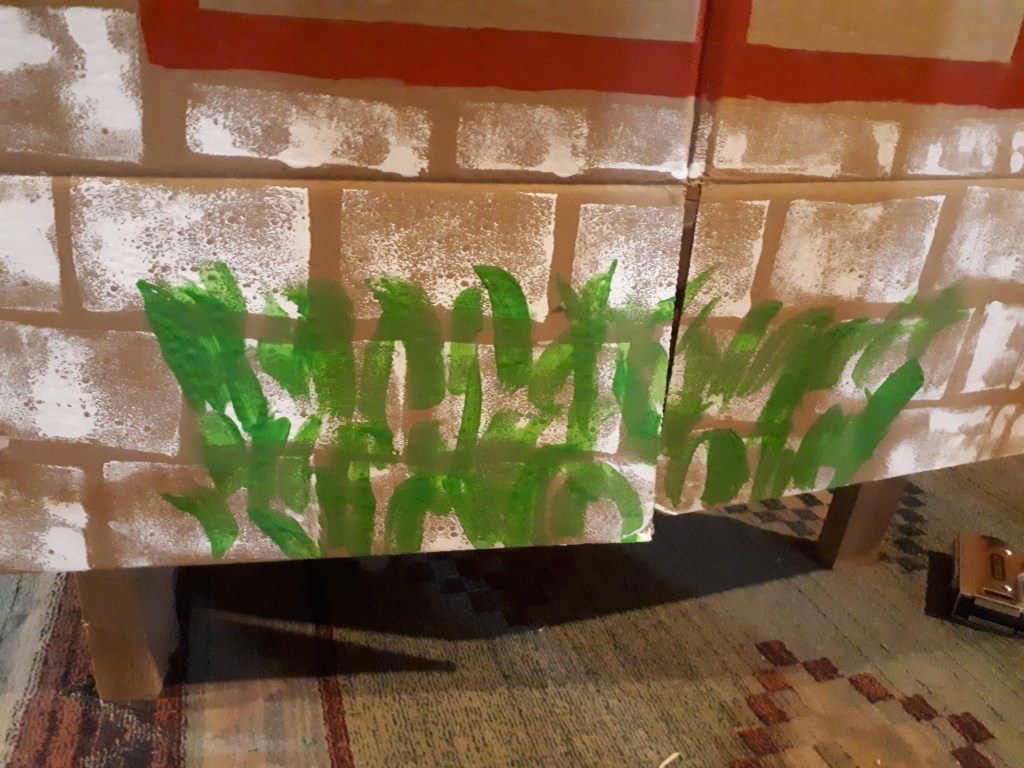
I was a little concerned before I painted the garden because I am no artist. But this really worked well! I used normal green for the first set of leaves, added a bit of black to it to make it darker green for the second coat, then got fresh original green and added A LOT of gold to it for the third set of leaves. I made a little video of how I did it so you can see how completely EASY it is! In the video I mention that gold paint can peel sometimes because it’s more “plasticky,” but the paint has stayed on beautifully, and it’s been a week since I painted it!
The Inside:
Obviously your house will look different than ours depending on your furniture and structure of your basement. We were fortunate in that it worked for us to put our house where the under-the-stairs hole is, so we gained some space to make a “bedroom.”
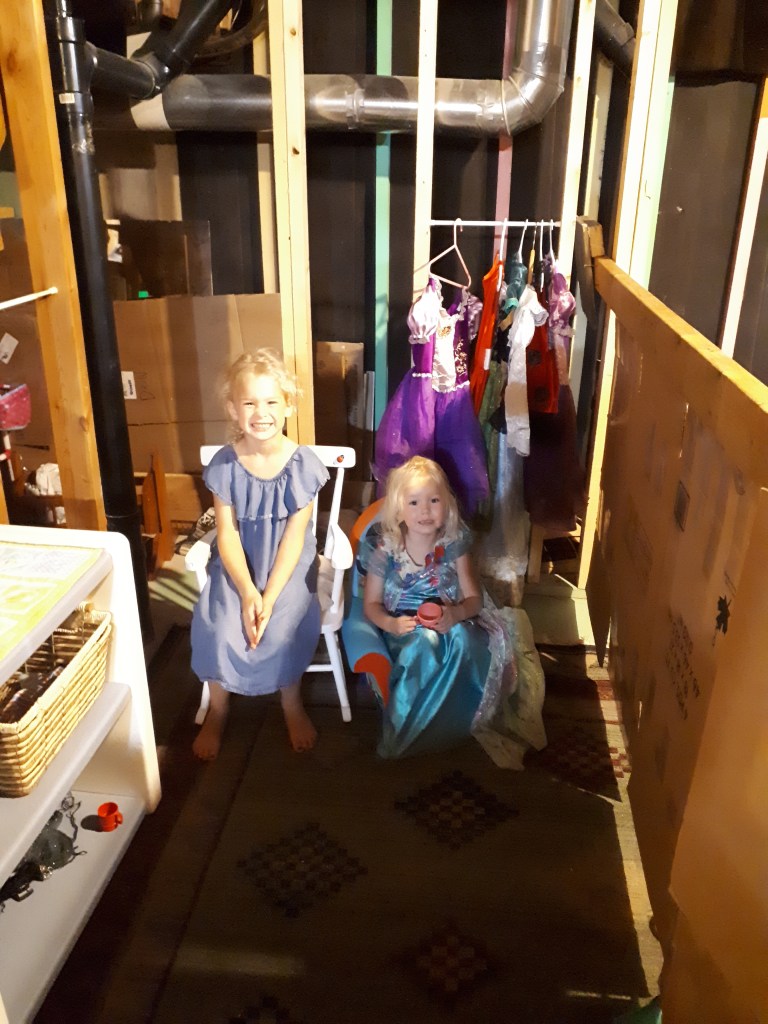
The picture above is of the living room, behind you can kind of see that there is a little bedroom with a very small bed. You can see their dresses hanging up, too. I had two little curtain rods from the window beside my front door that I was getting rid of right after we made this house, so I took them and put them inside the framing of the basement and hung up the girls’ princess dresses on them. They were so excited about this little feature. It was adorable.
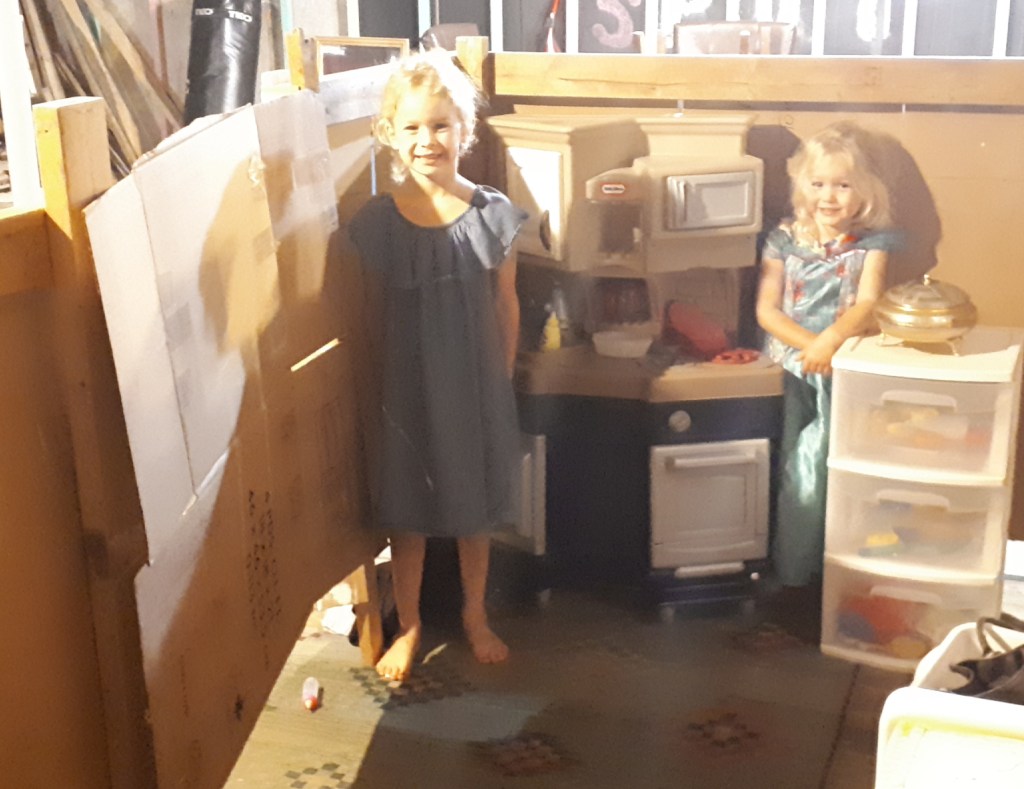
This is the Kitchen. I took the picture from the living room. You can see where the door is, just to the left of my oldest daughter.

And here’s the other bedroom. They managed to fit a cot, a baby doll cradle, and baby doll bassinet. It’s pretty amazing how many little girl things can fit into a playhouse!
Well, they love it, I love it! Every time I go to the basement I beam with pride, it’s a little ridiculous, actually! The door has fallen off once, but that was easy to repair. All the walls have remained sturdy, and it’s been up for a week. If you make one, be sure to share your pictures! I’d love to see it!


The girls will have hours and hours of fun in their new house – and lots of memories in years to come! Love it!!
LikeLike