

When I first began using adhesive vinyl decals on mugs and glasses (or the nightmare of a Baby’s First Christmas ornament I made for my nephew) I found it very difficult to make things straight. They would always fall down to the sides, or the letters would have bumps in them. Well, now I’ve figured it out, and this trick is so simple!
I’m trying out being an Amazon Associate. I have recommended some products in the way of text links. Either these products are ones I use, or ones I think would be perfect for this project (like the stemless wine glasses!). If you decide to buy something from these links I’ll get a bit of a commission, but it won’t be any extra to you. And if you do, buy something, “THANKS!”
Supplies:

- Glass
- Adhesive vinyl decal
- Rubbing alcohol and swab (I use Kleenex or a cotton ball)
- Scissors
- Glasses (like these stemless wine glasses)
- Transfer paper
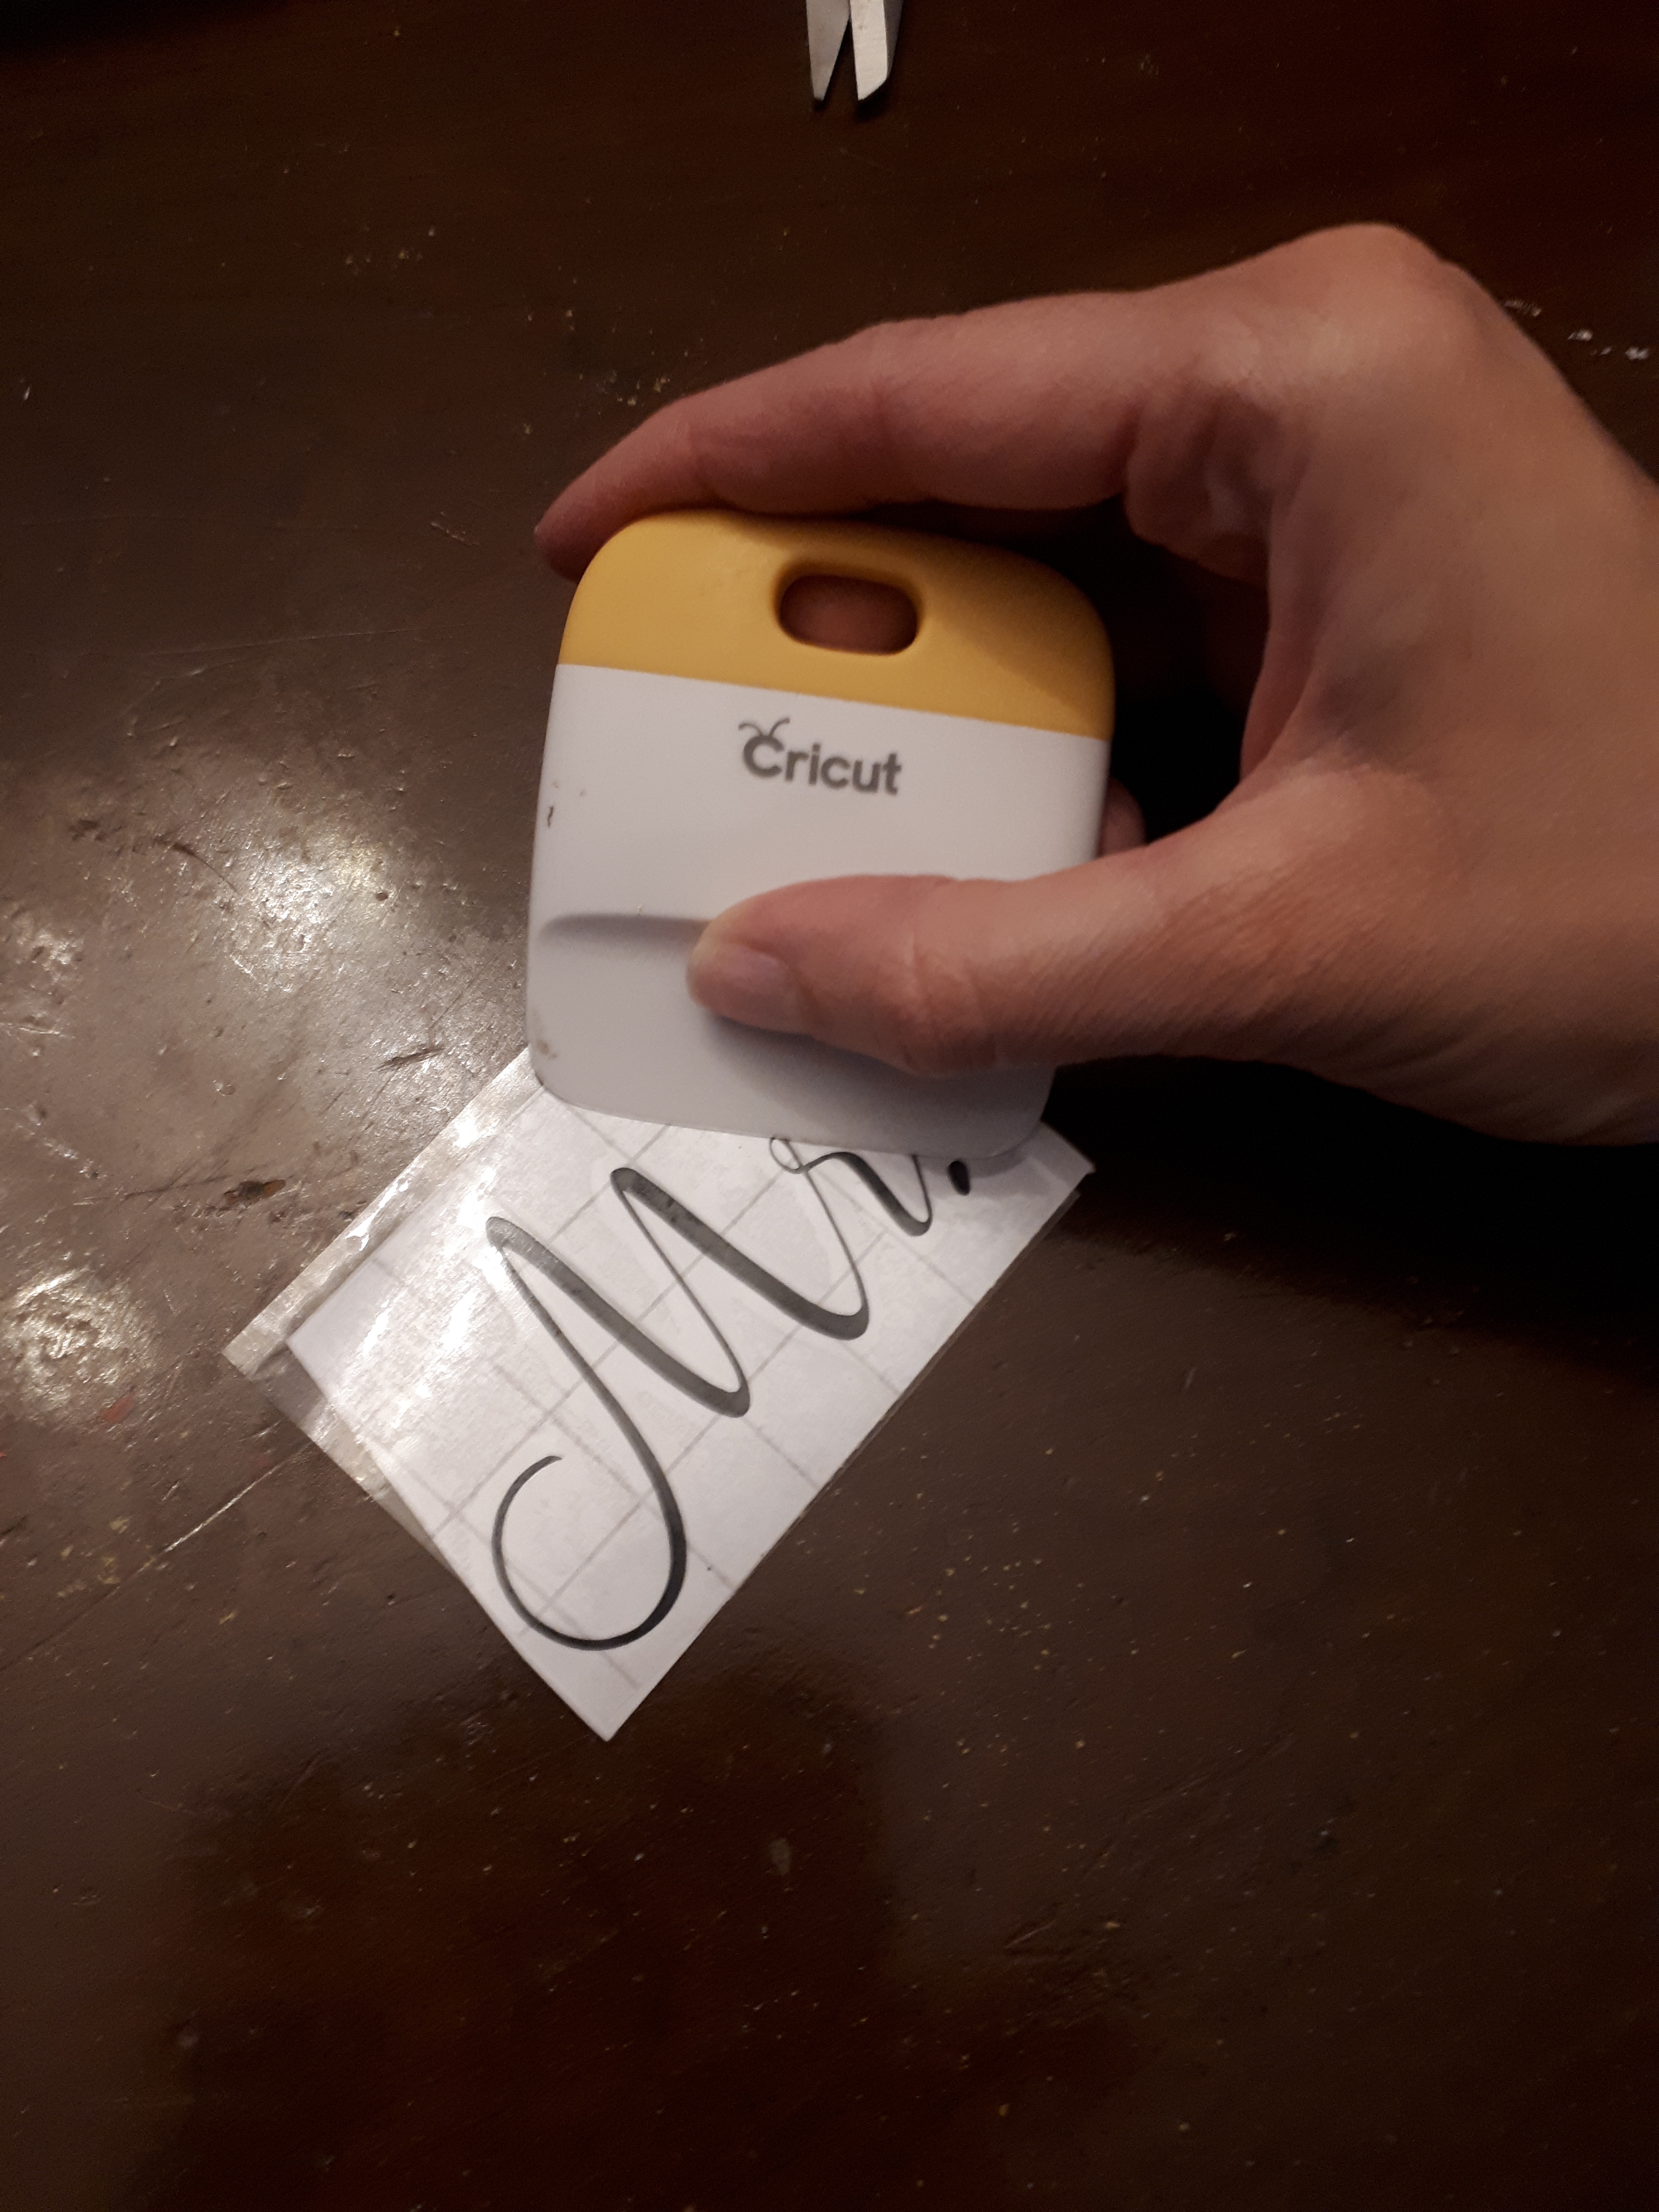
- Scraper (you can use a credit card if you don’t have a scraper)
Instructions:

- Using your preferred applicator wipe rubbing alcohol onto the surface of the glass. I always do the whole thing so that when the time comes to adhere the decal I don’t have to remember which area I’m supposed to stick it to. Let dry.
2. While you’re waiting for the rubbing alcohol to dry you can put your decal onto the transfer paper. Use the guidelines on the paper to line up your decal. This will make it easier to keep it straight on the glass. Remove the transfer paper backing.
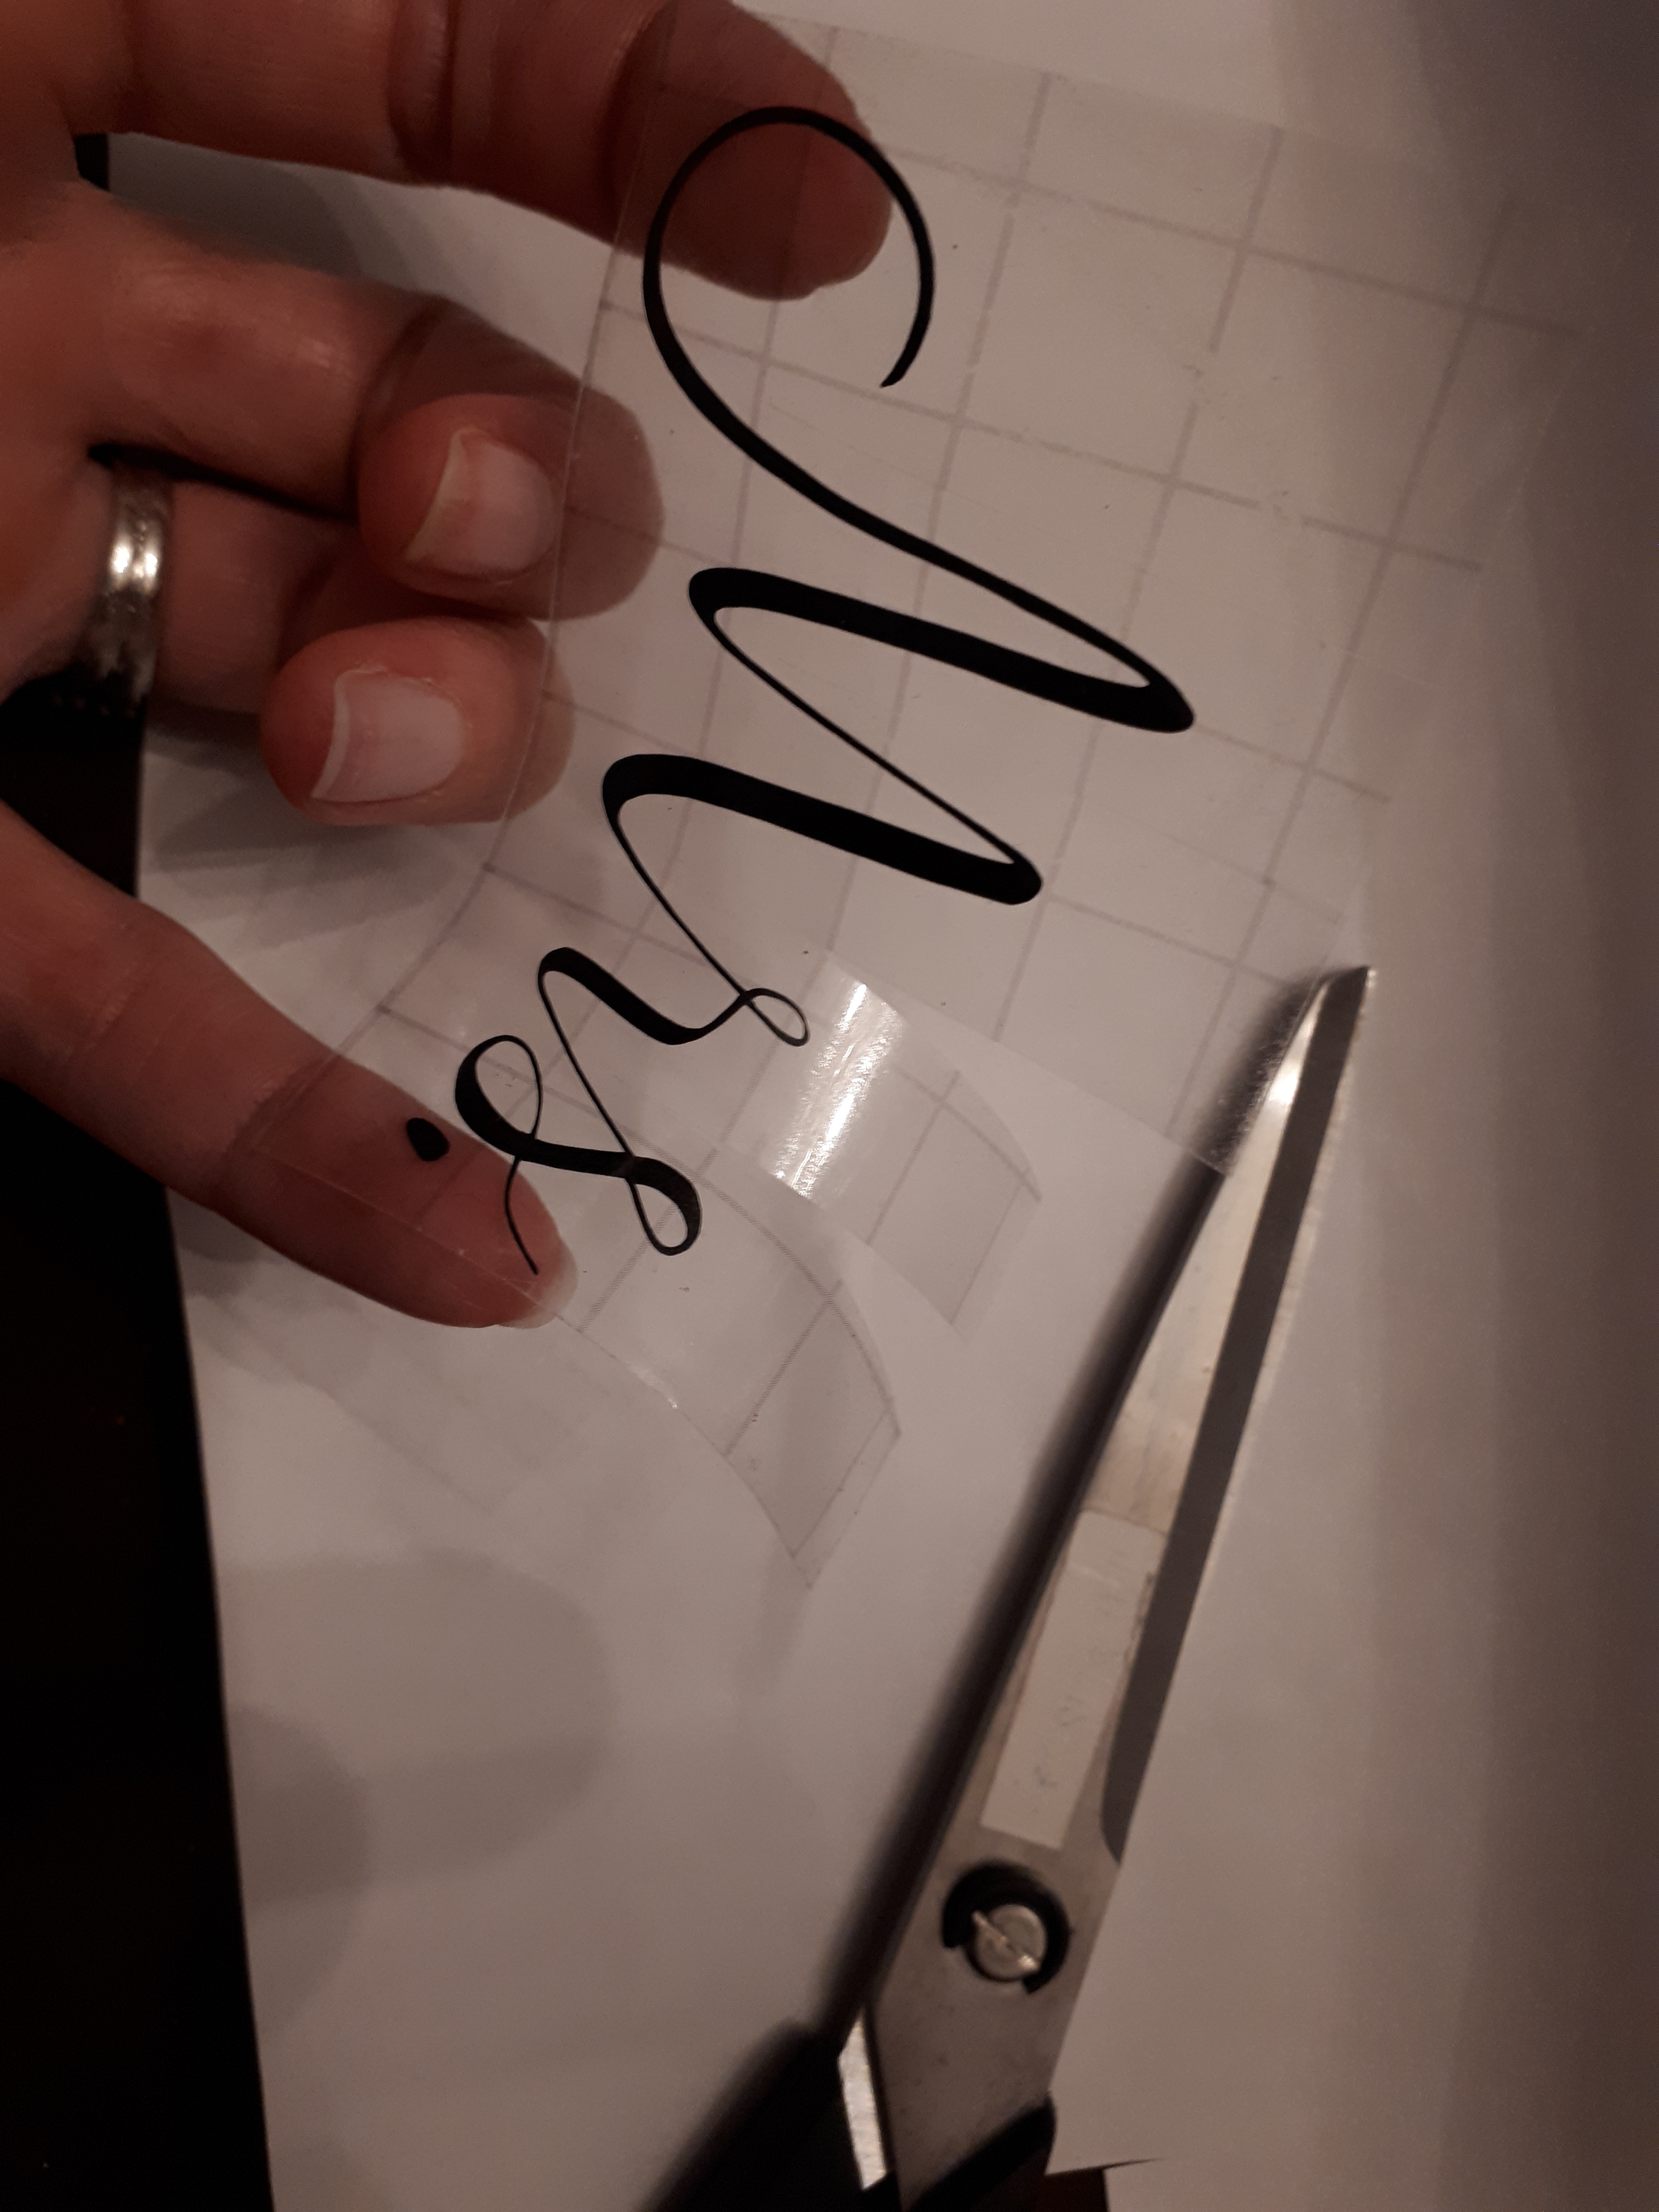
3. Now here is the trick: Cut in-between the spaces at the top of the letters. For the Mrs. decal I made four cuts: after the loop of the M, in between the peaks of the M, before the R and before the S. I also cut close after the S so there wasn’t a lot of leftover transfer paper to get in the way. This will allow you to manipulate the tops of the letters closer together than the bottoms are in order to follow the curve of the glass.
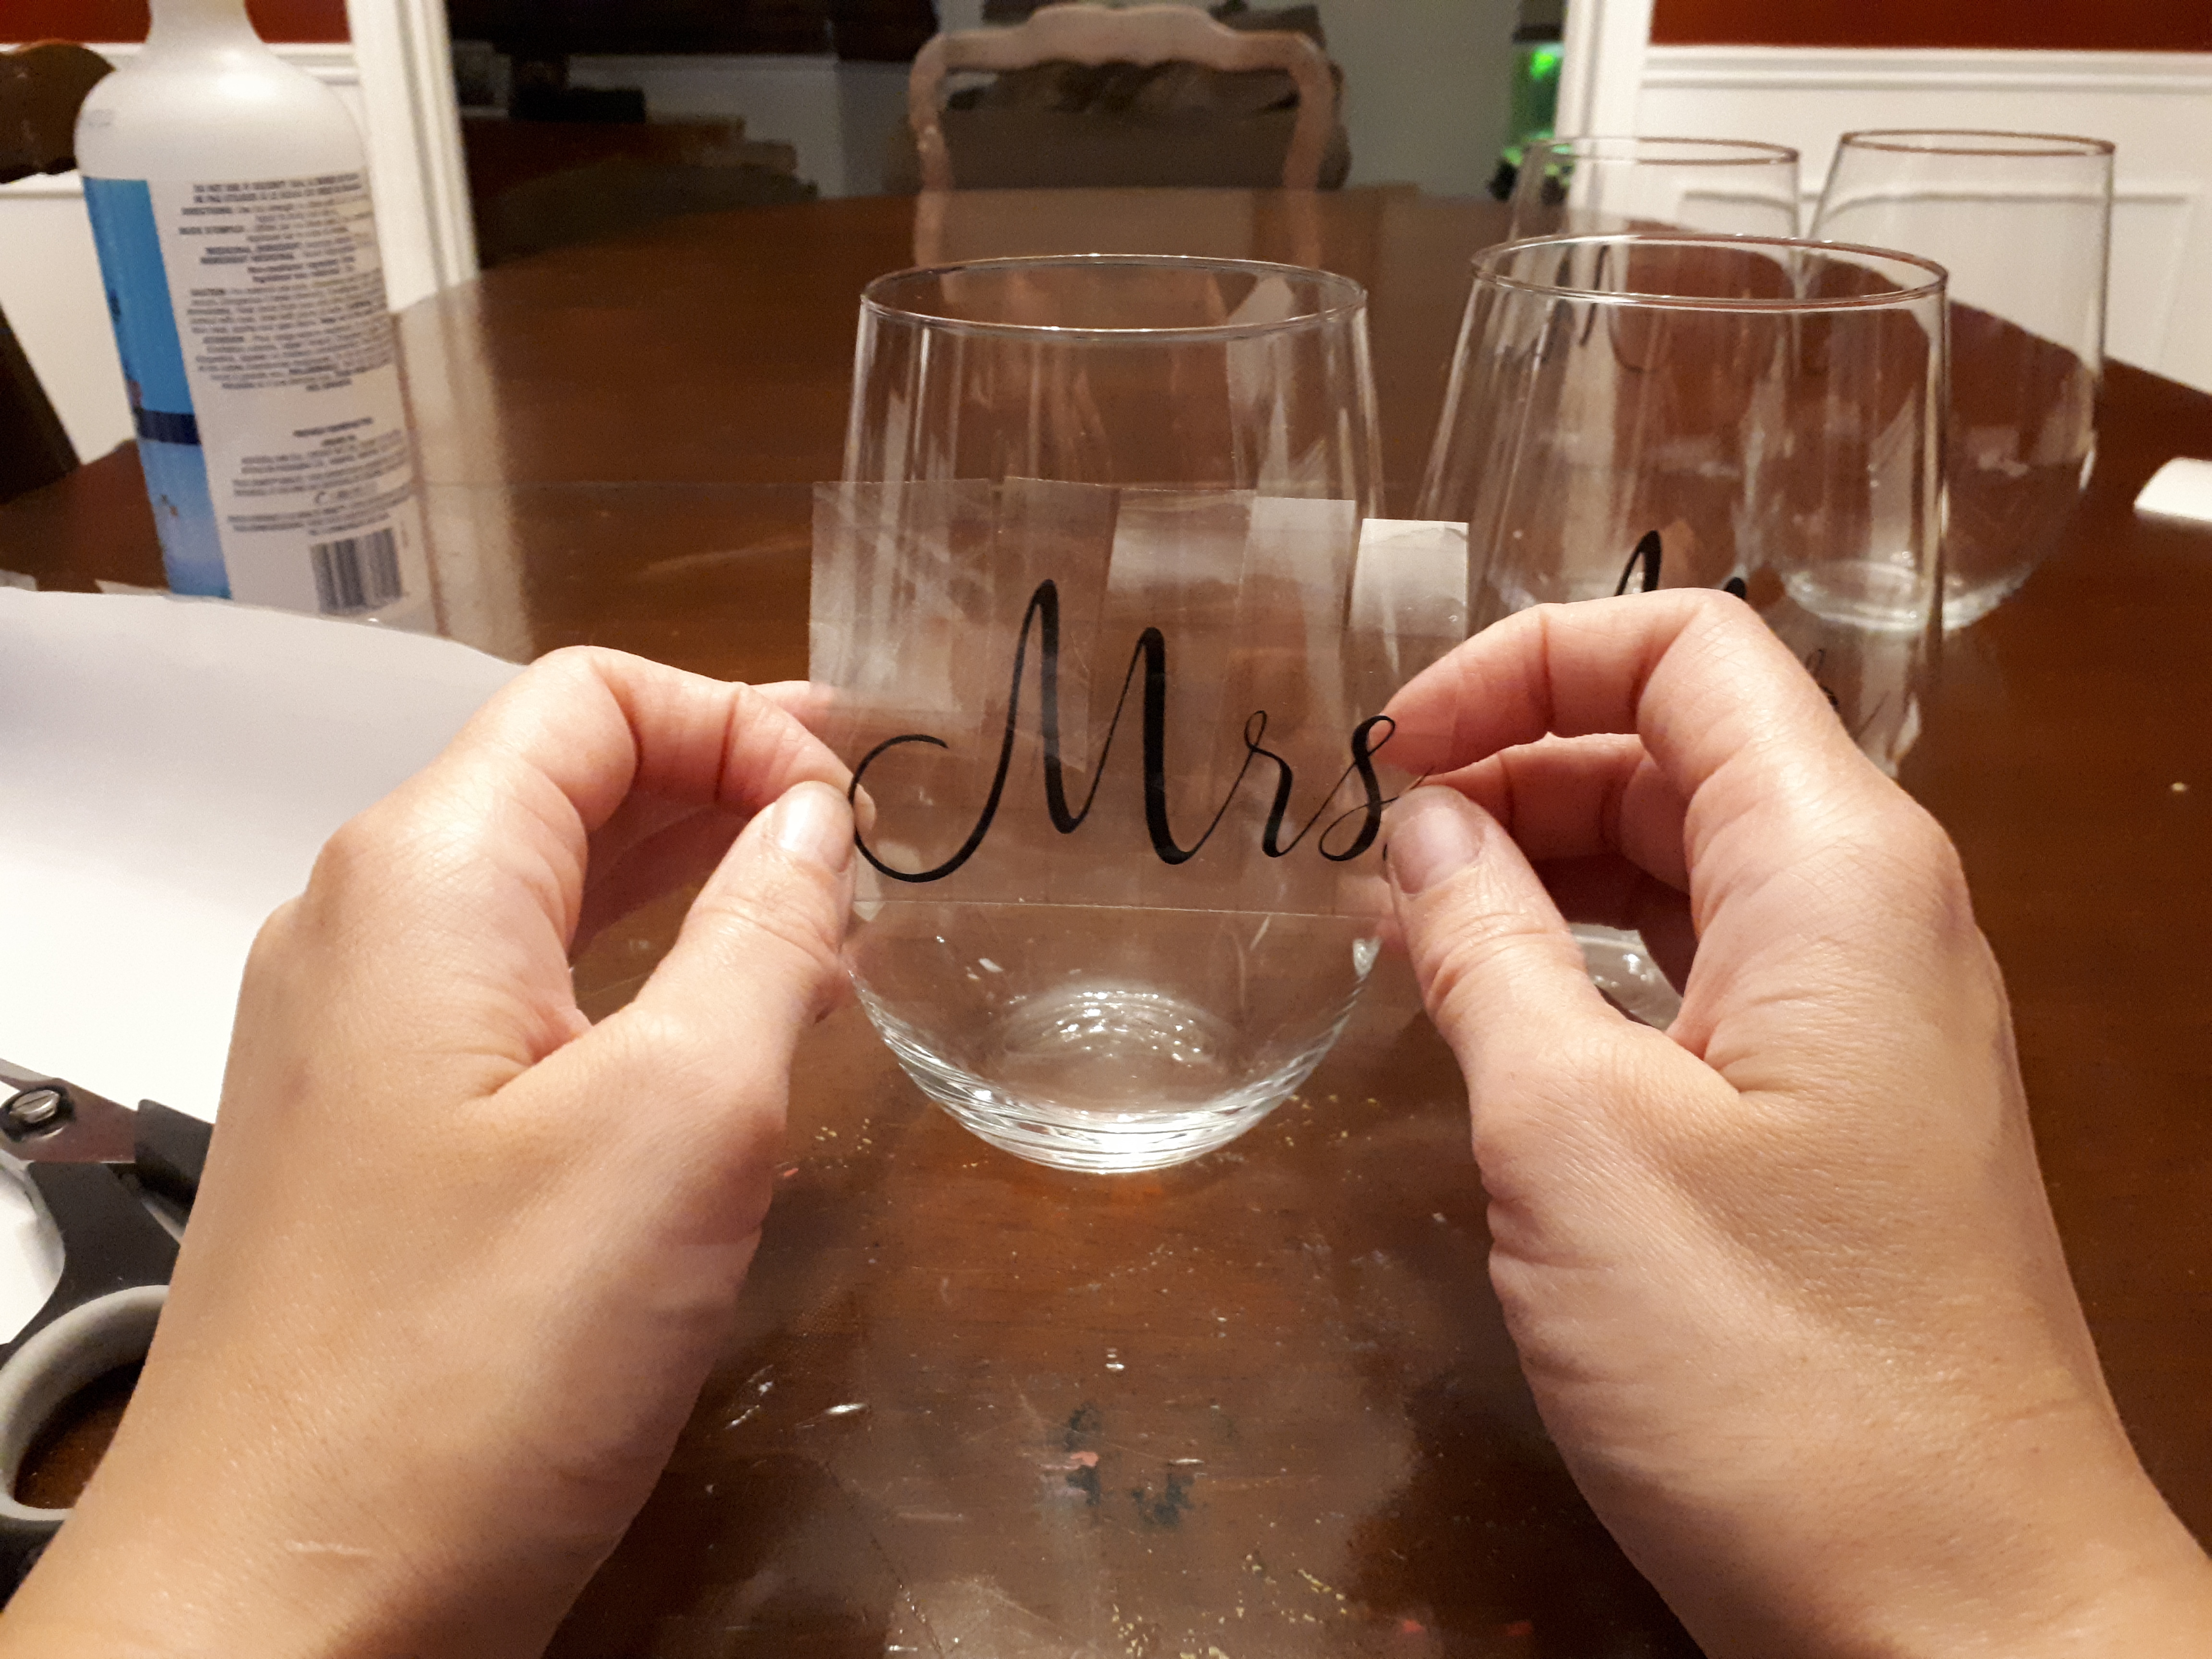
4. Put the bottom of the word straight across the glass. Push down all the letters at the bottom then follow each individual letter section up, smoothing as you go. When you get to the tops of the letters the transfer paper will overlap. You can see it a bit in the picture below at the top of the M.
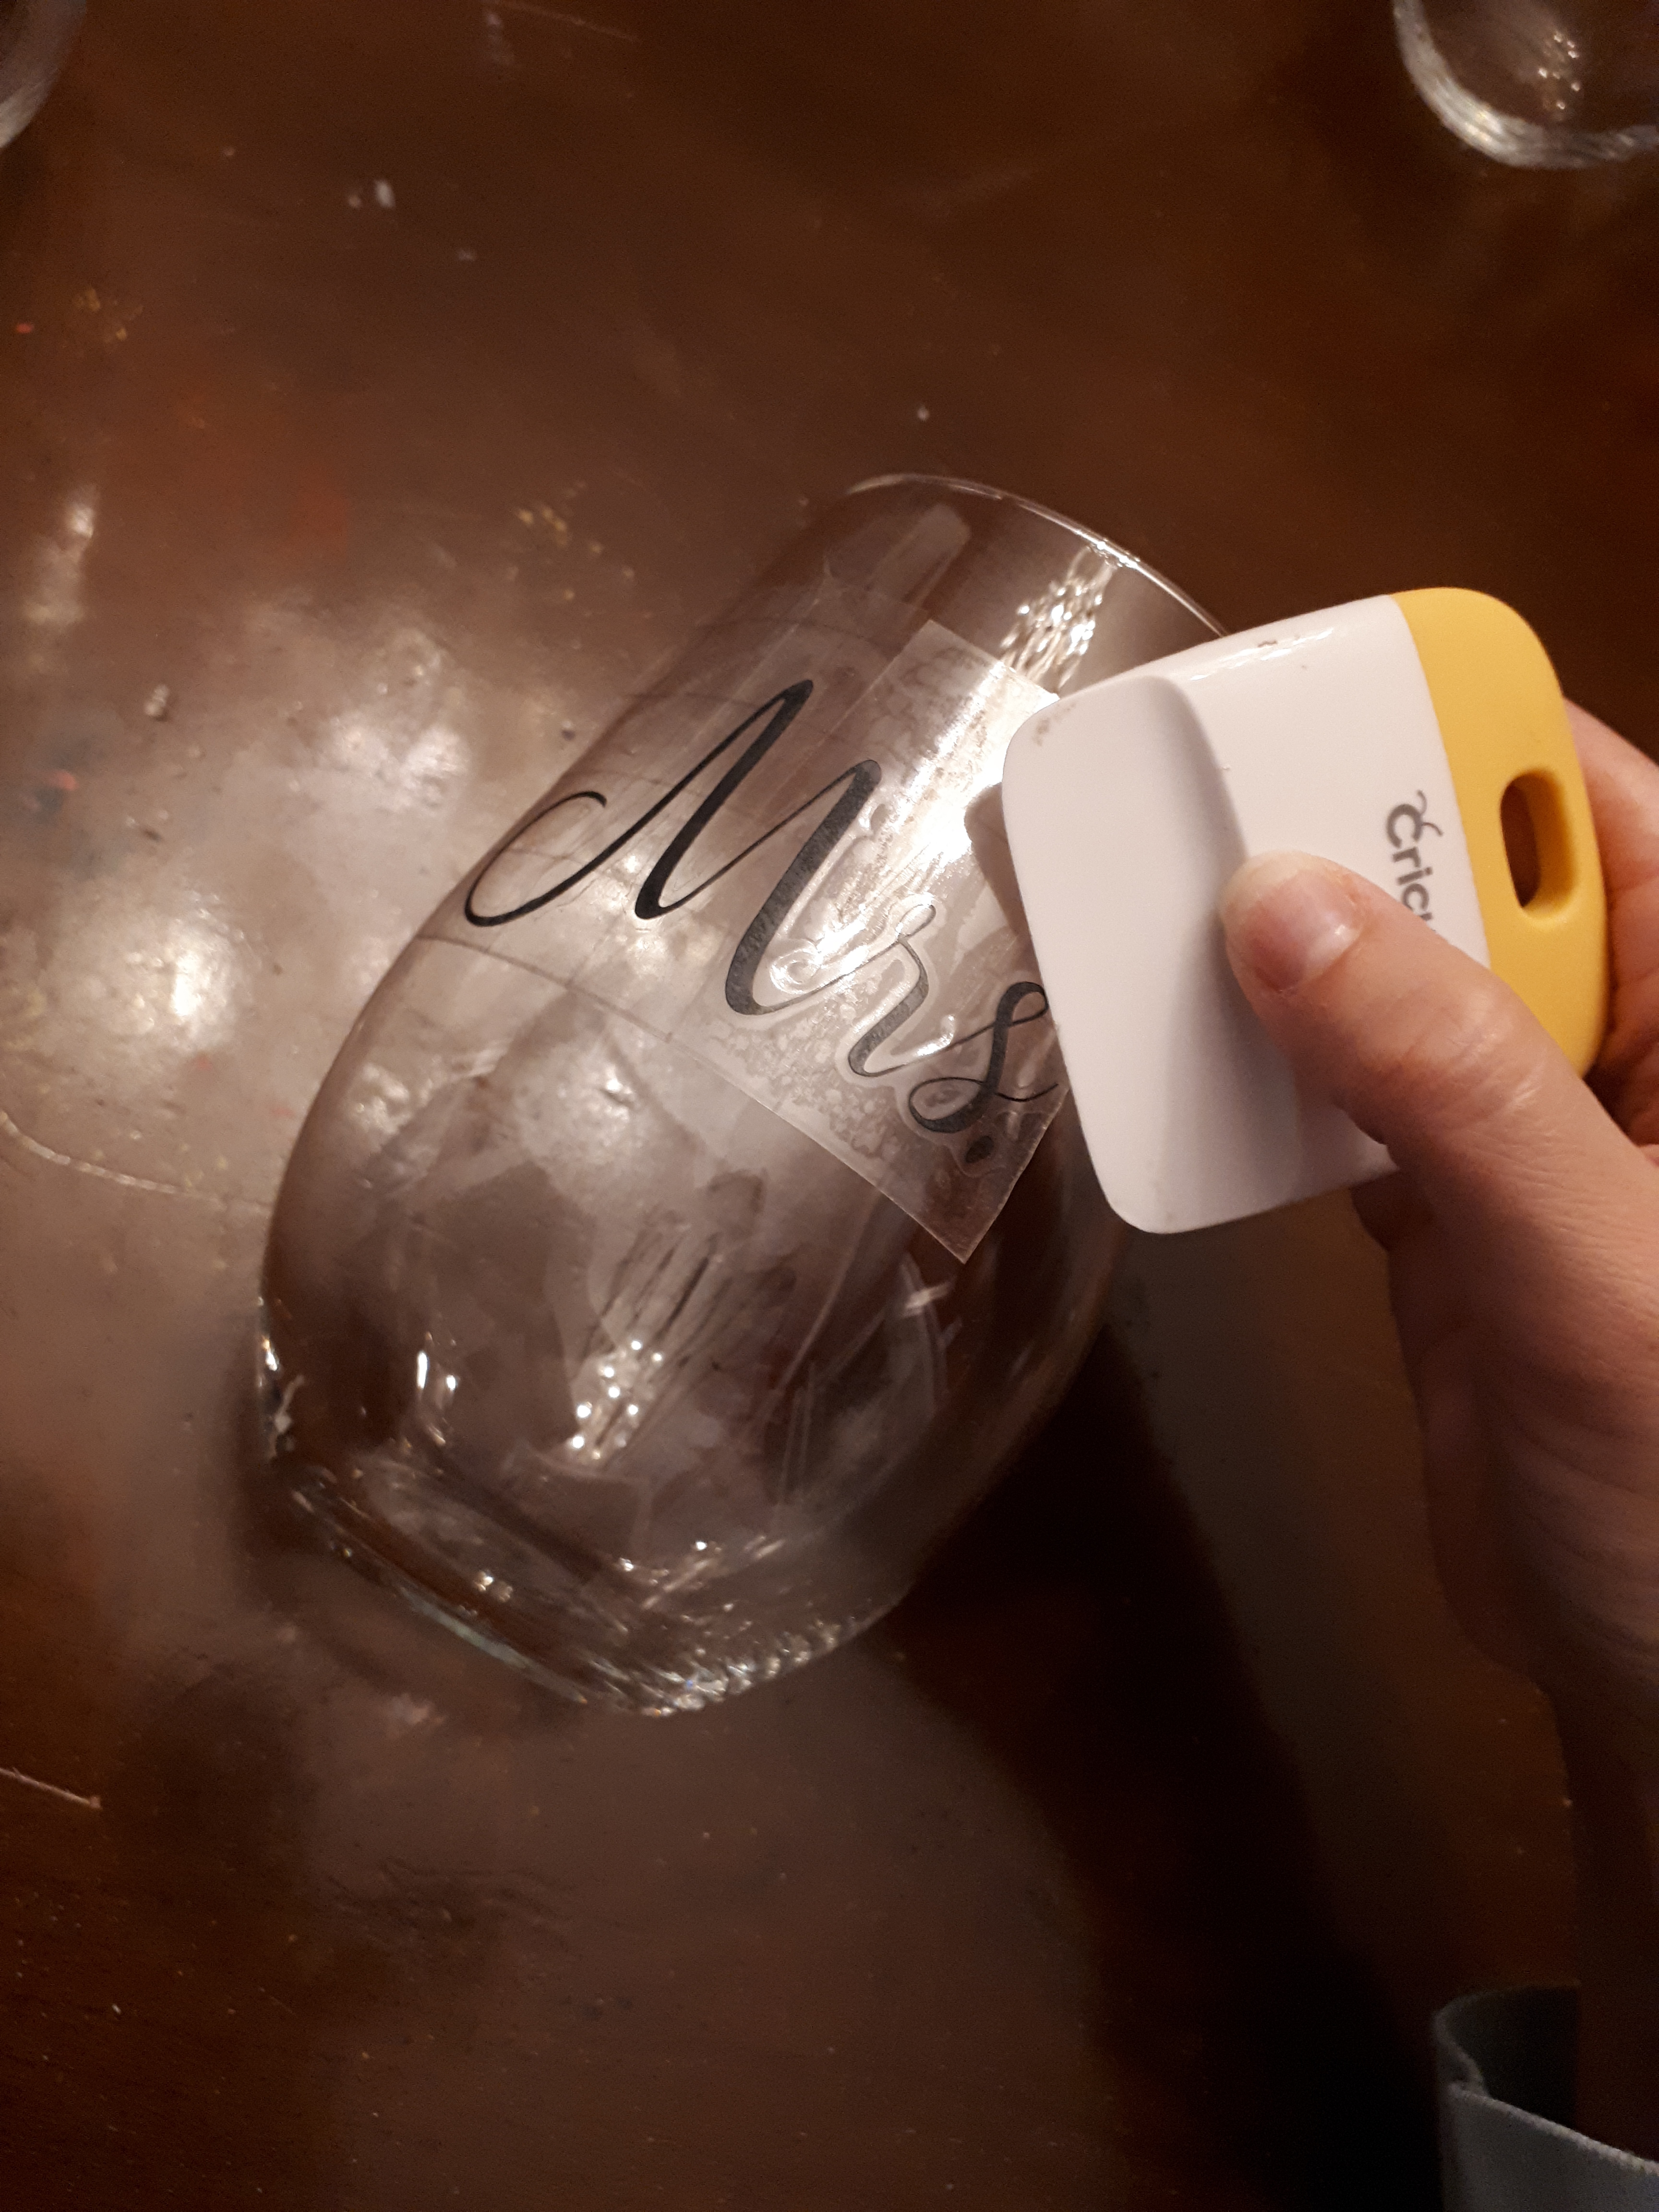
5. Using your scraper or credit card scrape the decal onto the glass. Gently peel the transfer paper off and scrape again. I always put my transfer paper on top of the word while I scrape it on to protect the vinyl. There! You’re done!
FINISHED PROJECT!
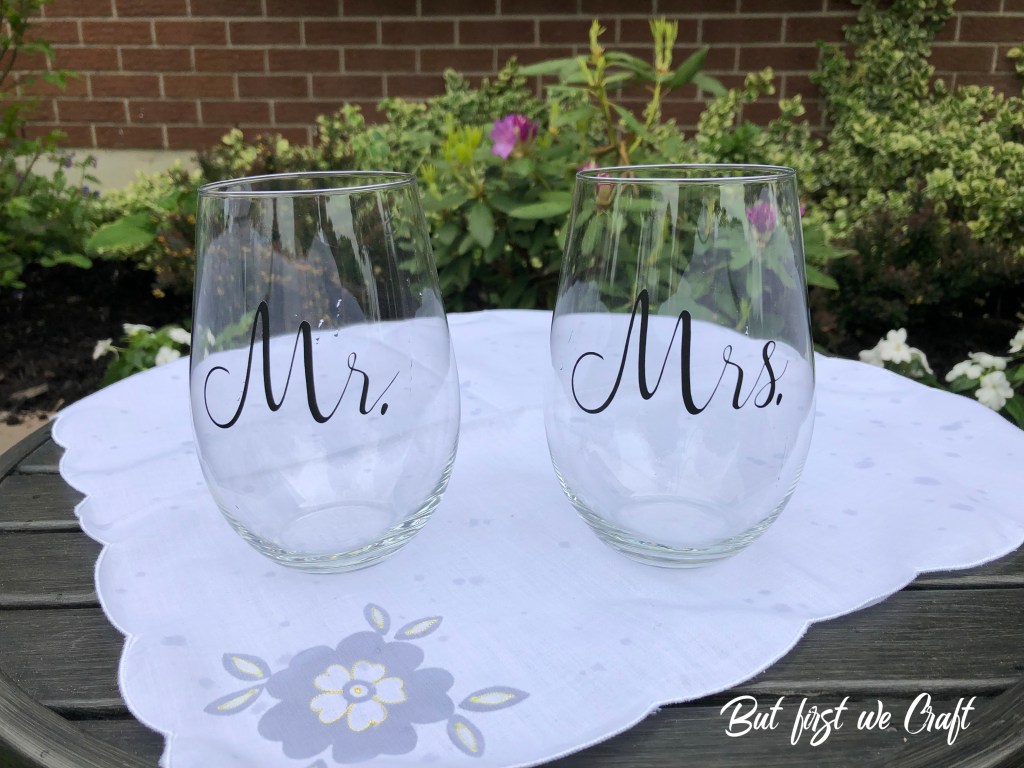
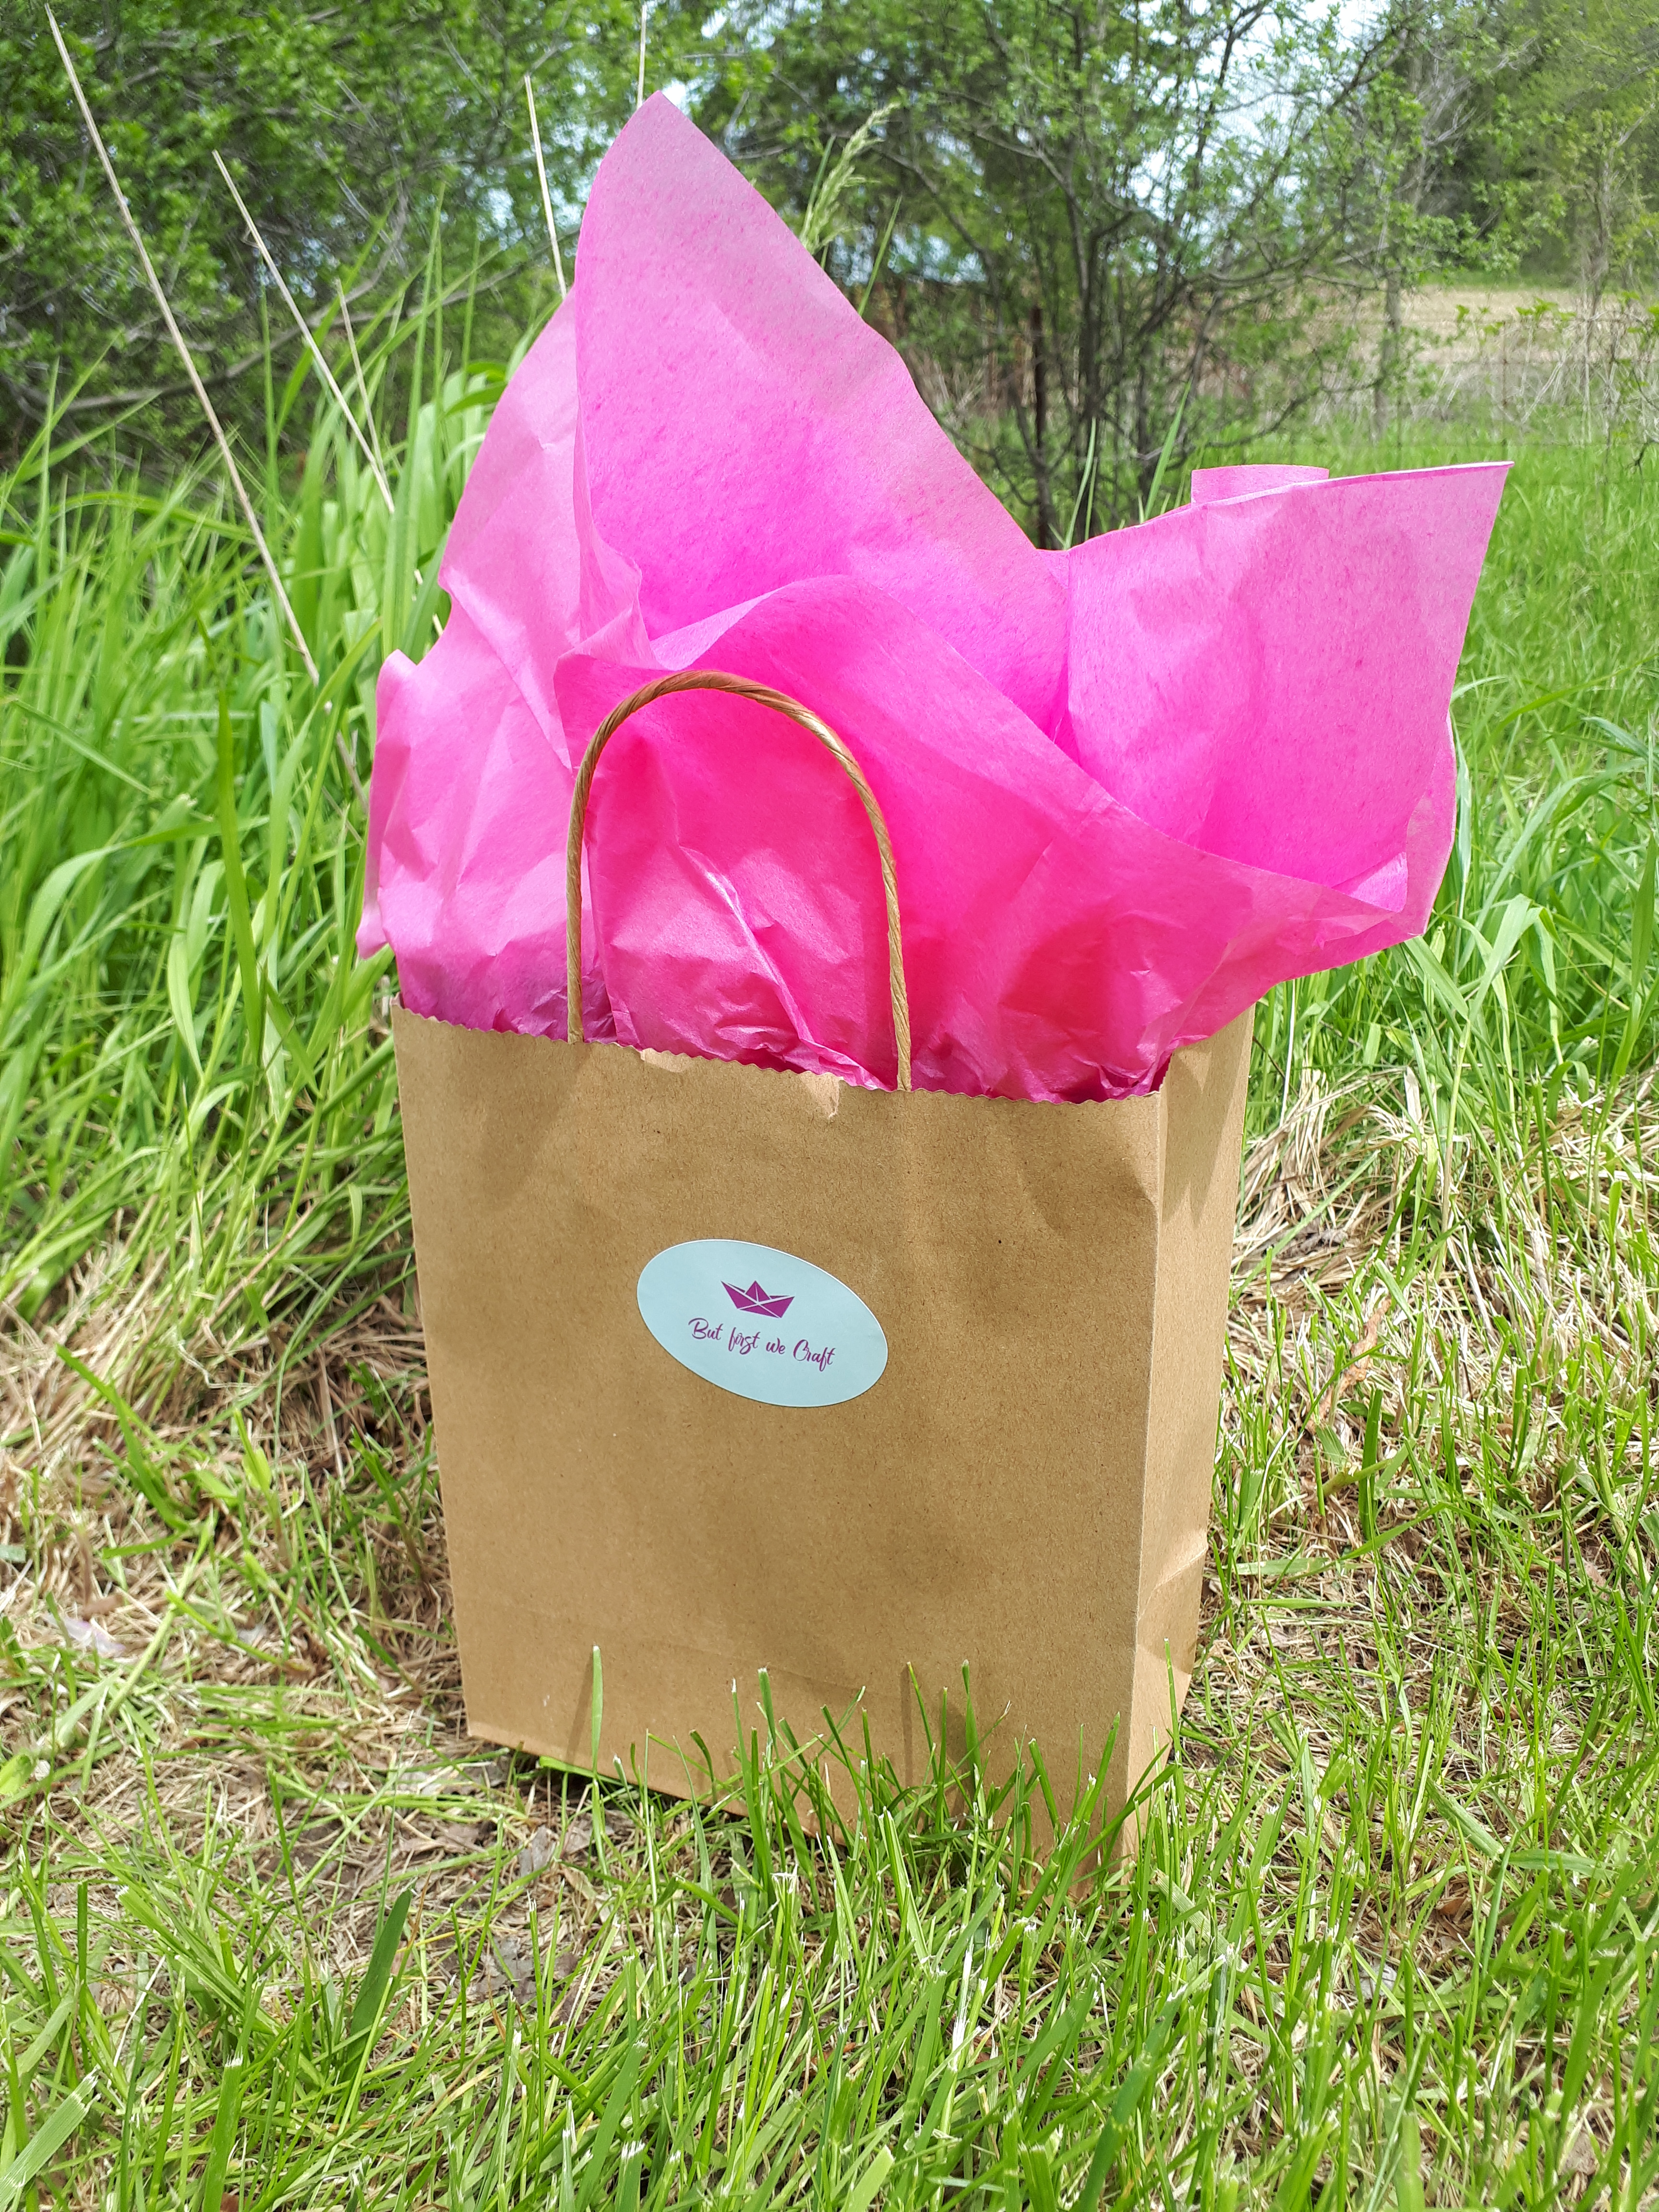
Now wrap it up for your lucky bride and groom!
I hope you’ll try out this great project! You can find this design of mine on Cricut Design Space, just ask me how on the Contact Me page. Or do you have your own idea of what you want to make? I’d love to read it in the comments! There are so many funny and encouraging ideas- it’s hard to narrow it down!

What are the care instructions?
LikeLike
It depends on the glass and the vinyl you’re using. I always recommend hand washing, especially if it’s small. However, I have some mugs that I’ve put through the dishwasher over and over again and they’re still going strong.
LikeLike